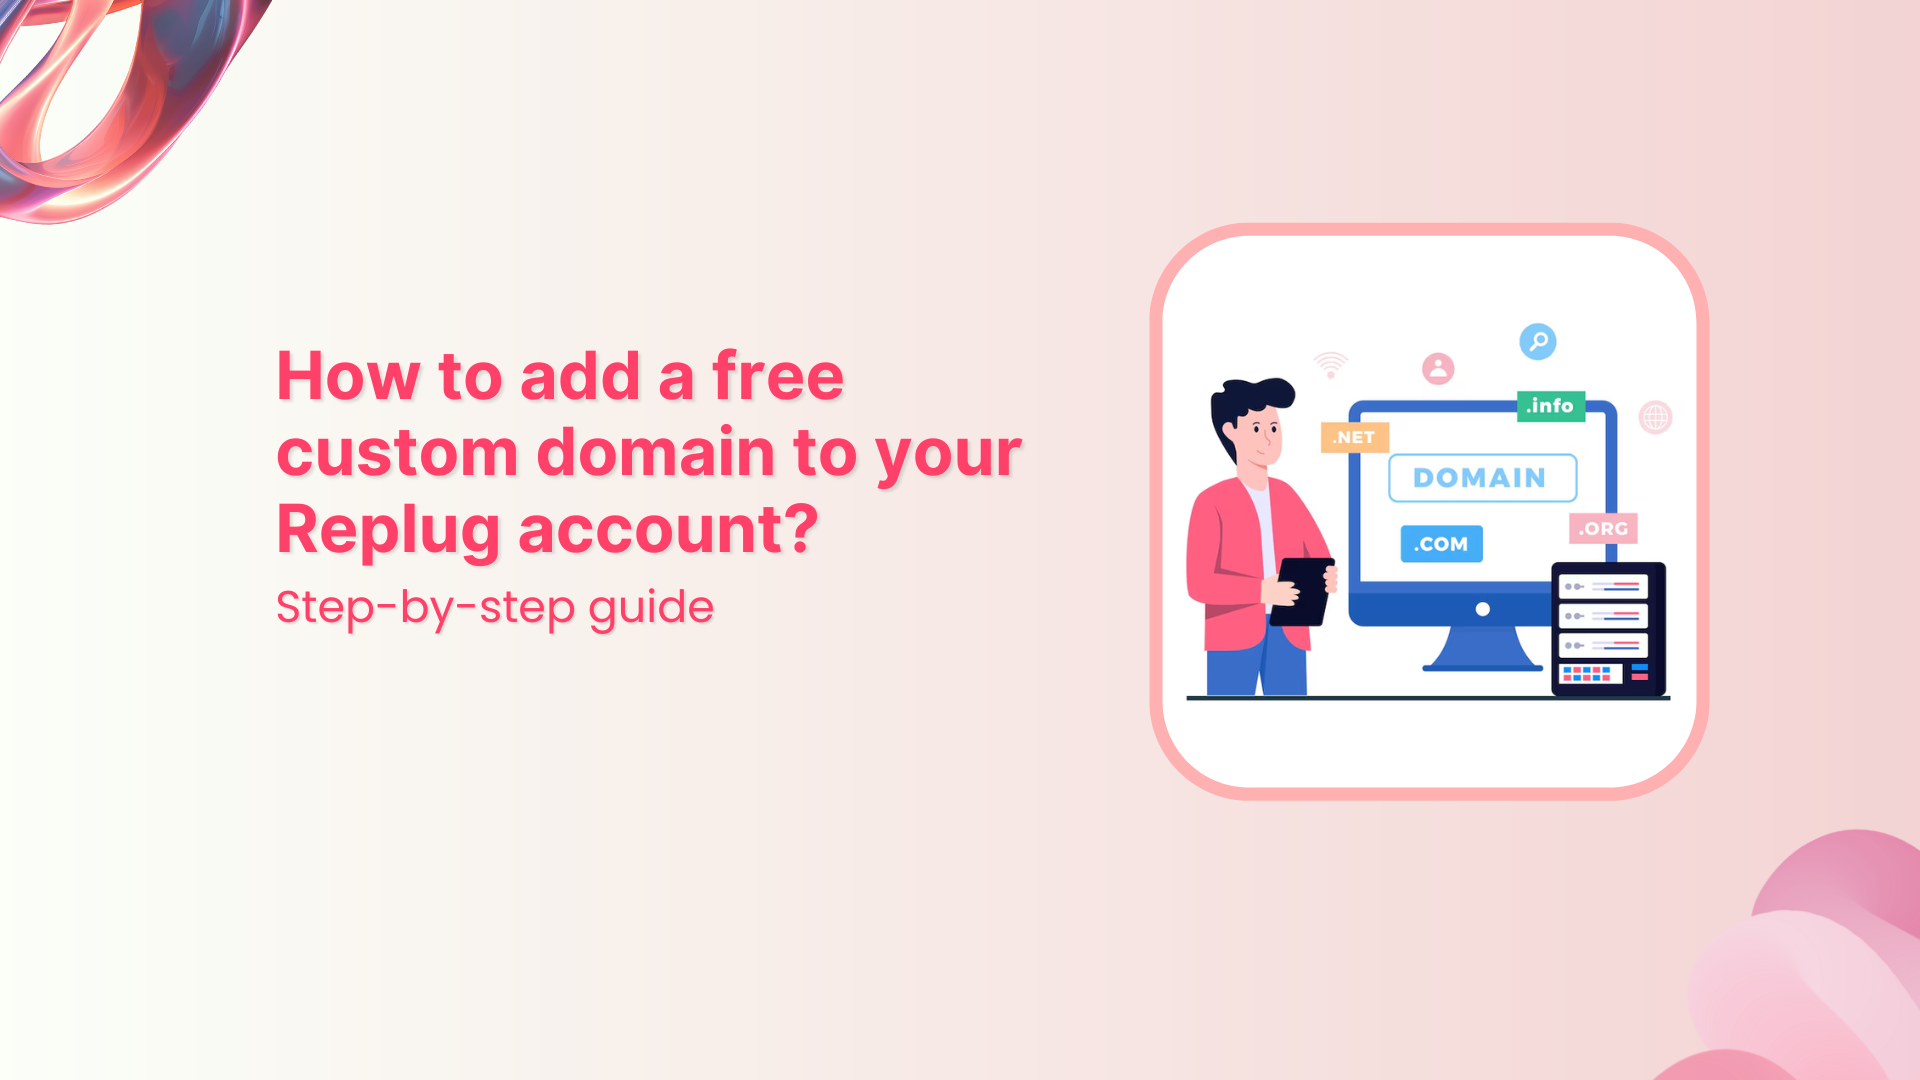
Want to build more trust and brand recognition with your short links? Replug now offers its paid users the ability to claim a custom domain for free for one year, no need to purchase a domain or deal with complex DNS settings.
This guide walks you through how to claim your free domain on Replug, why a branded domain matters for your marketing campaigns, and the benefits of using a branded short link.
A complete link management solution
for marketing professionals & agencies.
Try Replug for free
Eligibility to claim a free domain on Replug
To qualify for a free domain from Replug:
You must be on a paid user.
Each workspace is allowed one free domain.
The domain is free for the first year, and renews at $12/year after that.
Here’s how you can claim you free domain
Step 01: Sign in to your Replug account
Log in to your Replug account using your credentials. Once you’re in, you’ll land directly on the main dashboard.
Step 02: Open the settings menu
Click the small Settings icon located at the top right corner, next to your profile initials.
From the settings menu, select “Custom Domain”. You’ll be redirected to the custom domain dashboard.
Step 03: Select the Free.Link domain option
On the Custom Domain dashboard, you’ll the option to:
Claim a Free.Link domain.
A pop-up will appear, allowing you to search for your preferred domain.
Note: Only one free domain can be claimed per workspace.
Step 04: Search your domain
Type in your desired domain name. If available, it will appear with the option to claim it. If not, Replug will suggest similar domain names.
Step 05: Claim your domain
Choose your preferred domain from the list and click the “Claim Domain” button.
That’s it! Your free custom domain is now live and ready to use in your campaigns.
Important: To transfer your free .link domain to a different registrar, you must stay subscribed to a Replug paid plan for a minimum of one year.
Want to use your own custom domain for short links? Use Replug
If you’re serious about link branding and campaign performance, a custom domain is non-negotiable. With Replug, you can claim and set up your branded short domain in just a few clicks.
A complete link management solution
for marketing professionals & agencies.
Try Replug for free
A custom domain doesn’t just make your links look clean and professional. It also:
Stronger brand recognition: Your links reflect your brand. A custom domain builds trust and makes your content instantly recognizable across platforms.
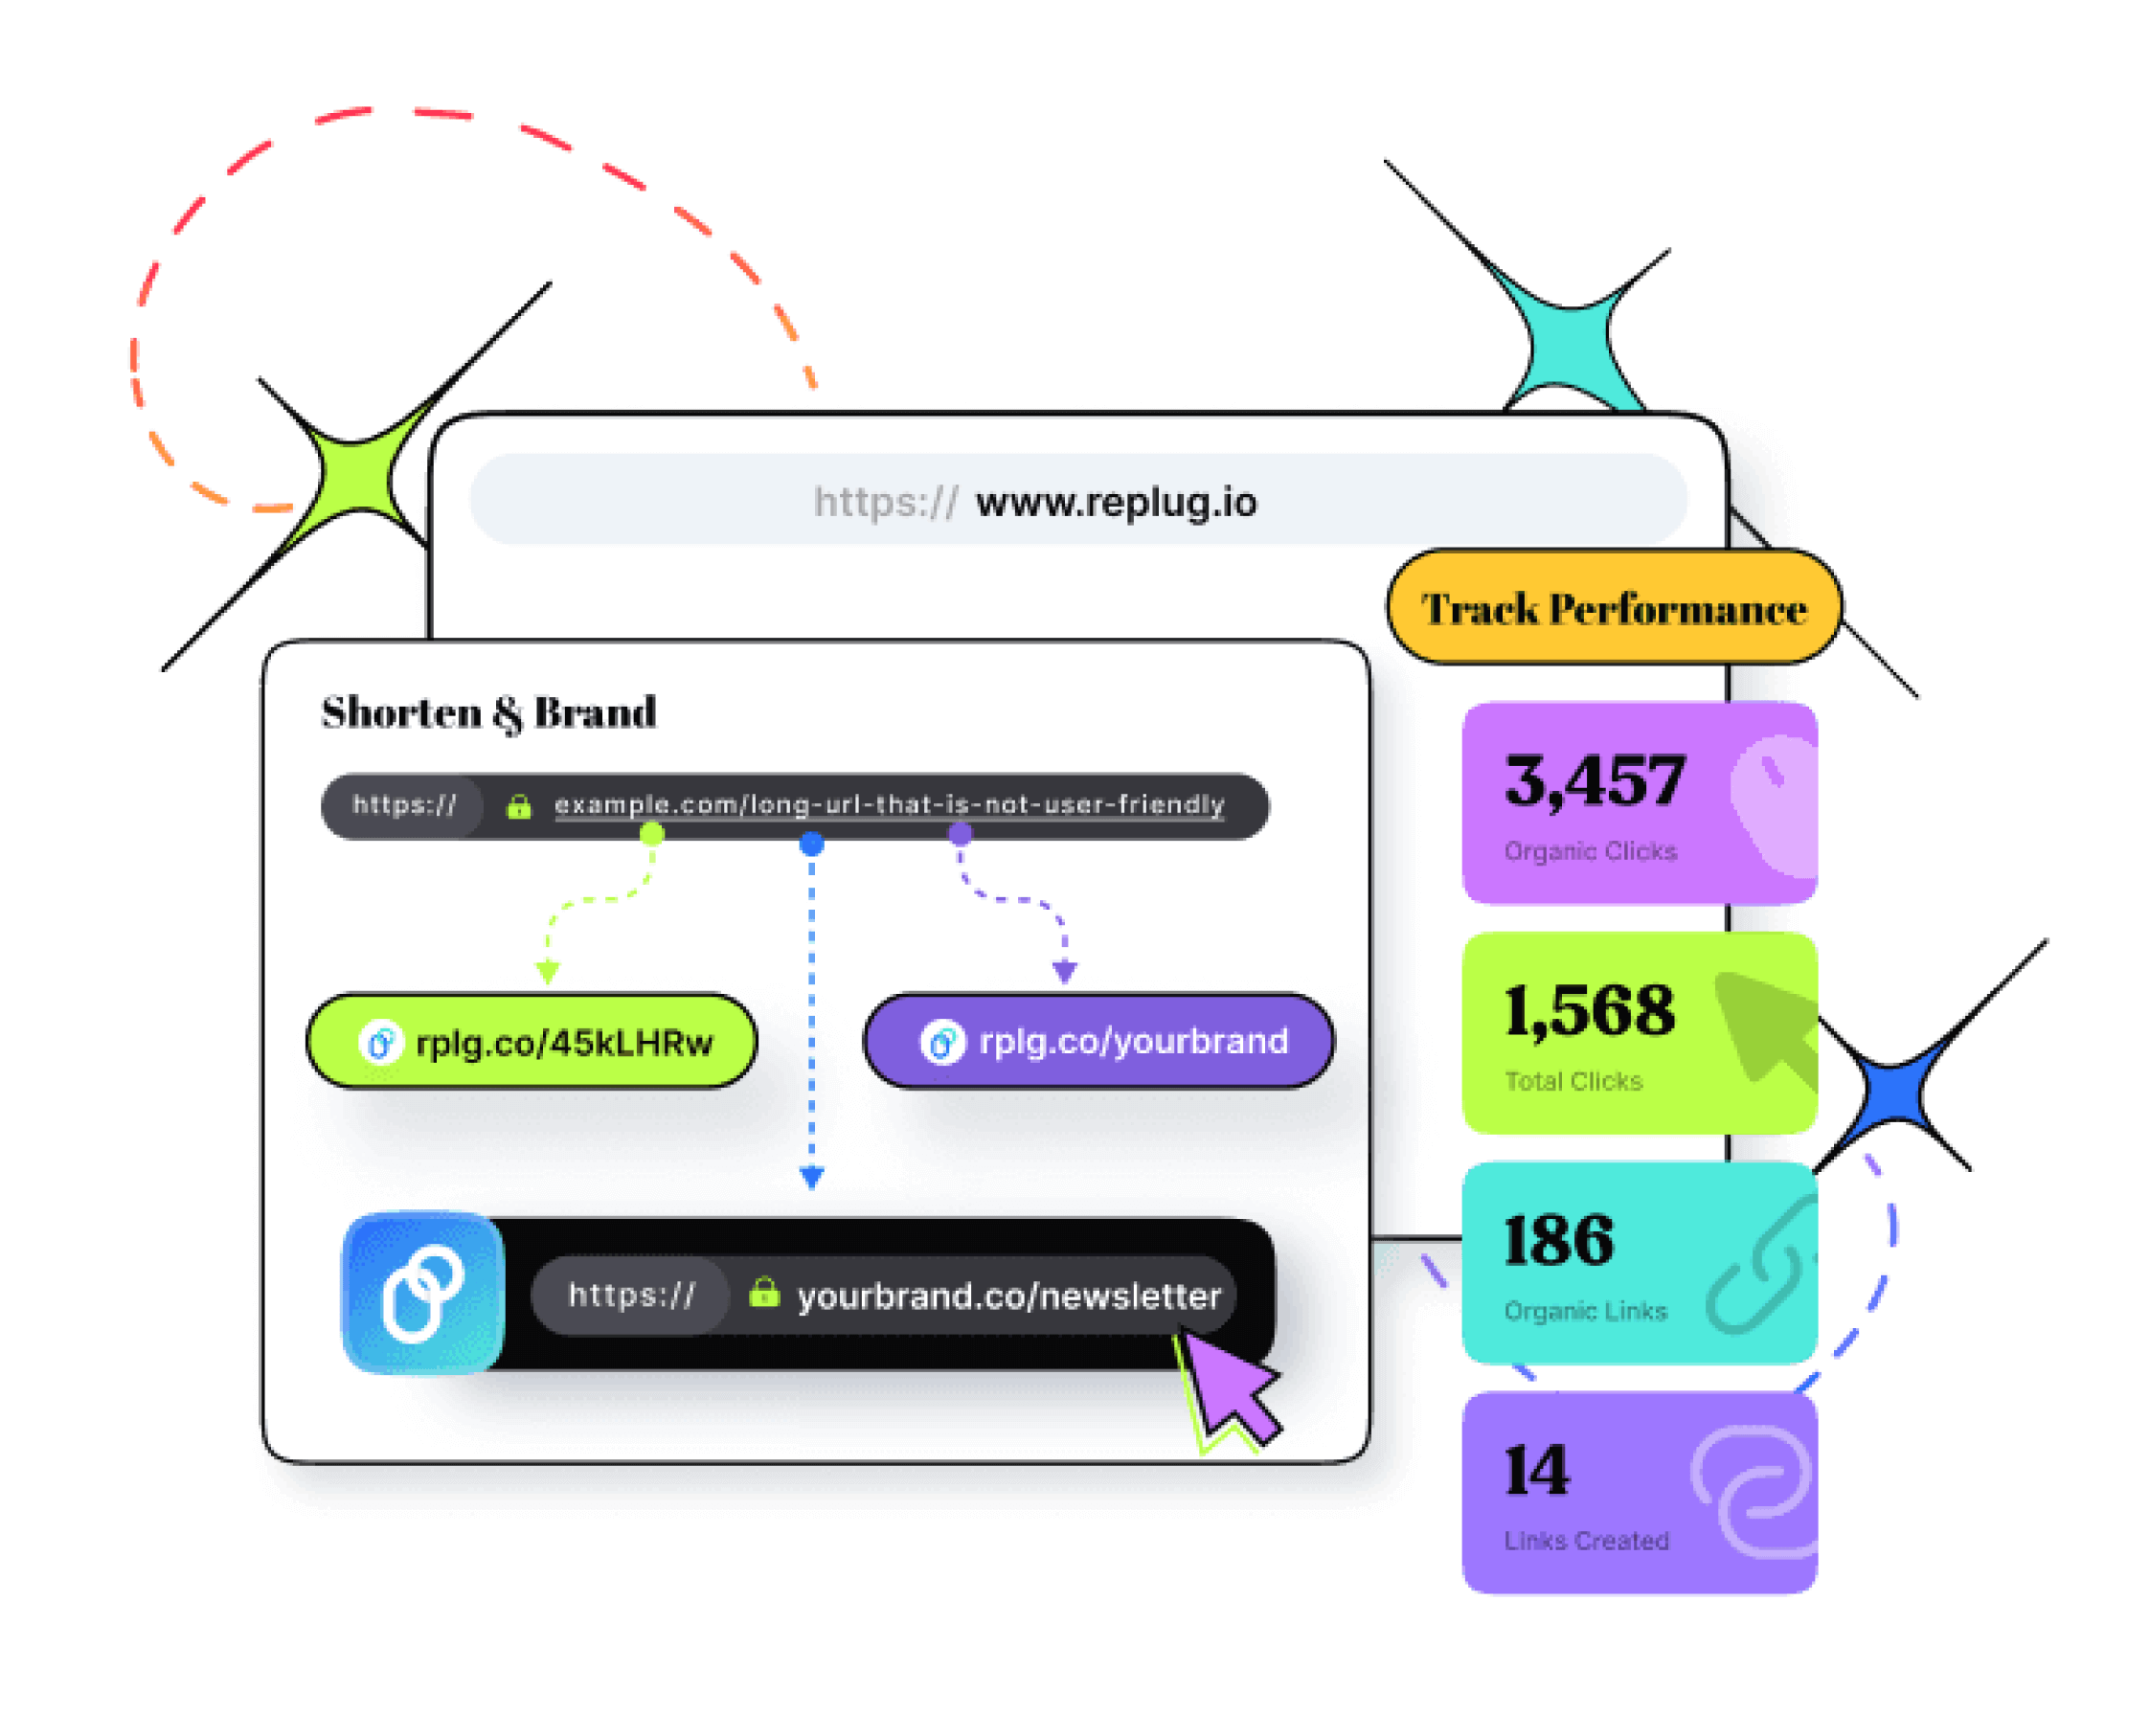
Here’s an example of a custom link
Simple URL
Custom URL
Better SEO and link authority: Branded short links can improve your link’s visibility and indexing in search engines, giving your campaigns an SEO boost.
Memorable and easy to promote: Short, branded links are easier to remember, type, and share, perfect for print, social media, and verbal mentions.
Helps avoid your links getting flagged or blocked: Generic shorteners are often associated with spam. A custom domain significantly reduces the risk of your links being filtered or blacklisted.
Advanced tracking and analytics: Track every click, referral source, and location in detail, Replug gives you in-depth analytics to fine-tune your marketing strategy.
Better user experience: Custom links look clean, load fast, and align with your brand, leading to more trust and higher click-through rates.
Conclusion
Claiming your free custom domain on Replug is a smart move for anyone serious about growing their brand and optimizing marketing efforts. It’s quick, hassle-free, and gives your links a professional edge that builds trust and drives more clicks.
FAQs
1. Can I claim more than one free domain on Replug?
No, only one free domain is allowed per workspace. You can add more domains manually if needed.
2. What happens after the first free year?
After the first year, your domain will renew at $12/year, still an affordable branding investment.
3. How long does the free .link domain last, and what happens after it expires?
The free .link domain is valid for 1 year from the date you claim it. About a month before it expires, you’ll receive an email reminder prompting you to renew. At that point, you can choose to pay the renewal fee to keep your domain or simply let it expire with no additional charges.
4. Can I use my own domain instead of the free one?
Yes! You can still add a domain you’ve purchased elsewhere by updating your DNS settings.
5. Is DNS configuration required for the free domain?
Nope! The free domain offered by Replug is automatically set up, no technical setup needed.
6. Can I change my free domain later?
Once claimed, a domain cannot be changed or reassigned to another workspace. Choose wisely.
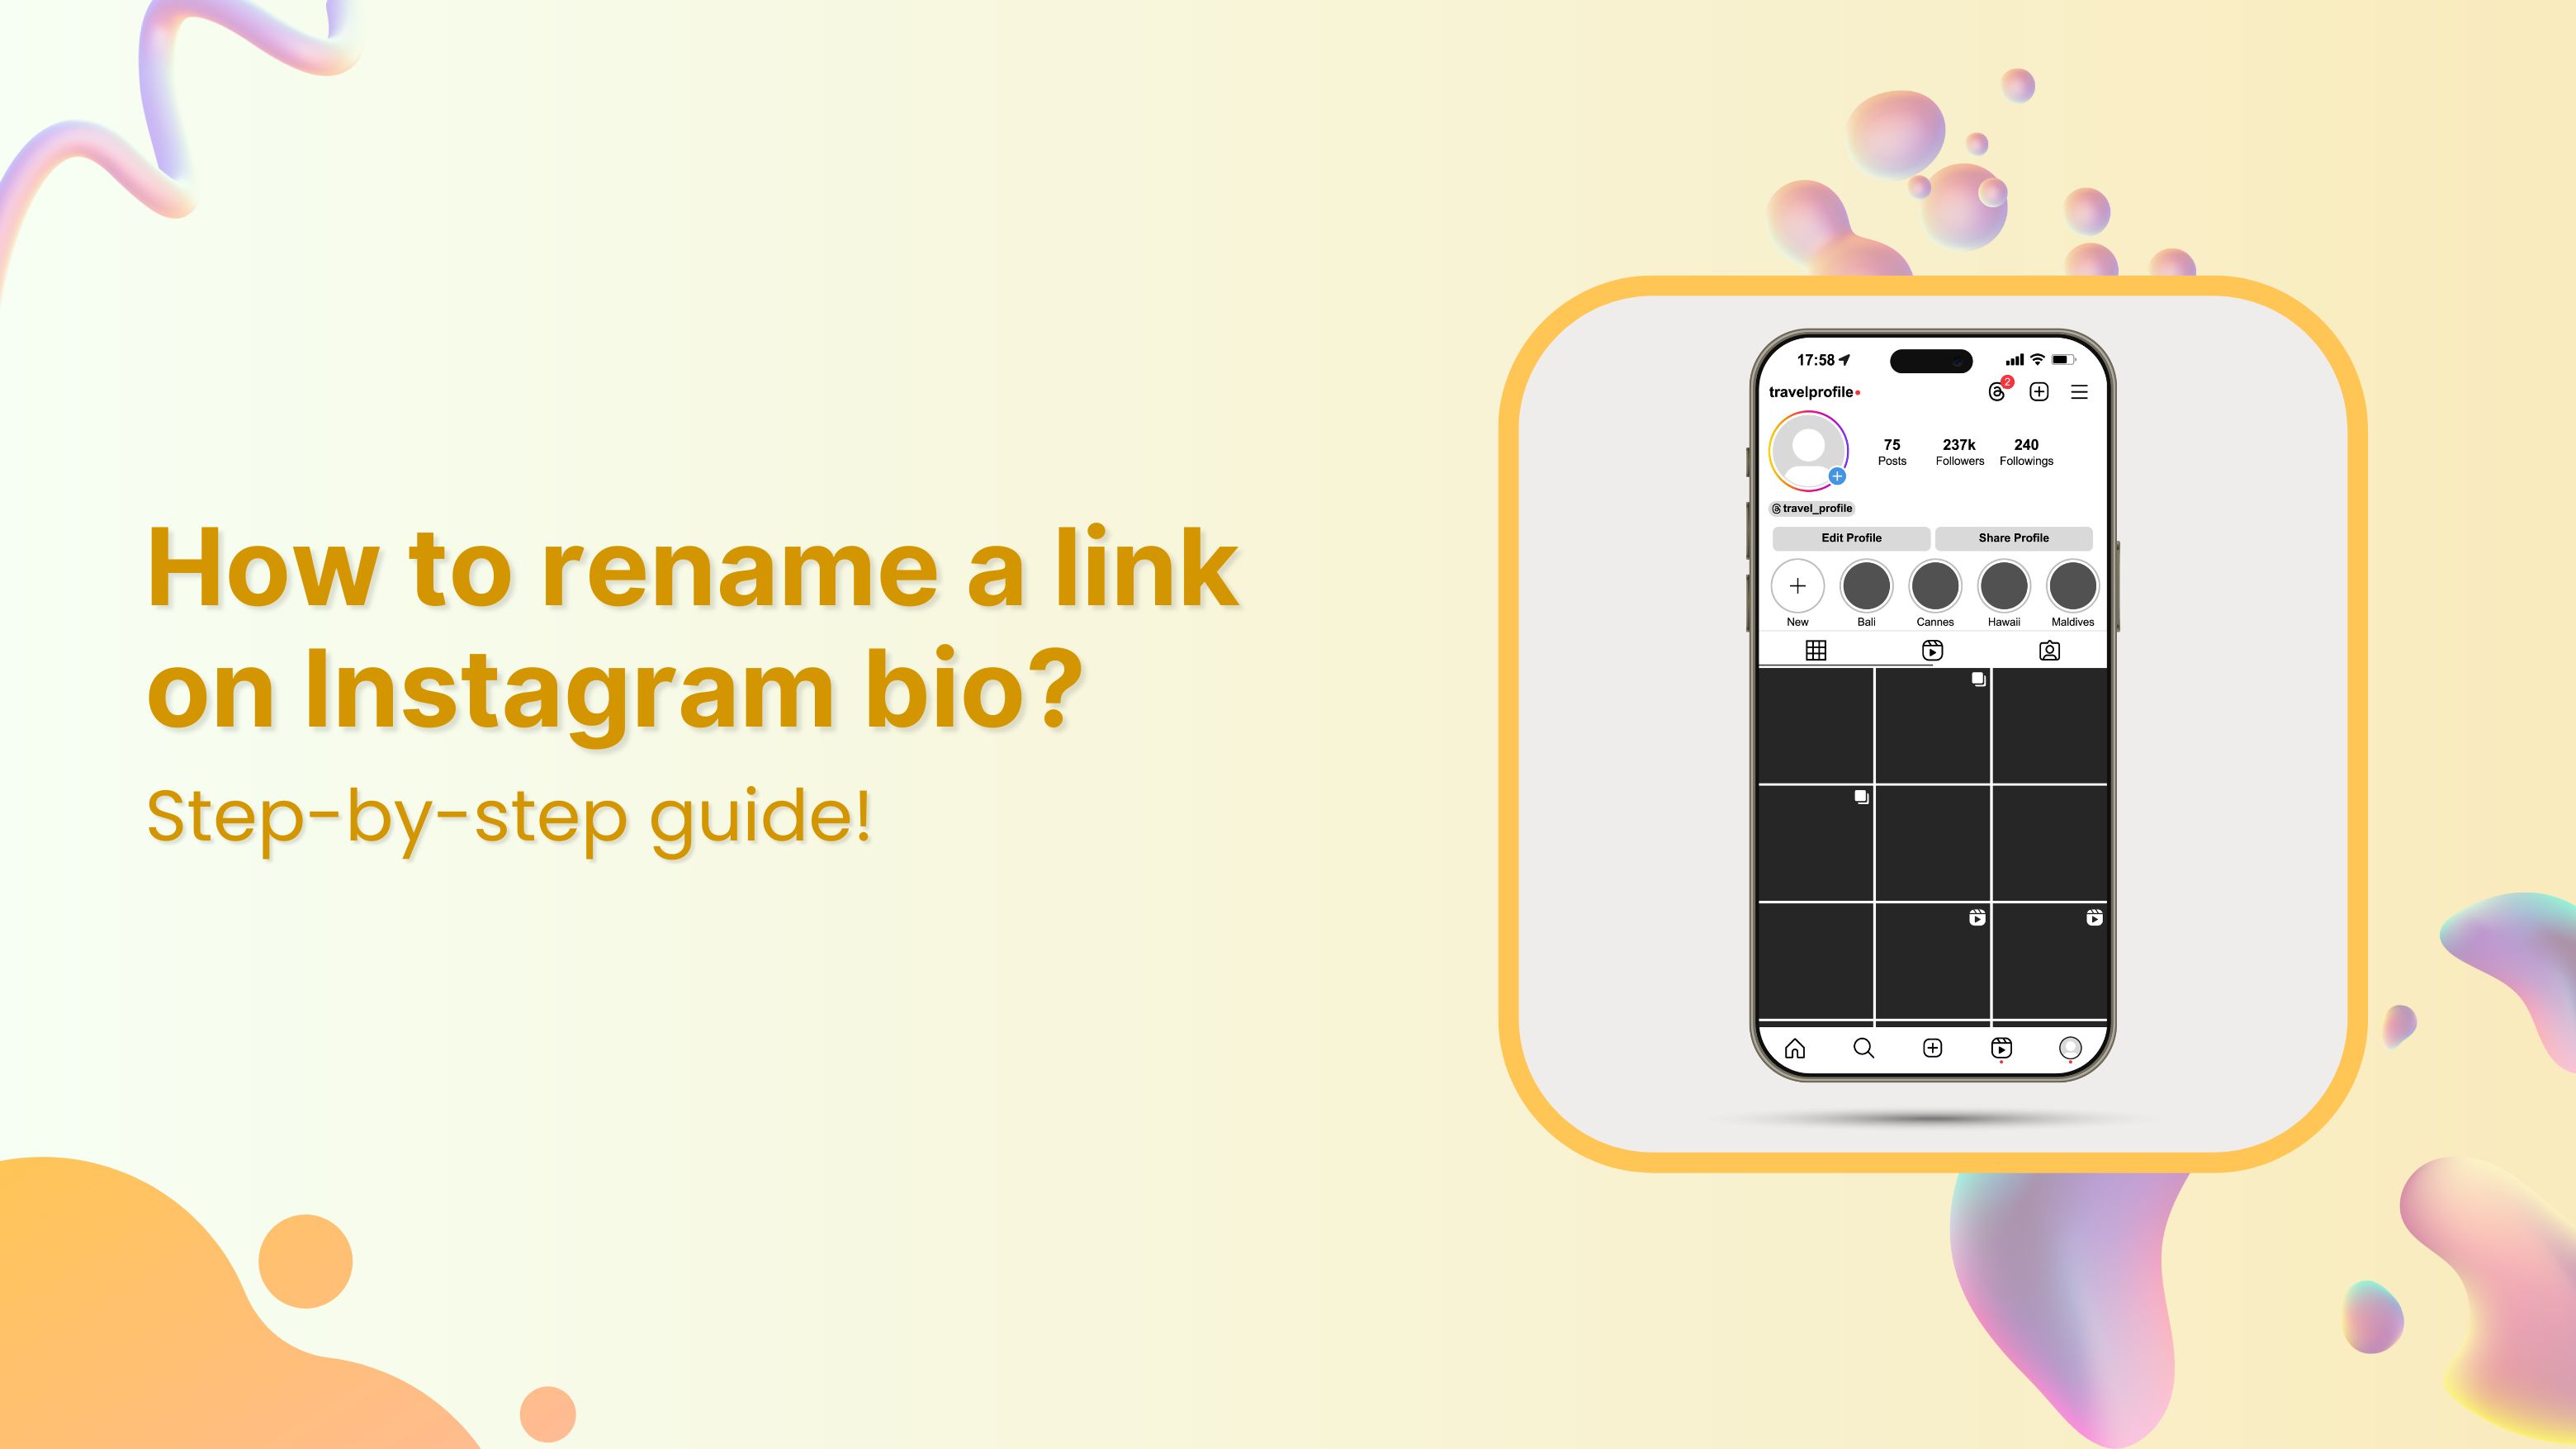
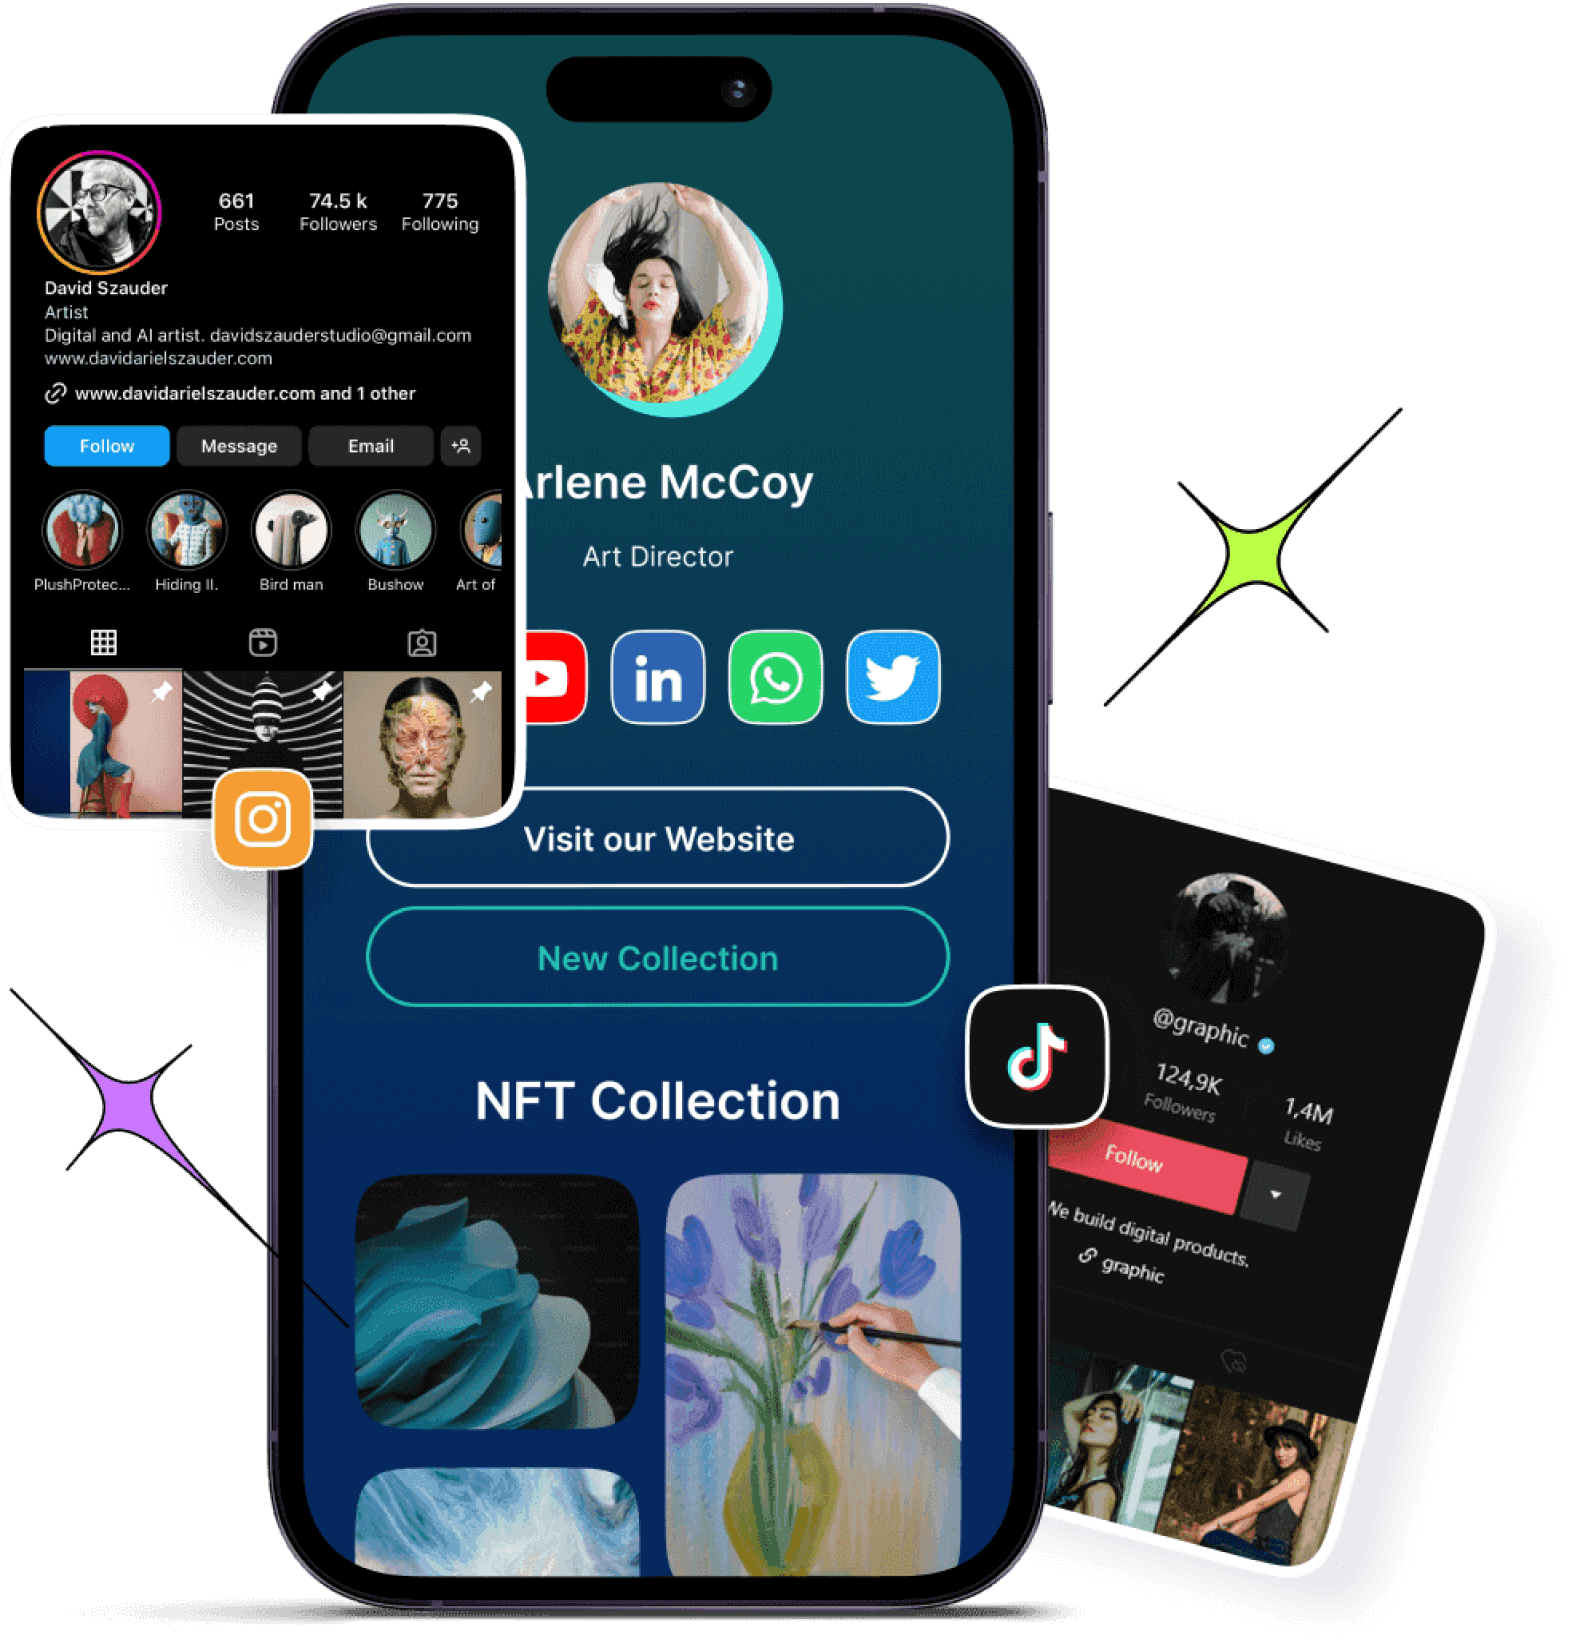
Instagram lets you add up to 5 links in your bio now, but that doesn’t mean they’re all going to convert. When it comes to personal branding or promoting a business on Instagram, every detail matters, including the link in your bio.
Your Instagram bio is one of the first things visitors notice, and it’s a powerful tool to drive traffic to your website, blog, or other social media profiles. If you’re pasting a long, messy URL straight into your profile, you’re missing the point. Instead, rename it using a branded short link.
Let’s walk through how to rename your Instagram bio link, and how to stretch its potential using Replug.
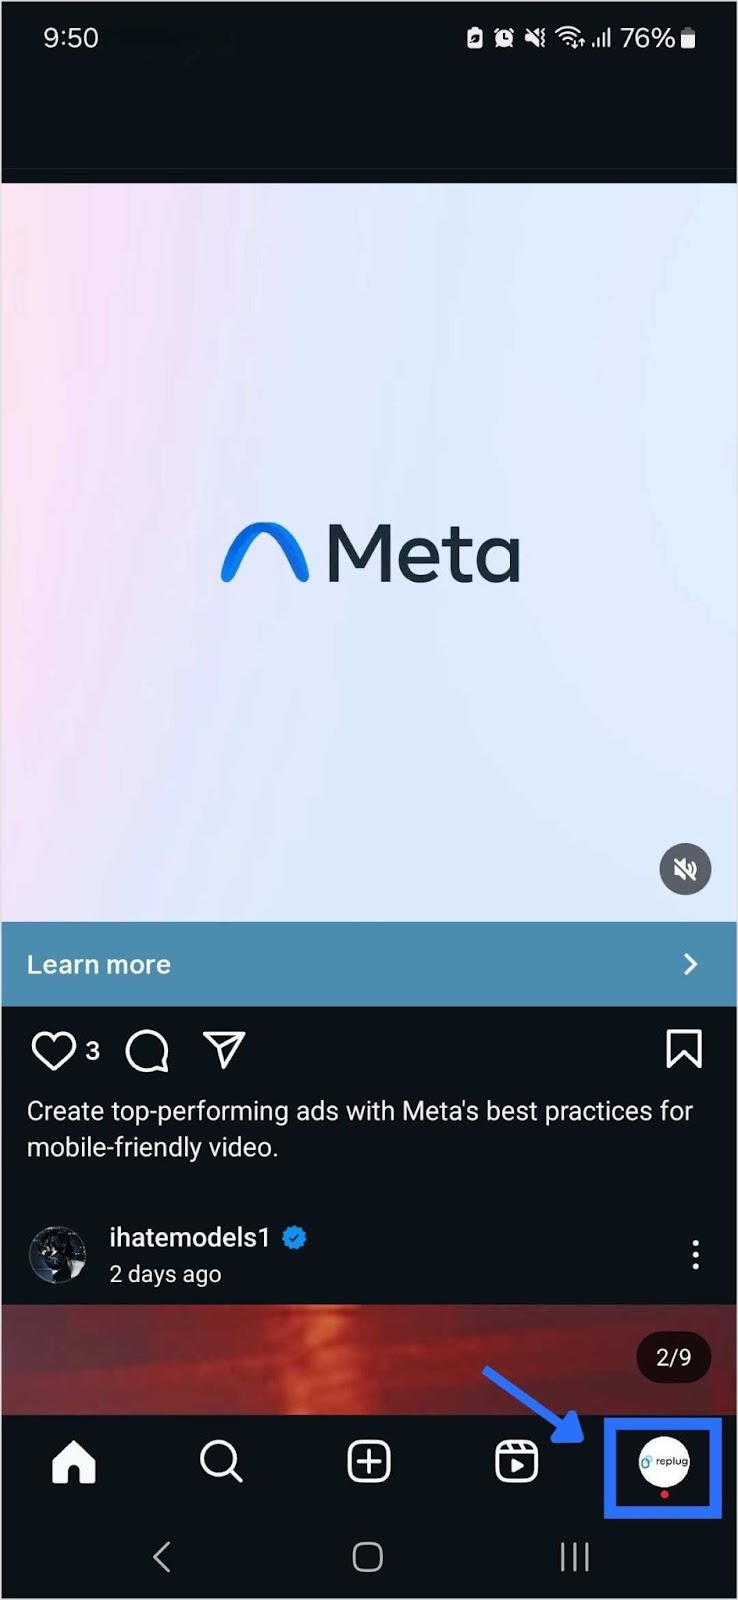
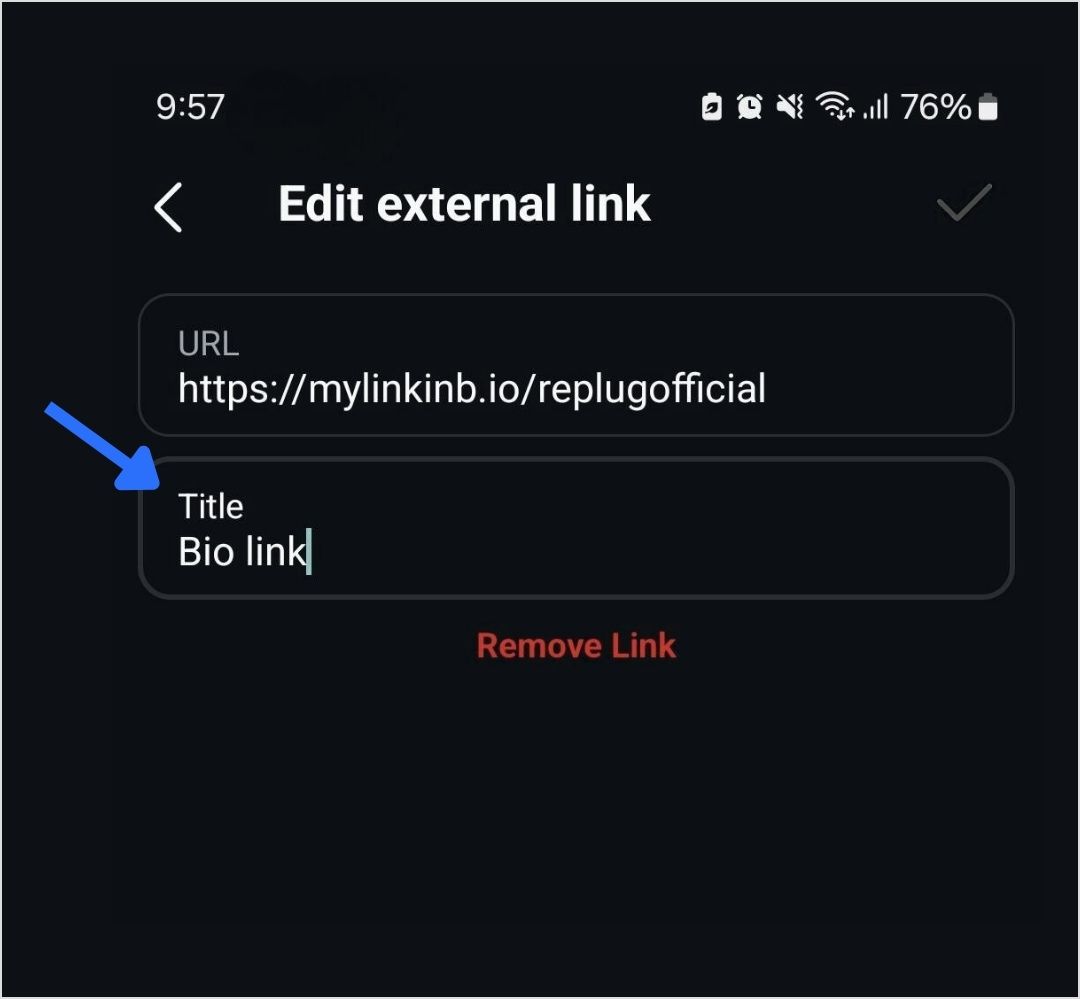
Step 6: Tap the save icon in the top-right corner to apply your changes. Your renamed link will now appear in your bio.
What is a “link in bio” on Instagram?
A “link in bio” on Instagram refers to the clickable URL that users can include in their profile’s bio section. Since Instagram does not allow clickable links in individual posts, the link in bio is a valuable method for directing followers to external content, such as websites, blog posts, online stores, or other social media profiles.
Why it’s important:
Traffic and conversion: The link in bio is a direct avenue to convert Instagram engagement into website traffic, sales, or other conversions. It’s an essential part of any Instagram marketing strategy.
Branding: A well-curated link and description contribute to a cohesive brand experience on Instagram, helping users quickly understand what to expect when they click the link.
How to make the most of your single Instagram bio link?
Renaming your Instagram link might seem like a small tweak, but it plays a big role in shaping user expectations, strengthening your branding, and increasing click-throughs. And if you’re managing multiple destinations? Users can use Replug, our link-in-bio tool, to overcome this limitation, which allows multiple links to be hosted on a single landing page.
Here’s how Replug can enhance your Instagram bio link:
Customizable landing page: Tailor your link landing page to match your brand’s aesthetics, making it an extension of your Instagram profile.
Multiple links: Share links to your latest blog posts, online store, social media channels, promotional offers, and more in one place.
Analytics: Track link performance to see which links are getting the most clicks, allowing you to optimize your content strategy based on data.
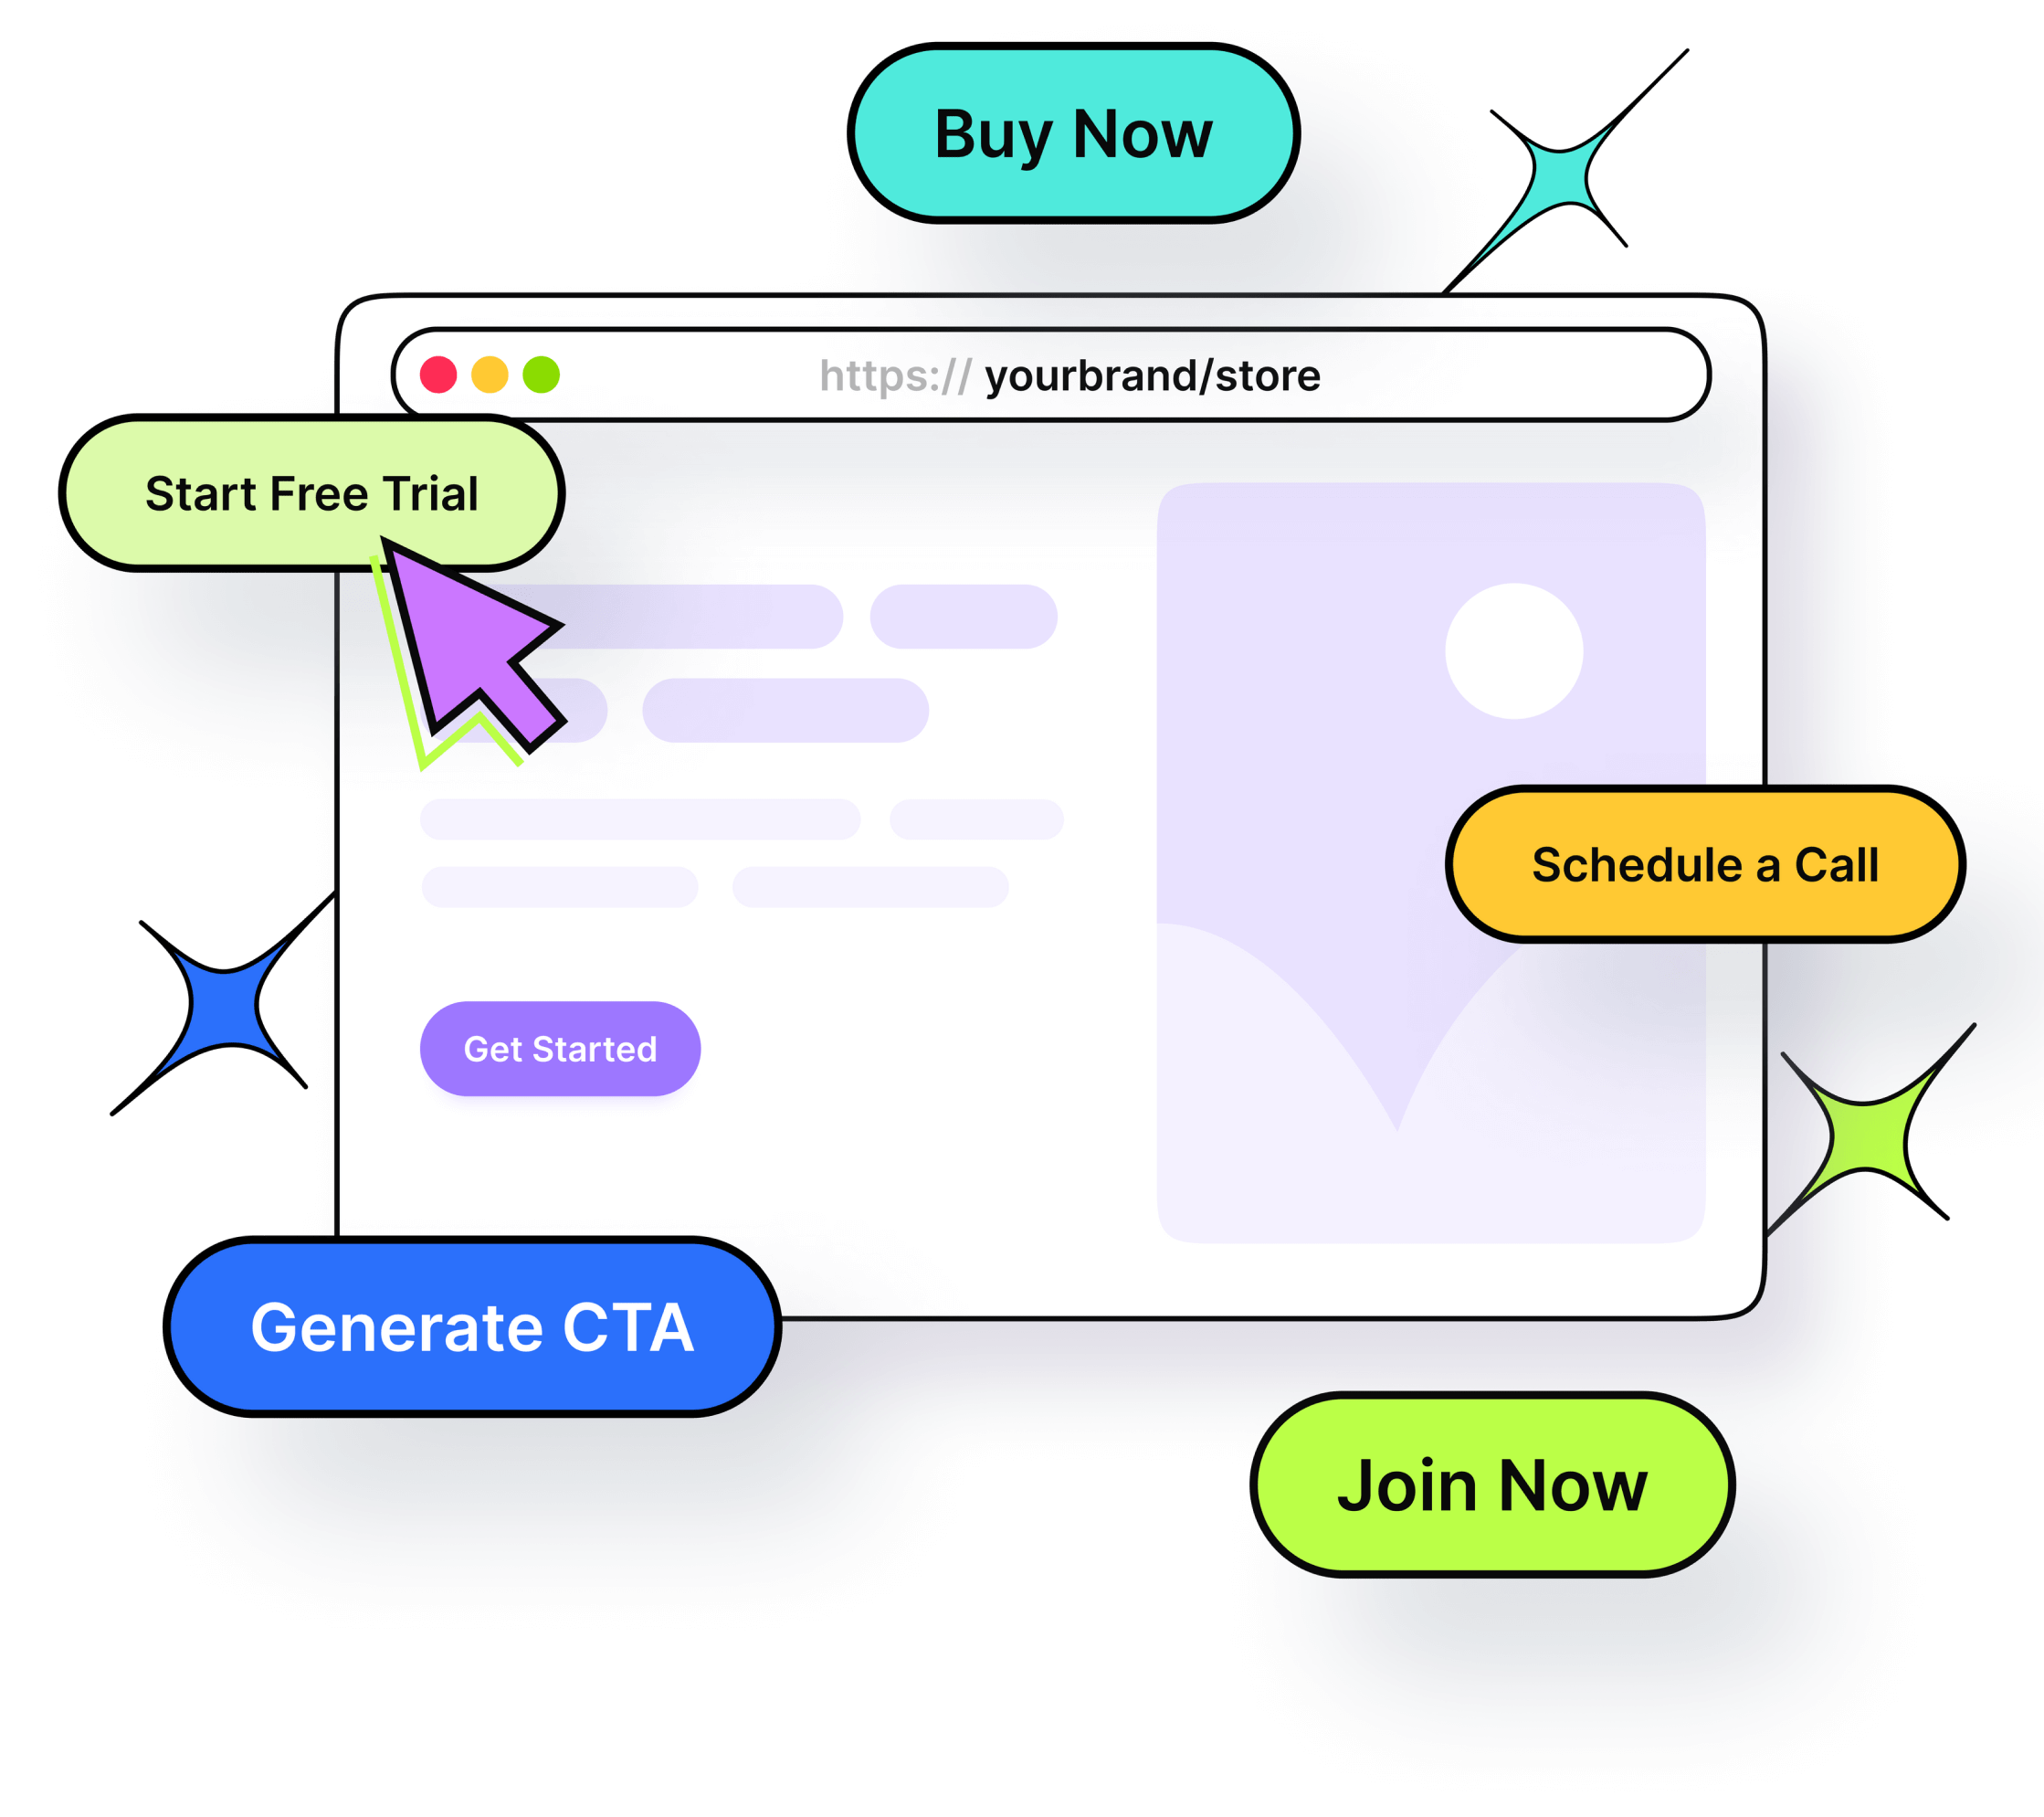
Add a relevant CTA: When it makes sense, add a call-to-action (CTA) to your link title like “Shop Now,” “Learn More,” or “Subscribe.” CTAs give your audience clear direction and can increase both clicks and conversions from your bio link.
Use custom, branded URLs: Custom URLs do more than save space’ they make your bio look cleaner and more intentional. Using tools like Replug, you can create branded links that match your style, improve trust, and keep your Instagram profile looking sharp.
Boost ROI with branded URLs!
Enhance your marketing campaigns by creating shareable, trackable, and fully multi-purpose
customizable branded URLs.
Keep it short: Long or cluttered titles can be overwhelming and easy to skip. A short, punchy title is more scannable, looks better in your bio, and makes it easier for followers to know exactly what to expect when they click.
Keep it clean: Avoid clutter in your link titles. Skip unnecessary punctuation, symbols, or random emojis. A clean, straightforward title is easier to read and looks more polished in your bio.
Match your brand voice: Your link title should reflect your brand’s tone, whether that’s casual, bold, or professional. Brand consistency helps build trust and makes your profile feel more intentional.
Final thoughts
By utilizing tools like Replug and implementing effective strategies, you can transform your single Instagram bio link into a powerful driver of traffic and engagement. Regular updates, strong CTAs, and a well-structured landing page can significantly enhance the user experience and help you achieve your marketing goals.
FAQs for how to rename a link on Instagram bio
Why can you only have one link in your Instagram bio?
Instagram limits users to one link in their bio to keep profiles concise and avoid spammy behavior. This restriction encourages users to choose the most relevant link for their audience.
How can I add multiple links to my Instagram bio?
You can add multiple links by using our link-in-bio tool, Replug. It helps you create a landing page that hosts multiple links accessible through a single URL in your bio.
What is a link-in-bio tool?
A link-in-bio tool is a service that allows you to create a customizable landing page with multiple links.
Can I track the performance of my Instagram bio link?
Yes, Replug offers analytics features that allow you to track the number of clicks and other engagement metrics, helping you optimize your content strategy.
How often should I update my Instagram bio link?
You should update your Instagram bio link regularly to reflect your latest content, promotions, or events. Keeping the link current ensures it aligns with your marketing goals and provides value to your followers.
Can I use a custom domain for my Instagram bio link?
Yes, Replug allows you to use a custom domain, which can enhance brand recognition and trust among your audience.
Trying to build a strong online presence? It starts with knowing how to find and share your social media profile links.
Sounds simple, until you’re five menus deep in an app wondering “where on earth is my profile URL?”. From Instagram to Telegram, some platforms make it harder than it should be to find your own URL.
That’s where this guide comes in; simple steps to locate your profile link on all the top platforms. Also, once you’ve collected them, you can use a tool like Replug to bring them all together in one branded, trackable bio link page.
Ready to know how? Let’s begin!
How to find your social media link on popular platforms?
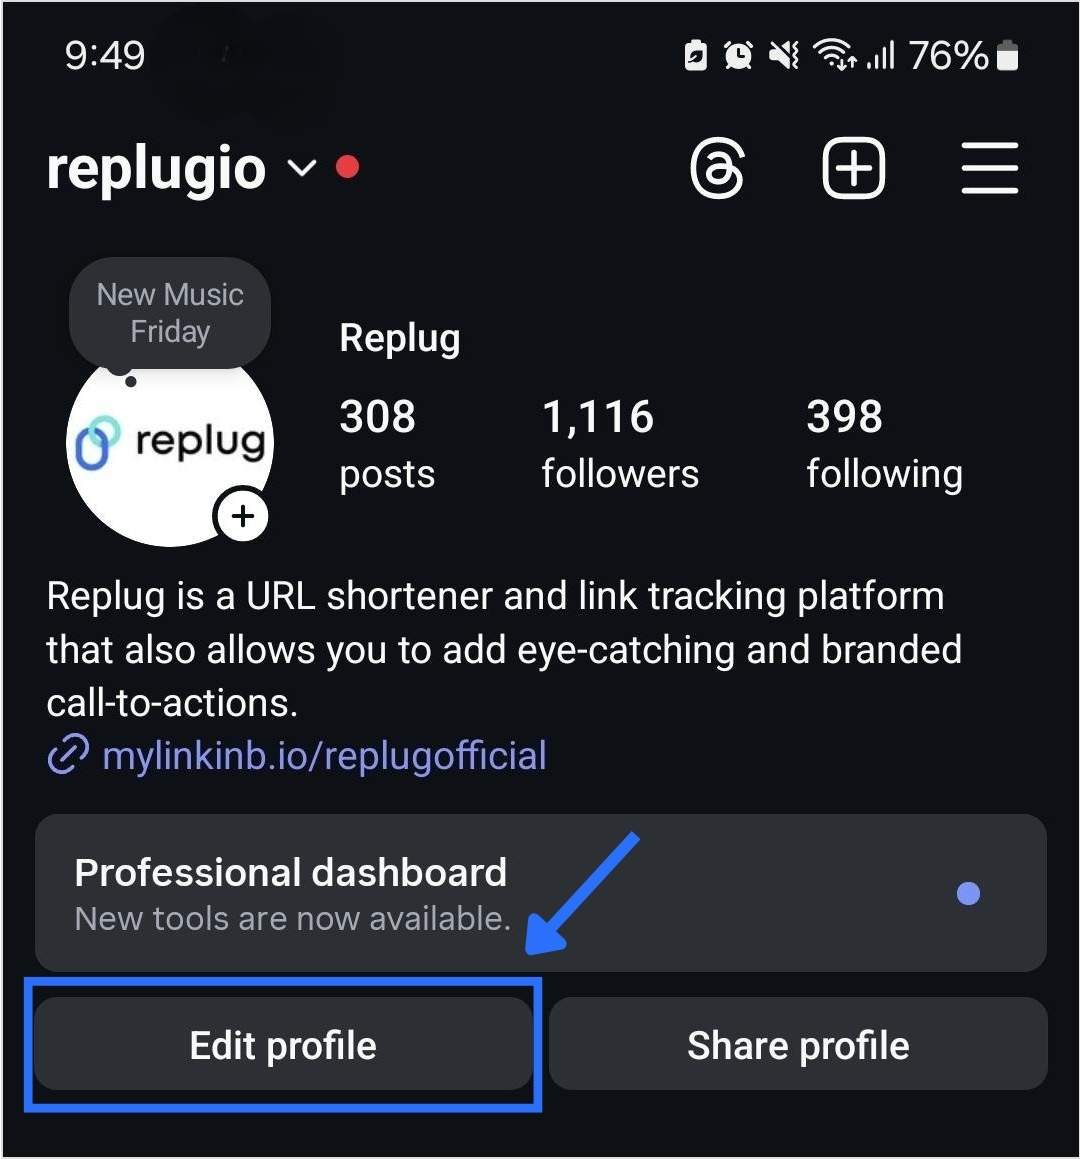
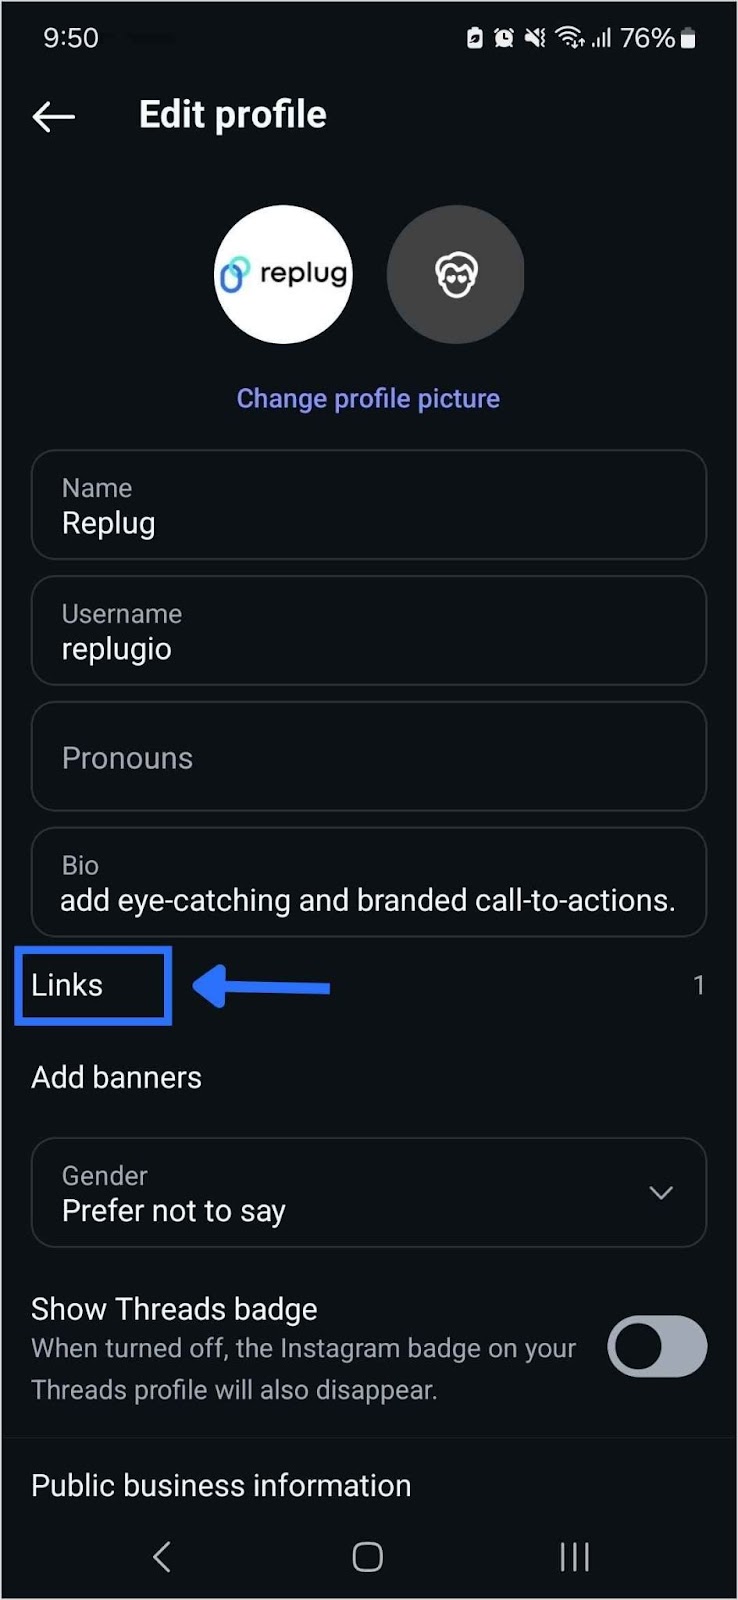
Open the Instagram app and tap your profile picture in the bottom right corner.
Tap “Edit Profile.”
Your username will be displayed. Your Instagram URL will look like:
You’ll need to manually construct this social media link.
How to find it (Desktop):
Go to instagram.com and log in.
Click on your profile picture in the top right, then select “Profile.”
Look at the URL in your browser’s address bar. This is your direct Instagram profile link.
Pro tip: Once you have your profile links, tools like Replug help you organize all your social media links in one place through one neat bio link so your audience never has to hunt for your socials.
At the top of your profile, you’ll see a small link icon next to your username. Tap this icon, and it will copy your social media link to your clipboard.
How to find it (Desktop):
Threads is primarily mobile-first, but your profile link will generally be:
You can access it on desktop by going to the Threads website and logging in, then navigating to your profile to find the URL in the address bar.
Open the LinkedIn app and tap your profile picture in the top left.
Tap “View Profile.”
Tap the three dots in the top right.
Tap “Share via…” or “Contact info.” Your profile URL will be listed there.
How to find it (Desktop):
Go to linkedin.com and log in.
Click on your profile picture or “Me” in the top bar, then “View Profile.”
Your profile URL will be in the browser’s address bar. You can also customize it by clicking “Edit public profile & URL” on the right sidebar.
Pro Tip: When sharing your LinkedIn profile link across platforms or in your email signature, consider using a URL shortener. It keeps your link clean and lets you track how often people are clicking, so you can measure interest in your profile effortlessly.
Maximize marketing ROI
by transforming ordinary URLs into branded short links that convert.
Try Replug for free
8. Tumblr
How to find it (Mobile):
Open the Tumblr app and tap the account icon (little person) in the bottom right.
Tap on your blog’s name at the top.
Tap the share icon (usually an arrow pointing upwards or sideways). Your blog’s URL will be displayed, and you can copy it.
How to find it (Desktop):
Go to tumblr.com and log in.
Click on your blog’s name in the top right corner.
Your blog’s URL will be in the browser’s address bar.
9. Bluesky
How to find it (Mobile):
Open the Bluesky app.
Tap on your profile icon in the bottom right.
Your Bluesky handle will look like this:
Tap on it, and it will copy the handle. Your profile URL is:
You’ll need to manually construct this or access it via the share button.
How to find it (Desktop):
Go to bsky.app and log in.
Click on your profile in the left-hand menu.
Your profile URL will be in the browser’s address bar.
10. YouTube
How to find it (Mobile – YouTube Studio app recommended for creators):
Open the YouTube app and tap your profile picture in the top right.
Tap “Your channel.”
Tap the three dots in the top right, then “Share,” and “Copy link.”
For custom URL (if you have one): Use the YouTube Studio app or desktop. In Studio, go to “Customization” > “Basic info.”
How to find it (Desktop):
Go to youtube.com and log in.
Click on your profile picture in the top right corner.
Click “Your channel.”
Your channel URL will be in the browser’s address bar. If you have a custom URL, that will also be displayed here.
11. Snapchat
How to find it (Mobile – Primary way):
Open the Snapchat app.
Tap your Bitmoji or profile icon in the top left corner.
Your Snapcode will be displayed. Click on it.
You can tap the “Share my profile link” button to share your Snapchat link.
When you share it (on whichever platform), you’ll find your Snapchat link in the caption.
How to find it (Desktop):
Snapchat is primarily a mobile-first platform, and you won’t find a direct profile link on a desktop browser in the same way.
Tip: For quicker sharing, Snapchat gives you a personalized QR code. If you want more advanced customization, tools like Replug can help you create a branded, dynamic QR code.
12. Reddit
How to find it (Mobile):
Open the Reddit app and tap your avatar in the top right corner.
Tap “Profile.”
Tap the Share icon in the right top right corner
Tap “Copy Link”.
How to find it (Desktop):
Go to reddit.com and log in.
Click on your username in the top right corner.
Your profile URL will be in the browser’s address bar.
Boost ROI with branded URLs!
Enhance your marketing campaigns by creating shareable, trackable, and fully multi-purpose
customizable branded URLs.
Go to “Settings” (iOS) or “three dots” then “Settings” (Android).
Tap on your name/profile picture.
Look for “QR Code” or “Invite a Friend.” You can share your QR code, or you can use the:
format (include country code, no + or spaces).
How to find it (Desktop):
You won’t find a direct profile link for sharing on the desktop app itself, but you can use the phone number format if you know your number.
Tip: Your WhatsApp URL might look messy because of your phone number as the URL slug. You can create a custom short WhatsApp URL using Replug to make your WhatApp link look cleaner.
Maximize marketing ROI
by transforming ordinary URLs into branded short links that convert.
Try Replug for free
17. Telegram
How to find it (Mobile):
Open the Telegram app and tap the three horizontal lines (menu) in the top left.
Tap “Settings.”
Under your name, you might see “Username.” If you have one set, your link will look like this:
If not, you can set one here.
How to find it (Desktop):
Open the Telegram desktop app.
Click the three horizontal lines (menu) in the top left.
Click “Settings” then “Edit profile.”
If you have a username set, it will be displayed.
How to use these links with Replug?
Once you’ve grabbed your social media profile URLs, tools like Replug make it easy to organize and share them all in one place. Instead of dropping individual links everywhere, create a simple, branded bio link page that keeps your profiles tidy and accessible.
Here’s a step-by-step process to create a bio link page using Replug:
Step 1: Access your Replug account
If you’re new, start by signing up for a free trial or choosing a paid plan to unlock all features. After that, you can quickly create a landing page to showcase all your social profile links and any other key information.
Step 2: Create a bio link page
Once logged in, head over to the Bio Links section from your dashboard and click Create New.
A setup window will appear with three main categories: Branding, Content, and Settings.
Start by customizing your branding. Add your profile name, description, profile image, cover photo, and brand colors. You can also include additional brand details like your logo, tagline, and social media handles to make your bio link page truly reflect your identity.
Step 3: Add your social profiles
Next, switch to the Content section to start adding your social media links along with other engaging elements like cards, text, videos, RSS feeds, and more.
Click the Socials button to open a pop-up window.
Add up to eight social buttons linking to your Instagram, Facebook, Twitter, LinkedIn, YouTube, TikTok, and other accounts.
Want even more customization? Click the Cards button to add content blocks with descriptions, images, animations, and scheduled visibility options. These features help make your social profile blocks more dynamic and engaging.
The profile blocks you add will appear like this on your bio link page:
When you’ve added all your social profiles and content blocks, click Update to save your changes and see a live preview of your bio link page.
Step 4: Optimize & track performance
Before you start sharing your bio link page, give it an SEO boost to maximize reach and impact:
Add a custom meta title, description, favicon, and featured image to improve how your page appears in search results.
Customize social media previews so your bio link looks great when shared across platforms.
Insert tracking pixels from Facebook, TikTok, Google, and more to enable retargeting and monitor conversions.
Adding these retargeting pixels helps you understand your audience and optimize your marketing efforts.
Once everything’s set, you’re ready to share your unique Replug bio link across all your favorite platforms; Instagram, TikTok, Facebook, X (Twitter), LinkedIn, and beyond.
Go beyond generic link pages!
Create custom bio links that truly fit your brand
With Replug, you can create bio links that are unique, engaging, and built to convert.
Your social media profile link is more than just a URL.
Whether you’re updating a link-in-bio, filling out a job application, or simply networking online, knowing how to quickly grab your profile URL from each platform is a small but powerful skill. While some platforms make it super easy, others hide it behind a few taps or clicks, but now, you’ve got the steps for all the major ones.
Bookmark this guide or save it to your notes. Your future self (or your future brand collab) will thank you!
FAQs for how to find your social media link on popular platforms
Why do I need to know my social media profile link?
Because it allows you to easily share your presence online. Whether it’s for job applications, marketing, networking, or adding to a social media bio, having your profile URLs handy makes your online presence more accessible.
Can I customize my social media URL?
On platforms like LinkedIn, YouTube, and Facebook, yes! You can often edit your public profile URL to be more personal or brand-aligned. Just look for “Edit public profile” or similar settings.
Are mobile and desktop URLs the same?
Yes. The URLs usually point to the same profile, whether you access them from mobile or desktop. What changes is the method of finding them.
What if I don’t have a username set on a platform like Telegram?
You’ll need to set one first in your account settings. Only then can you generate a direct profile link.
Do all social platforms have shareable profile links?
Not exactly. For instance, platforms like Discord don’t offer direct profile URLs in the same way others do.
How do I use these links with a bio link tool?
Simply copy the profile links you found and paste them into your bio link tool. It helps centralize all your social channels in one easy-to-share location.
Email is still one of the most reliable ways to connect with customers, clients, and collaborators. Whether you’re networking, running a business, or promoting a service, your email address is an essential contact point.
But here’s the problem. Asking people to type out your email can be a hassle. There’s always a risk of typos or missed opportunities.
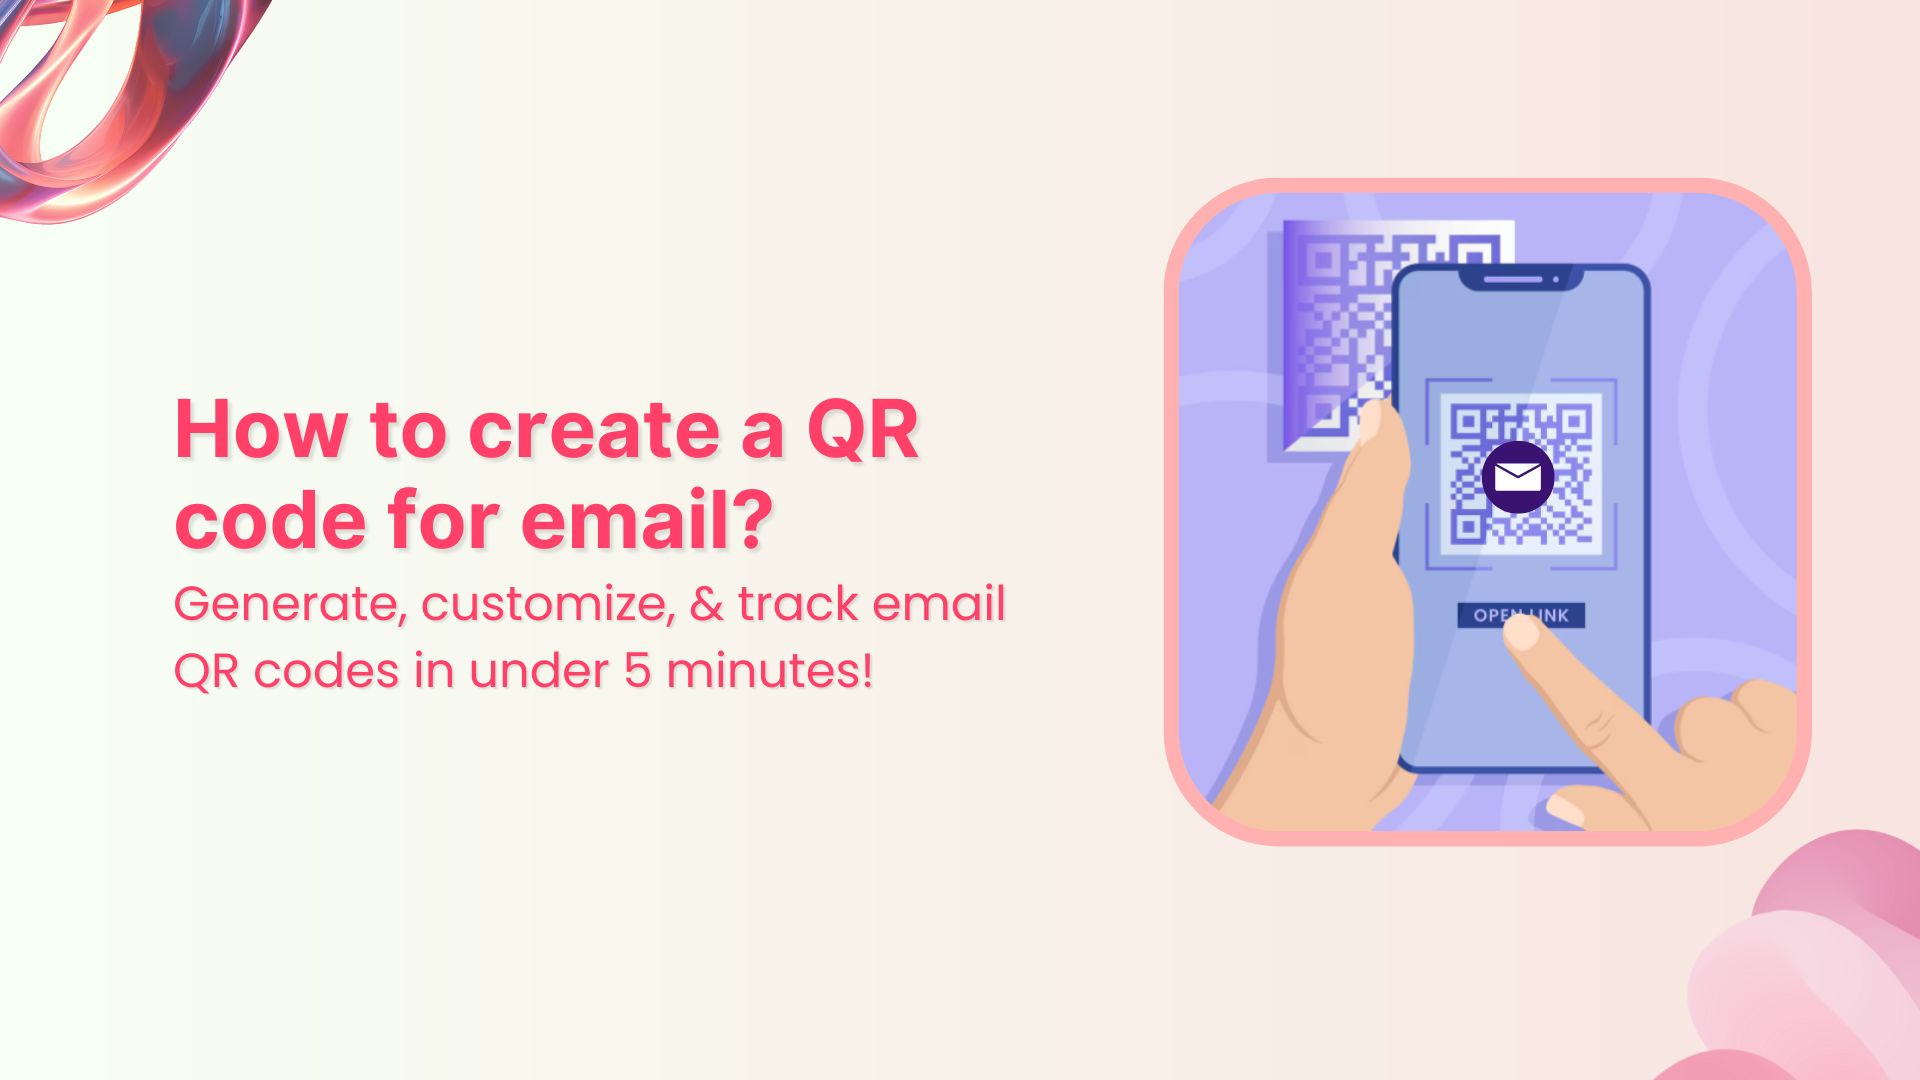
That’s where a QR code for email comes in handy.
In this guide, you’ll learn how to create an email QR code using Replug. It’s a simple and smart way to let people connect with you in just one scan.
What is a QR code for email?
A QR code for email is a type of quick response (QR) code that launches a pre-filled email when someone scans it. It can include your email address, a subject line, and even a message.
Here’s what it looks like in action:
Someone scans the code
Their email app opens instantly
Your email address is already added as the recipient
They just tap “send”
No typing. No mistakes. Just smooth communication.
If you’re still handing out business cards or publishing contact details online, email QR codes offer a smarter way to connect. Here’s why they’re worth using:
Faster communication: People don’t have to manually type or copy-paste your email. Just scan and send.
Great for offline and print: Add it to business cards, posters, flyers, packaging, or event booths. It’s a seamless bridge between offline attention and digital communication.
Cleaner and more professional: An email QR code looks more modern and intentional than a line of text in fine print.
Trackable (if you use Replug): Replug lets you track how many people scanned your QR code, where they were, and which campaigns performed best.
How to create a QR code for an email using Replug?
Creating an email QR code with Replug is quick and beginner-friendly. Here’s how to do it in just a few steps.
Step 1: Log into Your Replug account
Go to Replug and sign into your dashboard. If you’re new, you can try the 14-day trial to get started.
It lets users scan the code and instantly open an email draft with your address already filled in. It’s faster, easier, and avoids typos.
Can I create a QR code for an email address for free with Replug?
Replug offers a 14-day free trial plan that lets you generate QR codes, including email types. For advanced tracking and branding, a paid plan may be better.
Can I customize the look of my email QR code?
Absolutely. Replug lets you change colors, shapes, and even add your logo to match your branding.
Do email QR codes expire?
No, they don’t expire. However, you can delete or update them anytime from your Replug dashboard.
Can I track who scans my email QR code?
You can track how many scans happen, what devices or locations they come from, and when. However, personal identification requires the user to interact or reply via email.
Exchanging contact information isn’t what it used to be.
Gone are the days of digging into your bag for a crumpled business card or spelling out your email letter by letter in a noisy setting. Sharing your details should be fast, frictionless, and kind of cool.
That’s where a QR code for your contact info comes to the rescue.
Whether you’re at a networking event, attending a trade show, or just casually meeting someone who wants to stay in touch, a contact info QR code (also known as a vCard QR code) makes the exchange seamless. One quick scan, and boom! Your new contact has everything they need to reach you.
In this guide, we’ll walk you through how to create a QR code for your contact info using Replug. It’s simple, fast, and lets you ditch the paper.
Maximize marketing ROI
by transforming ordinary URLs into branded short links that convert.
Try Replug for free
What is a QR code for contact info?
A QR code for contact info is a scannable code that automatically saves your contact details to the user’s phone. Instead of manually typing in your number, email, or job title, the scanner gets it all pre-filled.
These QR codes are based on vCard or meCard formats, which smartphones recognize and convert into a new contact entry.
Still unsure why you should care?
Why use a QR code for contact info?
Let’s count the benefits:
Paperless and professional: No more printing hundreds of business cards.
Instant saving: Scanning the code instantly adds you to someone’s contact list.
More info, less space: Unlike a traditional card, you can include your website, address, title, socials; basically, your whole professional identity.
Error-free sharing: Avoid typos in email addresses and phone numbers.
Great first impression: It shows you’re tech-savvy and efficient.
Now that you’re convinced (hopefully), let’s get into the “how.”
How to create a QR code for contact info using Replug?
Creating a contact info QR code with Replug is as simple as it can get. Here’s how to do it:
Step 1: Sign in or create a Replug account
Start by heading over to Replug. If you’re already part of the Replug family, log in to your dashboard. If not, no worries. You can create an account in under two minutes.
Pro tip: Replug offers a free trial, so you can test the feature without commitment.
Step 2: Navigate to “QR Codes”
Once you’re in your dashboard, look for the “QR Codes” tab in the navigation menu. Click it.
You’ll see an option to “Create New”. Go ahead and hit that button.
Step 3: Choose “vCard” as your QR code type
Replug supports different QR code types (like URLs, text, and emails), but for contact info, you’ll have to select vCard.
This is the format that stores all your details in one neat package.
Here’s where you enter the info you want to share. Here’s what Replug allows you to include:
First and Last Name
Phone Number
Email Address
Company Name
Job Title
Full Address (Street, City, Province/State, ZIP/Postal Code, Country)
Website URL
Step 5: Customize the design (optional but fun)
Replug gives you tons of design customization options. You can:
Change QR code color
Add your company logo in the center
Pick from various frame shapes
Add a CTA like “Scan to Save Contact”
Remember. Design isn’t just about aesthetics; it can improve scan rates too.
Step 6: Download and share
Once your contact info QR code looks perfect, hit “Download.”
Download it in your preferred format (PNG, JPG, SVG, or WEBP), and you’re ready to roll. You can print it on:
Business cards
Flyers
Brochures
Event badges
Conference booths
Even your LinkedIn banner
Or just keep a digital version on your phone ready to show.
Benefits of using Replug for QR codes
Here’s why Replug is a solid choice for generating QR codes:
User-friendly interface: Replug’s dashboard is clean, intuitive, and beginner-friendly. Everything from creating to customizing your QR code happens in a few simple clicks.
Advanced customization: Add brand colors, logos, borders, and calls to action that make your QR code stand out and match your identity.
Boost your conversion rates with irresistable CTAs with
Multiple QR code types: Besides contact info (vCard), Replug supports QR codes for social media, URLs, email, phone numbers, text, and more.
Editable even after sharing: Made a typo or changed your job title? No need to reprint everything. With Replug’s dynamic QR codes, you can edit QR codes even after they’ve been shared.
Built-in analytics: Want to know how many people scanned your QR code, when, and where? Replug’s analytics gives you detailed stats so that you can measure your outreach efforts.
Safe and secure: Replug ensures your QR codes and associated information are stored securely. No shady business or random redirects.
Seamless integration: Whether you want to use your QR code on a landing page, embed it in emails, or pair it with link tracking tools, Replug plays nicely with your existing workflow.
Where to use your QR code for contact info?
Here are some smart ways to use a contact info QR code:
Add it to your email signature
Embed it on your website contact page
Print it on presentation slides
Share it during Zoom calls by holding it up or screen-sharing
Place it on tabletop stands at events or meetups
Final thoughts
Using a QR code for contact info may not be your default move yet, but it should be.
It saves time, reduces human error, and makes your interactions smoother. Plus, it’s a subtle flex that says, “I’ve got my stuff together.”
With Replug, setting up your contact info QR code is super easy. Whether you’re a freelancer, a startup founder, a recruiter, or just someone who networks a lot, it’s a tool you’ll want in your digital toolkit.
So go ahead. Ditch the stack of business cards, and let your QR do the talking.
A vCard QR code is a type of QR code that contains your contact details; like name, phone number, email, company, and more. When someone scans it, your info is automatically saved to their phone’s contacts.
Do I need any special app to scan a contact info QR code?
Nope! Most modern smartphones have built-in QR code scanners in their camera apps. Just point and scan.
Can I edit my QR code later if my contact info changes?
Yes! With Replug’s dynamic QR codes, you can update your contact information without having to reprint or redistribute the code.
Can I add my social media links to the QR code?
While vCard QR codes primarily include contact and job-related information, you can include a website URL that links to your social profiles or use a separate QR code for social media via Replug.
What makes Replug different from other QR code generators?
Replug offers dynamic editing, advanced design customization, built-in analytics, multiple QR types, and a super intuitive interface, all in one place.
Is it safe to share my personal contact info via QR code?
Yes. Replug stores your information securely and doesn’t redirect users to shady third-party sites. However, it’s always best to avoid sharing sensitive personal info (like home addresses) in public spaces.
Where can I use my contact info QR code effectively?
Almost anywhere! Popular placements include business cards, resumes, event badges, LinkedIn banners, email signatures, websites, and even screens during virtual meetings.
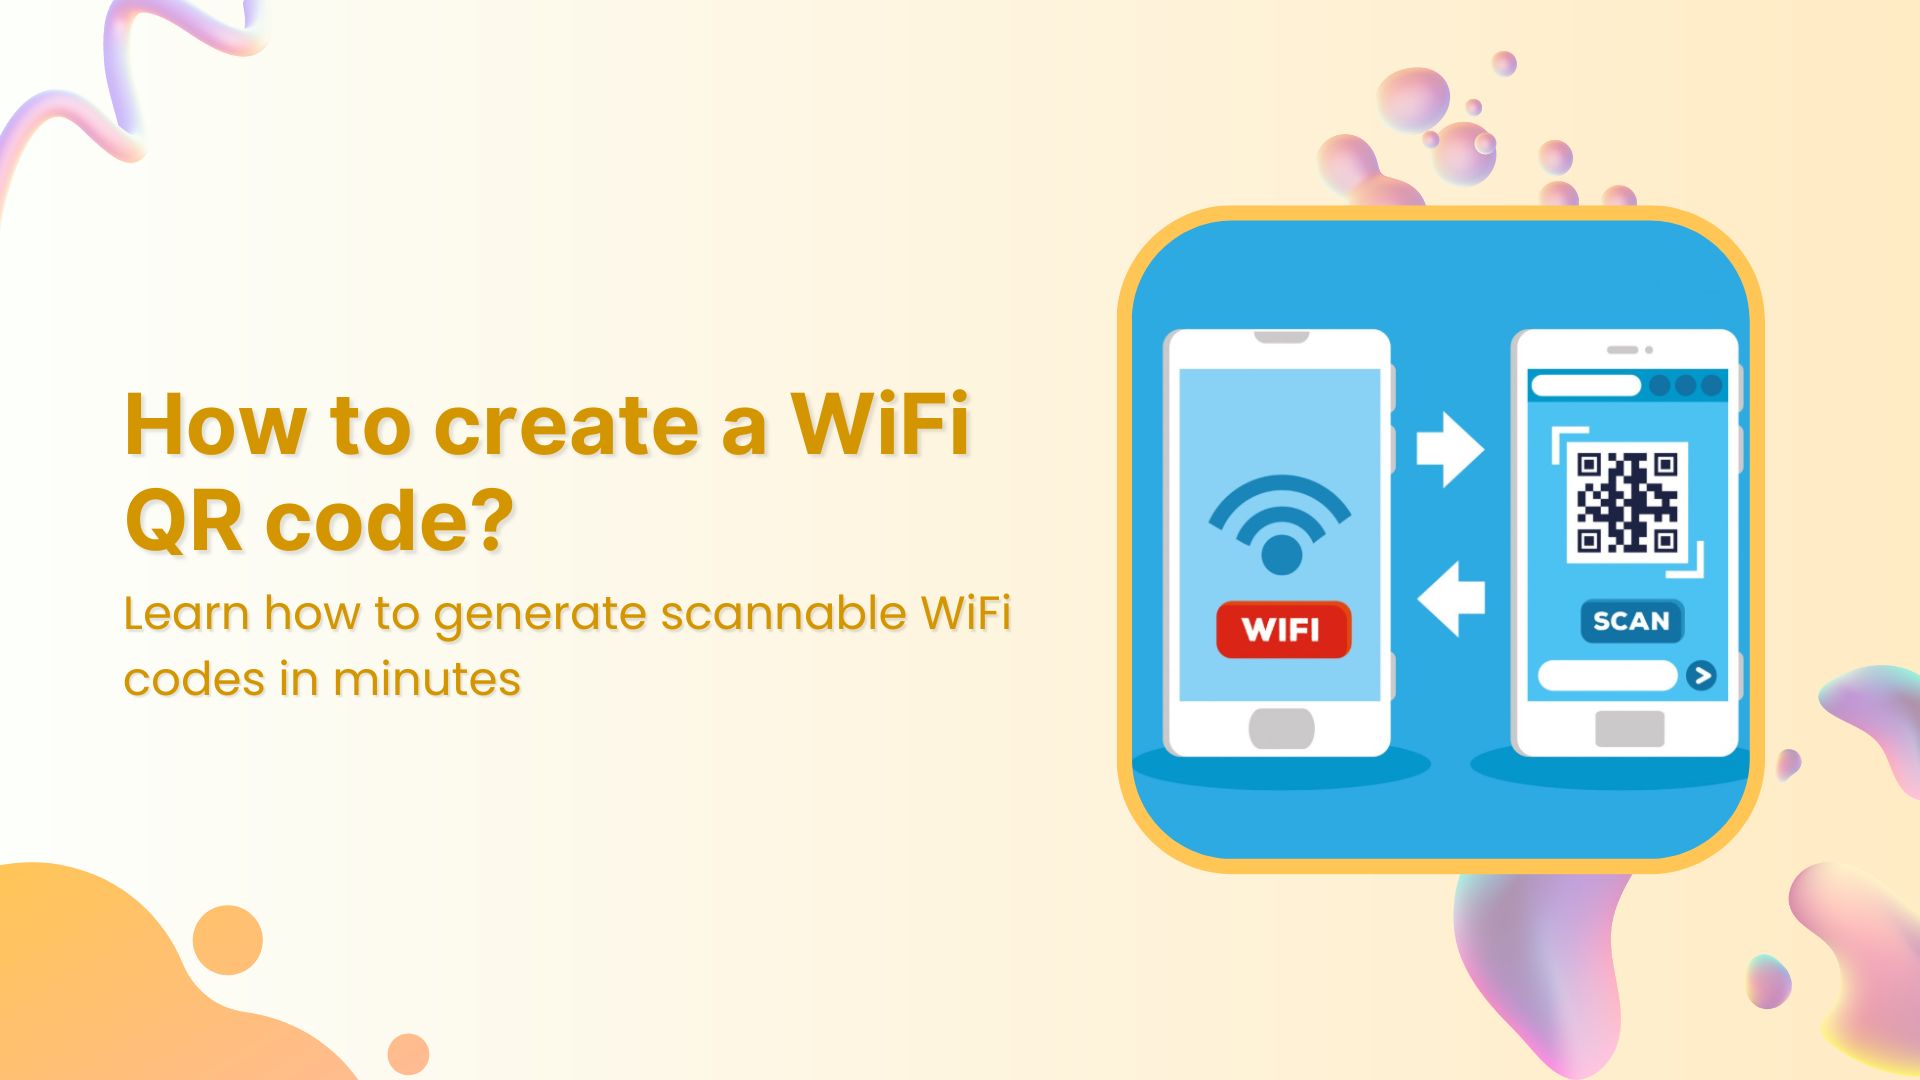
Whether you’re managing a café, hosting guests at home, or setting up a booth at an event, one thing’s for sure: no one enjoys asking for the WiFi password over and over again.
That’s where WiFi QR codes come in handy. They’re a quick, seamless, and tech-savvy way to let users connect to your wireless network without typing a single character.
These handy little codes can be scanned by any smartphone camera, allowing instant access to WiFi. Whether for personal use or to streamline customer experience, generating a WiFi QR code is a clever move.
In this guide, we’ll walk you through what WiFi QR codes are, how they work, and how to create a WiFi QR code using tools like Replug.
What is a WiFi QR code?
A WiFi QR Code is a scannable barcode that automatically connects a device to a specific wireless network; no need to manually type in the SSID or password. All the user has to do is scan the code using their camera or a QR code scanner app, and boom! They’re connected to the internet.
If you’re looking to create a WiFi QR code for your guests, it’s one of the fastest ways to offer seamless connectivity.
What is a WiFi QR code generator?
A WiFi QR Code generator is any online tool or platform that helps you create a QR code for WiFi using your network information, such as your SSID (network name), password, and encryption type.
You just enter the details, choose your design, and download the code. Most modern smartphones can scan and interpret these QR codes instantly using their built-in camera apps, which makes them incredibly user-friendly.
Why use a WiFi QR code?
Here are a few reasons why it’s worth it to create a WiFi QR code:
Convenience: No more shouting your password across the room or writing it on napkins.
User Experience: Offer a seamless connection process for guests and customers.
Branding: With the right tool, you can design branded QR codes that reflect your business aesthetics.
Security: Since the password is encrypted inside the code, it reduces the chances of unauthorized access.
Touch-free: In a post-pandemic world, minimal-contact solutions are a plus.
Maximize marketing ROI
by transforming ordinary URLs into branded short links that convert.
Try Replug for free
Versatile downloads: Export in various file formats for digital or print use.
All-in-one platform: Manage all your QR codes, branded links, bio links, and campaigns in one place.
Whether you’re a business owner, freelancer, or marketer, Replug combines design flexibility, usability, and data insights, making it more than just a basic QR code generator.
Best practices when creating a WiFi QR code
To make the most of your QR code, here are a few things to keep in mind:
Use strong encryption: Always choose WPA/WPA2 unless absolutely necessary.
Test before sharing: Scan the QR code with a couple of different devices to ensure it connects correctly.
Place it strategically: Make it easy for people to spot, whether be at the entrance, on tables, or behind the counter.
Update regularly: If your WiFi credentials change, remember to create a new WiFi QR code.
Conclusion
WiFi QR Codes are the modern answer to the age-old question: “What’s your WiFi password?”
Whether you’re a business aiming to enhance customer experience or someone who just wants to make things a little easier at home, creating a WiFi QR code is a smart, user-friendly solution.
And with tools like Replug, not only is the process simple; it’s also an opportunity to show off your branding while keeping things secure.
Yes. Anyone who scans the code can connect to your network. That’s why it’s essential to place it wisely and use a strong password with encryption.
Do I need a special app to scan a WiFi QR code?
Not at all! Most modern smartphones can scan QR codes directly from the default camera app. However, older phones may require a third-party QR scanner.
Can I edit the QR code after creating it?
Yes. With advanced link management and QR code generators like Replug, you can edit the design and the destination link of your QR code. But if credentials change, you must create a new WiFi QR code.
Is it safe to share my network with a WiFi QR code?
Yes, as long as you use WPA/WPA2 encryption and avoid sharing the code in public forums or social media platforms where unknown users might gain access.
Can I use WiFi QR codes for multiple locations?
Yes. Just create a WiFi QR code for each unique network.
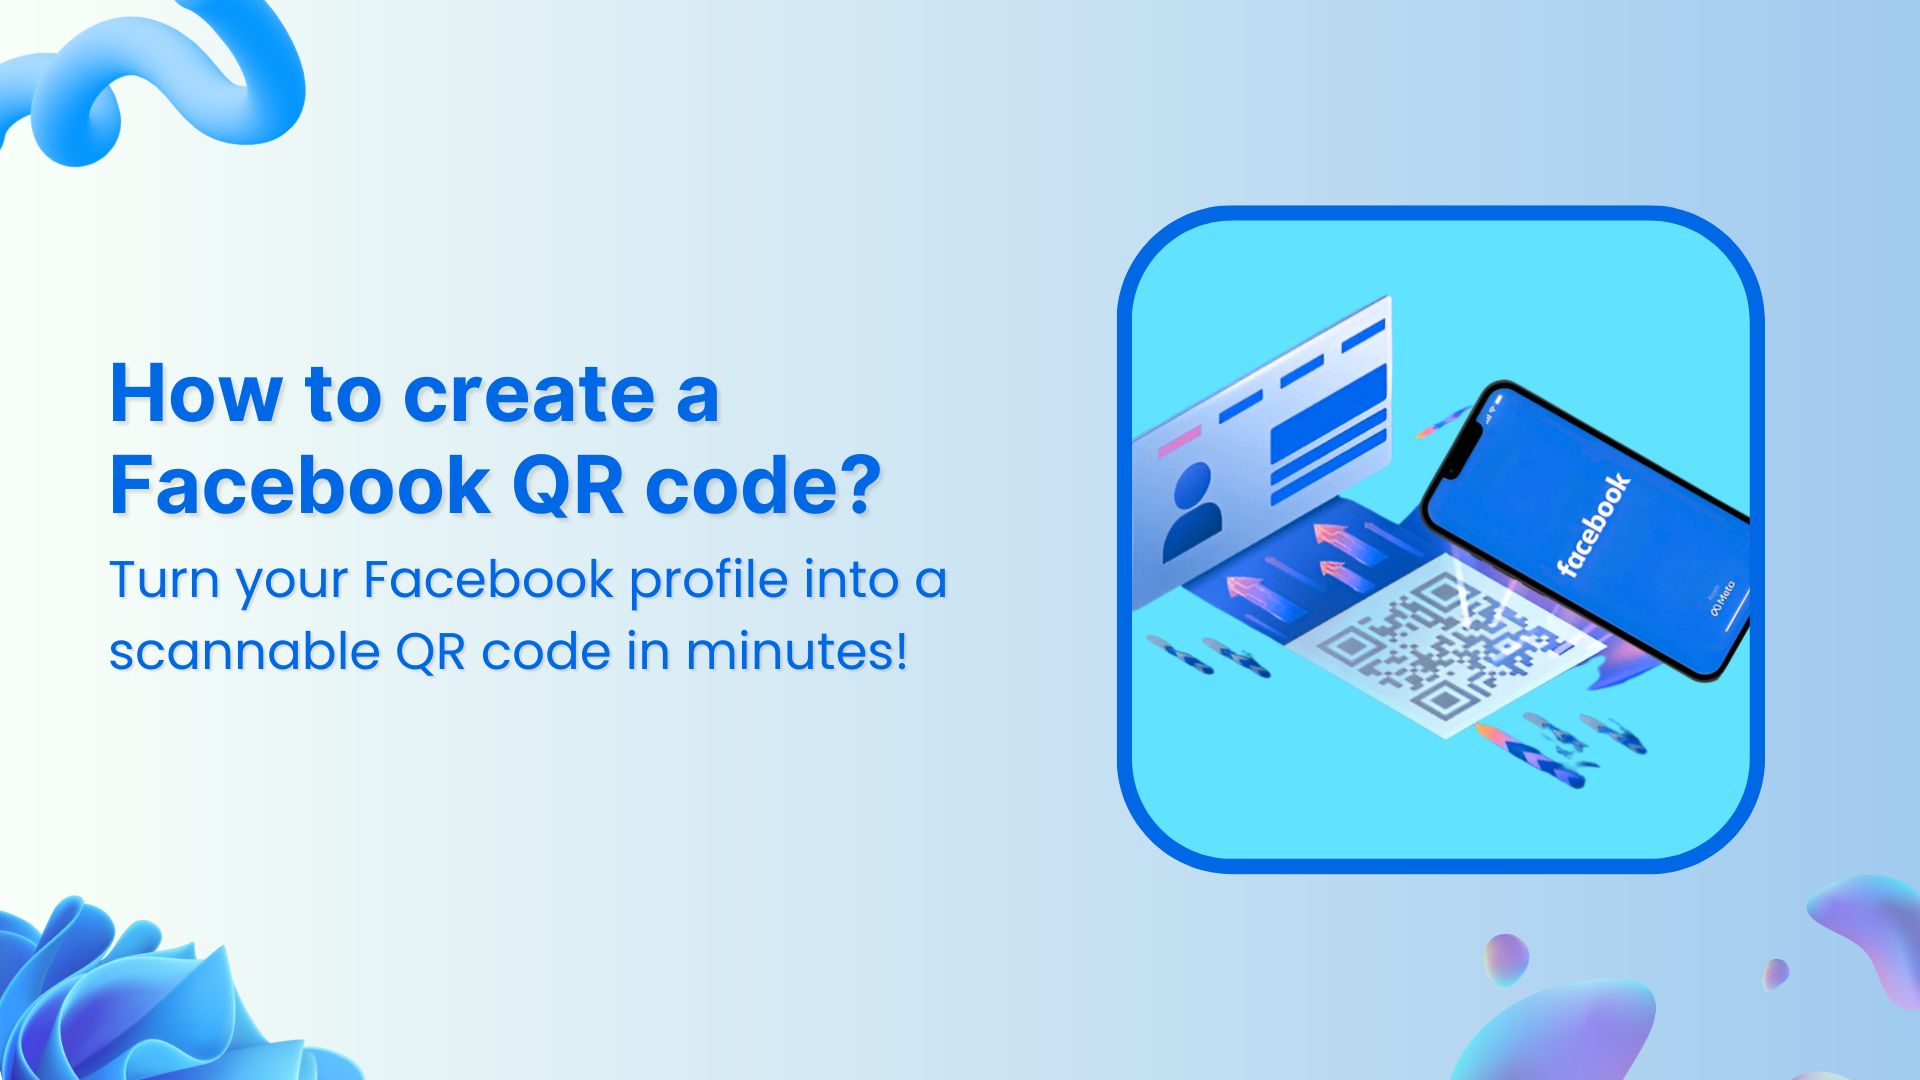
Want to drive more traffic to your Facebook page without relying solely on paid ads or organic search?
Here’s a simple yet underrated trick: Facebook QR codes.
Yes, those scannable little black-and-white squares are more than just tech gimmicks. They’re powerful tools that can bridge the offline and online worlds, bringing people directly to your Facebook page with a quick scan.
In this blog, we’ll show you how to create a Facebook QR code in just a few minutes using Replug, a powerful link management tool. Plus, we’ll explain why it’s a smart move for your business or brand.
What is a Facebook QR code?
A Facebook QR code is a unique, scannable code that, when scanned by a mobile device, redirects users directly to your Facebook profile, business page, or group.
Think of it as a shortcut. Instead of asking someone to search for your page, you give them a one-tap way to access it. Whether you add it to flyers, product packaging, business cards, or display it in your store, a Facebook QR code is all about reducing friction and increasing engagement.
Why use a Facebook QR code?
Still on the fence? Here are a few reasons why a Facebook QR code is worth your attention:
Offline to online: Connect with people in the real world and drive them to your online presence.
Saves time: No need to spell out long URLs or ask people to “look you up.”
Professional touch: It shows you’re digitally savvy and makes your brand more accessible.
Boosts conversions: The easier it is to find your page, the more likely people are to follow or message you.
There are many ways to generate a QR code, but using Replug gives you some major advantages like tracking QR code analytics, customizing your QR code’s design, and even retargeting your visitors.
Step 1: Sign in or create an account
The first step is to sign in to your Replug account. If you don’t have an account, create one. It only takes a few minutes.
A complete link management solution
for marketing professionals & agencies.
Try Replug for free
Step 2: Create a QR code
There are two ways to create a Facebook QR code for your page or profile:
Way #1: Head straight to the QR code builder
From your main dashboard, tap “QR Codes” in the navigation bar.
Click “Create New.”
You’ll be taken to the QR code creation page where you can build a fully branded and customizable code.
Here’s what you can do:
Add a title and description.
Choose a QR code type: website, link, PDF, SMS, WiFi, phone, and more.
Customize the frame, shape, and even upload your logo.
Once you’re happy with the design, hit “Create QR Code.” Your code is ready to download in multiple formats like PNG, JPEG, SVG, or WEBP.
💡 Pro Tip: You can also create a custom URL by optimizing the slug of your shortened link. Even though the QR code hides the link itself, it’s always nice to redirect users to a clean, easy-to-read URL after they scan.
Way #2: Shorten your link first, then create a QR code
Paste your Facebook URL into the bar under “Quickly shorten your link.”
Want a cleaner, more memorable link? Go ahead and edit the slug to create a custom URL. Totally optional, but definitely recommended for clarity.
Click the QR code icon next to your link.
Time to customize! You can tweak the design, colors, and branding to make the QR code match your style.
And just like that, your Facebook QR code is ready to go.
What makes Replug a great QR code generator?
You might be wondering… why use Replug instead of a random free QR generator online?
Here’s what sets Replug apart:
Branded short links: Customize your URL before turning it into a QR code.
Maximize marketing ROI
by transforming ordinary URLs into branded short links that convert.
Try Replug for free
Retargeting pixels: Add tracking pixels to the shortened link inside your QR code to run remarketing campaigns.
Link analytics: Monitor how many times your QR code has been scanned, clicked, and converted.
Advanced customization: Control the appearance of your QR code to align it with your brand aesthetics.
Multiple formats: Download your QR code in print-friendly and web-friendly file types.
Basically, it’s not just a QR code, it’s a marketing tool.
Final thoughts
A Facebook QR code isn’t just a techy gimmick; it’s a smart way to make your online presence more accessible, especially in offline spaces. With Replug, creating one is a breeze, and you get the added bonus of click analytics, retargeting, and full customization.
Whether you’re a small business owner, marketer, or content creator, this is a quick win for increasing visibility and engagement on Facebook.
So go ahead, create your Facebook QR code today, and make it easy for the world to find (and follow) you.
Ready to get started? Sign in to your Replug dashboard and try it for yourself!
FAQs for how to create a Facebook QR code
What is a Facebook QR code?
A Facebook QR code is a scannable code that directs users straight to your Facebook profile, business page, or group. It’s a convenient way to share your page without asking people to search for it manually.
Why should I use a Facebook QR code for my business?
It helps you:
Connect offline users to your online page
Boost your follower count
Look more professional and tech-savvy
Save time (no need to spell out links!)
Can I customize the Facebook QR code?
Yes! With Replug, you can customize everything from the shape and colors to adding your logo. This makes the QR code look on-brand and professional.
Can I track how many people scan my Facebook QR code?
Absolutely. Replug offers analytics that show how many times your QR code has been scanned and how users interacted with it.
Can I change the Facebook link after the QR code is printed?
If you’re using Replug’s dynamic QR code feature, yes. You can update the destination URL without changing the code itself. Handy for campaigns or seasonal updates!
Want a single QR code that sends users to different destinations based on location, device, or time? Replug makes it simple. Whether you’re managing global campaigns, A/B testing landing pages, or creating personalized user journeys, Replug’s traffic routing and bio link features give you powerful ways to connect users with the right content, automatically.
In this guide, we’ll walk you through two easy methods to create a multi-URL QR code using Replug:
One with traffic routing rules
Another using a customizable bio link page
Let’s get started and help you create a smart QR code that works harder for your brand.
A complete link management solution
for marketing professionals & agencies.
Try Replug for free
Method 1: Create a multi-URL QR code using traffic routing
Step 1: Log in to your Replug account
Head to Replug.io and log in. If you’re new, sign up for a 14-day free trial.
Step 2: Create a smart link
Click “Create new link” on your dashboard. Add a primary URL (the default destination).
After entering the link, a pop-up will appear – choose “traffic routing”.
Step 3: Set up your multi-URL destinations
You’ll now define how your traffic should be routed. Replug gives you a variety of conditions to choose from:
Country-based redirection: Send users to different URLs based on their location.
Device-based redirection: Route users based on whether they’re using a mobile, tablet, or desktop.
Browser or OS-based redirection: Customize based on the user’s browser or operating system.
Date and time-based rules: Perfect for limited-time offers or rotating links.
A/B testing: Split traffic between multiple pages for performance testing.
Add each URL, set its rule, and click “Save.”
Edit or delete any rule block right from the dashboard anytime.
Step 4: Generate a QR code for your link
Once your traffic routing link is ready:
Click the QR code icon next to your link.
Customize the QR code with your brand colors, logo, and frame text.
Click “Download” to save your QR code.
Now, one QR code can dynamically redirect your audience based on the rules you’ve set.
This one QR code now dynamically redirects your audience based on the rules you’ve set.
Save your link and share your QR code anywhere: product labels, posters, social media, you name it. Don’t forget to monitor performance from the Replug analytics dashboard. Track:
Method 02: Create a multi-URL code using a bio link page
Start by logging into your Replug account. Don’t have one? Sign up for free and explore all the features. Once logged in, you’ll land on your dashboard.
Creating a multi URL QR code in Replug is easy, powerful, and perfect for anyone running advanced marketing campaigns. With the flexibility of traffic routing and detailed analytics, you’ll have more control over how and where users land – all from one smart QR code.
These days, spotting a malicious link isn’t as easy as it used to be. Hackers have gotten smarter, and even the most harmless-looking URL could hide a scam, virus, or phishing trap. All it takes is one wrong click to compromise your personal data – or worse.
Whether you’re about to share a link or just thinking of clicking one, it’s crucial to double-check where it’s really taking you.
In this guide, we’ll walk you through simple tools, tips, and tricks to help you check if a link is safe. Plus, we’ll share extra insights to help you stay one step ahead of online threats. Stick around, it’s worth the read.
Boost ROI with branded URLs!
Enhance your marketing campaigns by creating shareable, trackable, and fully multi-purpose
customizable branded URLs.
Scammers often use tactics like fake urgency, threats, or requests for sensitive info.
Watch out for:
Urgent language (“Act now!” “Only 5 minutes left!”)
Grammar or spelling mistakes
Generic greetings (“Dear user” instead of your name)
Requests for passwords, PINs, or financial details
8. Follow safe browsing practices
Protect yourself with good habits:
Hover to preview the URL
Type URLs manually instead of clicking
Copy-paste suspicious links into scanners
Use bookmarks for trusted sites
Update your browser and antivirus software regularly
Enable built-in security warnings
Use incognito mode or a separate browser for risky content
Connect through a VPN on public Wi-Fi
How can I keep my links safe?
Clicking on malicious links can lead to identity theft, malware infections, financial loss, and privacy breaches. That’s why learning how to identify and share safe links is crucial for protecting yourself and your audience online.
Since you’re likely to encounter suspicious links at some point, it’s smart to take proactive steps. One of the best ways to safeguard your digital presence is by creating branded, trustworthy links with a secure URL shortener like Replug.
Create trustworthy branded links with Replug
Replug lets you shorten URLs using your own custom domain, making your links instantly recognizable and easier for your audience to trust. This helps prevent confusion with malicious links that might be impersonating your brand.
Maximize marketing ROI
by transforming ordinary URLs into branded short links that convert.
Try Replug for free
To enhance safety and credibility even further, Replug offers features like:
Remember that cybercriminals constantly evolve their tactics. The best defense combines technical tools with informed skepticism and careful browsing habits.
Stay informed:
Follow cybersecurity news and alerts
Participate in security awareness training
Share knowledge with friends and family
Report suspicious links to appropriate authorities
No single method is foolproof, but using multiple verification techniques significantly reduces your risk of falling victim to malicious links.
FAQs: How to check if a link is safe?
How can I tell if a link is suspicious before clicking?
Hover over the link without clicking. Most browsers show the full destination URL in the bottom-left corner. Check for misspellings, strange domains, or excessive subdomains that might signal a phishing attempt.
Are shortened URLs always unsafe?
Not always, but they can be risky if you don’t know who created them. Use trusted tools like Replug to help users instantly recognize and trust your URLs.
What tools can I use to check if a link is safe?
Some reliable link scanners include Google Safe Browsing, VirusTotal, Norton Safe Web, and Sucuri SiteCheck. Just paste the suspicious link into any of these platforms to check for known threats.
What should I do if I accidentally click a malicious link?
Immediately disconnect from the internet, don’t enter any personal information, close the browser, clear your cache, and run a full antivirus scan. If you entered login credentials, change your passwords and enable 2FA.
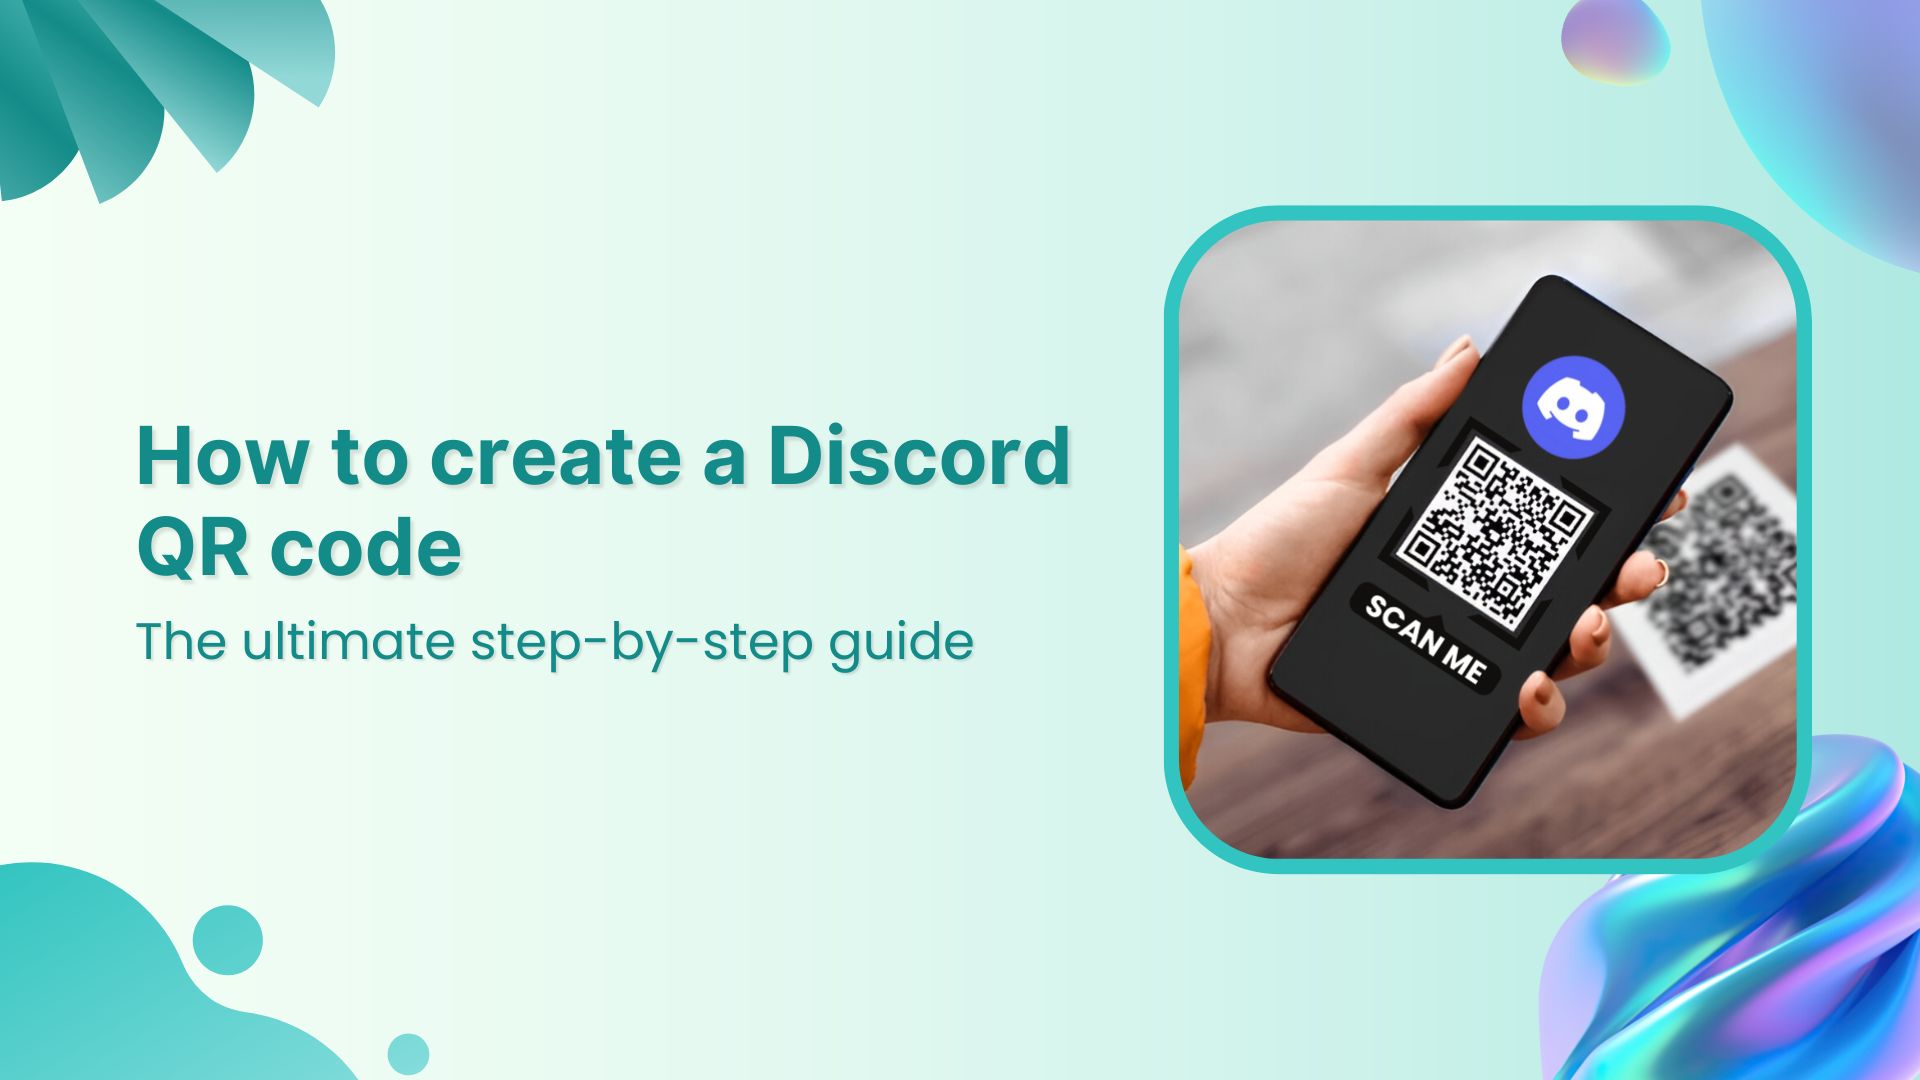
Discord isn’t just a gaming hangout anymore. With over 614 million registered users in 2024 and a projected 689 million by 2025, the platform has become a go-to space for communities, creators, businesses, and brands looking to build loyal audiences.
Whether you’re running a community server, launching a new product, or hosting events, a Discord QR codeis your shortcut to making your space more accessible, shareable, and engaging.
In this guide, we’ll show you how to create a QR code for your Discord server using Replug, how users can scan a QR code, and why it can be a powerful growth tool.
What is a Discord QR code?
A Discord QR code is a scannable code that leads users directly to a Discord server, channel, or login screen, eliminating the need for manual search or typing.
There are two common ways QR codes are used with Discord:
For sharing Discord server links: Create a QR code that redirects users straight to your server invitation link. This is ideal for marketing materials, digital invites, or community growth.
For logging into Discord: Instead of typing your credentials, scan a QR code on the Discord website to log in via your mobile app.
Why use a QR code for Discord?
Here’s why you should start using QR codes for your Discord server:
Add QR codes to posters, flyers, product packaging, business cards—anything physical.
Higher engagement
Easier access means more people are likely to join, especially from events or social gatherings.
Professional & scalable
Looks tech-savvy and works well for both small creators and big brands.
How to create a QR code for a Discord server (using Replug)
Ready to create a QR code for your Discord server and share it with the world? Here’s how to do it in just a few minutes with Replug, a powerful link management tool and QR code generator.
A complete link management solution
for marketing professionals & agencies.
Try Replug for free
Step 1: Sign in or create a Replug account
Head over to Replug and sign in. If you don’t have an account yet, creating one only takes a minute.
Step 2: Get your Discord server invite link
Before you make the QR code, you’ll need your Discord invite link.
Open your Discord server.
Click the down arrow next to the server name.
Select “Invite People.”
Choose “Edit Invite Link” if you want to customize expiry settings.
Copy the invite link.
Now you’re ready to build your QR code.
Step 3: Create a Discord QR code in Replug
There are two easy ways to do this:
Way #1: Use the QR code builder
From your Replug dashboard, click on “QR Codes”.
Tap “Create New.”
Enter a title and description, and paste your Discord invite link in the appropriate field.
Choose QR code type → Website.
Customize the code: shape, colors, border, frame text (e.g. “Scan to Join!”), and even add your logo.
Hit “Create QR Code.”
Download it in your preferred format: PNG, JPEG, SVG, or WEBP.
💡 Pro Tip: Customize your URL slug for more clarity.
Way #2: Shorten your Discord link first
Want a cleaner link behind your QR code? Here’s how:
Access your Replug dashboard.
Paste your Discord invite URL in the bar under “Quickly Shorten your link”
Customize the slug to make it short and branded.
Click the QR code icon next to the shortened link.
Customize the design as you like.
Download and start sharing.
Why use Replug to create your Discord QR code?
There are plenty of free QR code generators out there but Replug offers more than just a code:
Branded short links: Keep your links clean and professional by creating a branded, vanity URL.
Retargeting: Add tracking pixels to your QR code links to retarget users.
Analytics: Track scans, clicks, and unique clicks based on geographical information, referral, and date.
Full customization: Play around with the colours and frame of your QR code, and even add a logo to it for branding.
Dynamic QR codes: Change the destination link later without changing the QR code image.
Easily shareable: You can share your Replug QR across any platform, be it via WhatsApp, email, SMS, Instagram; you name it!
Maximize marketing ROI
by transforming ordinary URLs into branded short links that convert.
Try Replug for free
How to scan a QR code to log in to Discord
If you want to log in to Discord from a desktop browser using a QR code, here’s how to do it:
Go to the Discord website Visit discord.com/login. You’ll see a QR code next to the usual login form.
Open the Discord app on your phone Tap your profile picture in the bottom-right corner to access settings.
Scan the QR code Tap “Scan QR Code,” point your phone camera at the code on your desktop screen.
Confirm login Tap “Yes, Log Me In” when prompted, and you’re in!
Note: Make sure you’ve enabled camera access for the Discord app on your phone to use the scanner.
Discord QR codes are a simple yet powerful way to make your server more discoverable, professional, and easy to access. Whether you’re growing a creator community, running a marketing campaign, or just trying to simplify the joining process, using Replug to create and manage your QR codes adds a layer of polish and performance you won’t get with basic tools.
With features like branded links, analytics, and retargeting, your QR code isn’t just a static square, it’s a smart growth tool. So go ahead, make your server just a scan away!
FAQs for how to create a Discord QR code
Can I use a Discord QR code for multiple servers?
No, each QR code links to a specific invite URL. If you want codes for multiple servers, you’ll need to create individual QR codes for each one using their unique invite links.
Do Discord QR codes expire?
It depends on the invite link settings. By default, Discord invite links may expire after 7 days. To create a permanent QR code, make sure your Discord invite link has no expiry before generating the QR code.
Can I create a Discord QR code on mobile?
Absolutely. Just log into Replug via your mobile browser, copy your Discord invite link from the mobile app, and create a QR code just like you would on desktop.
Can I track how many people scanned my Discord QR code?
Yes! If you create your QR code through Replug, you get access to real-time analytics. You can see how many people scanned it, where they’re from, and when they scanned.
What if I want to change my server invite link later? Do I need to make a new QR code?
Not with Replug. If you create a dynamic QR code, you can update the destination URL anytime without changing the QR image. Super helpful if you need to rotate links or update server settings!