Converting a PDF to a URL link allows you to share PDF documents online, making them easily accessible to others.
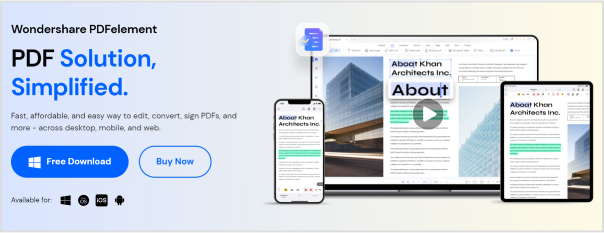
In this guide, we will explore two methods: an online approach using a PDF converter and a desktop solution using Wondershare PDFelement.
By following these step-by-step instructions, you’ll be able to convert your PDF documents into URL links quickly and efficiently.
Method 1:
How to convert PDF to URL Online?
Here’s how to convert PDF to URL link using an online PDF converter:
Step 1: Open your preferred web browser and go to the HiPDFwebsite (an online PDF to URL converter).
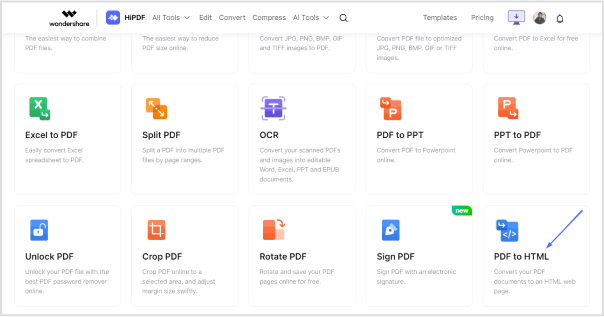
Step 2: Navigate to the PDF to HTML conversion page by either clicking on the “All tools” section on the homepage and selecting the “PDF to HTML” module or directly visiting the HiPDF PDF to HTML conversion page.
Step 7: Sign in to your preferred cloud storage service, such as Google Drive or Microsoft OneDrive.
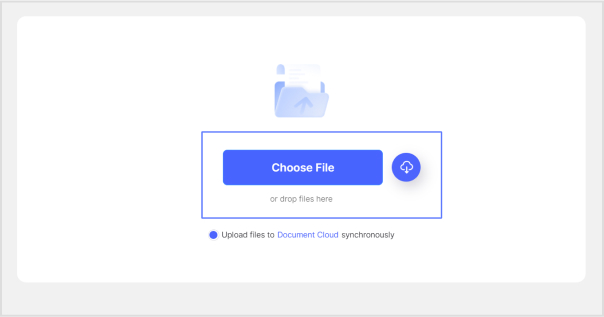
Step 8: Upload the converted HTML file to your cloud storage.
Step 9: After the upload is finished, copy the share link of the HTML file to your clipboard.
Step 10: Paste the URL link into an email, browser address bar, or any other platform where you wish to share the link.
The HTML file will render as a responsive web page when accessed.
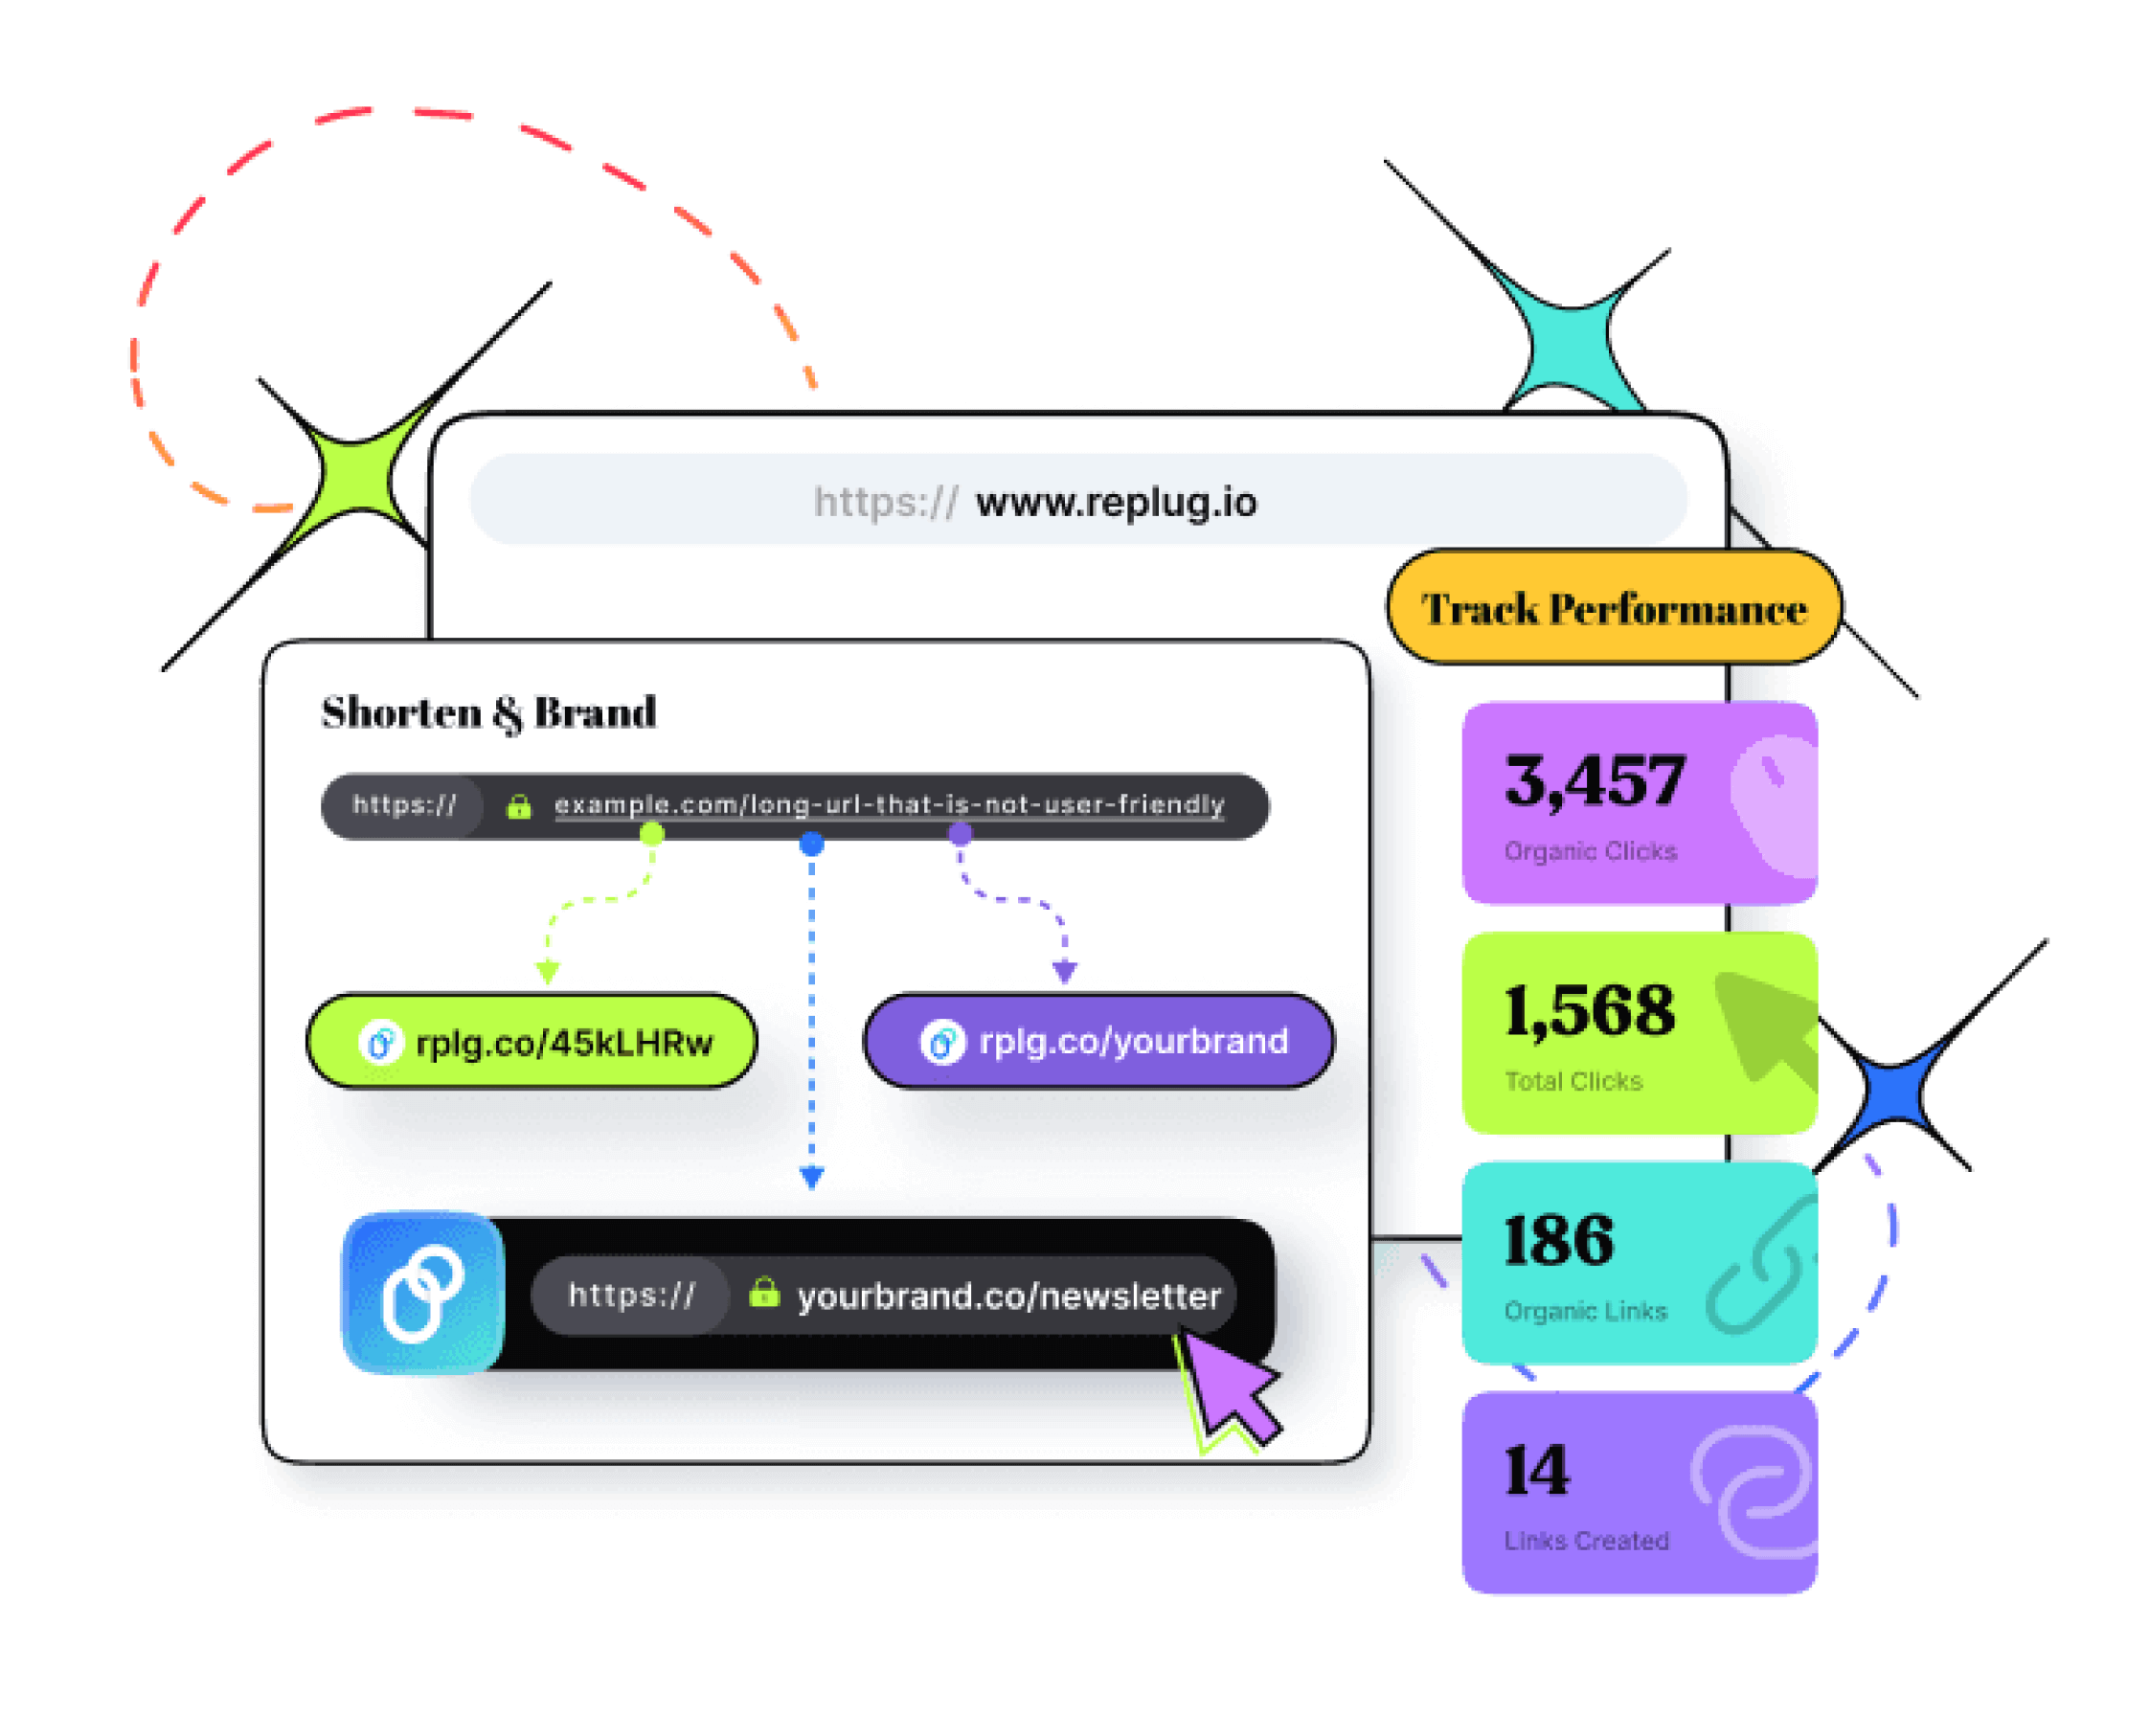
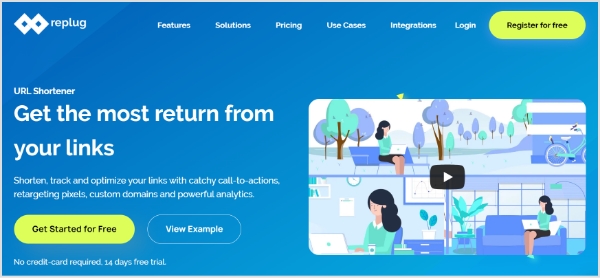
Maximize marketing ROI
by transforming ordinary URLs into branded short links that convert.
Try Replug for free
Method 2:
Convert PDF to URL link on desktop using a desktop PDF converter
Step 1: Launch Wondershare PDFelement (a desktop PDF converter) on your desktop.
Step 2: Import the PDF file by clicking the “+” option or dragging and dropping the PDF file into the software interface.
Step 3: Navigate to the top menu and click the “Convert” tab.
Step 4: Click the “More” option below the tab, and select “To HTML” from the drop-down menu.
Step 5: In the “Save As” window, choose the target folder for the output HTML file.
Step 6: Optionally, modify additional settings and parameters to suit your requirements.
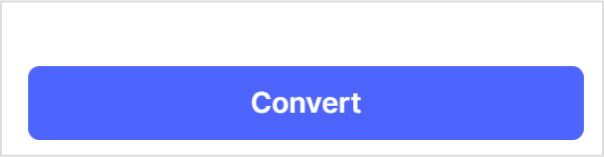
Step 7: Click “Save” or the equivalent button to initiate the conversion process.
Make Your PDF Links Memorable, Shorten, and Personalize with Replug
Now that you have converted your PDF to a URL link, you can further enhance its effectiveness by using Replug, a powerful URL shortening and link management tool.
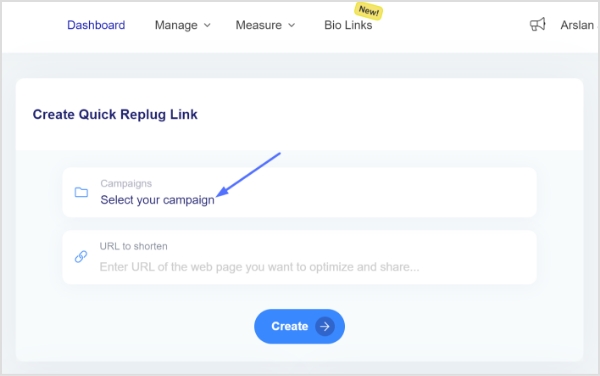
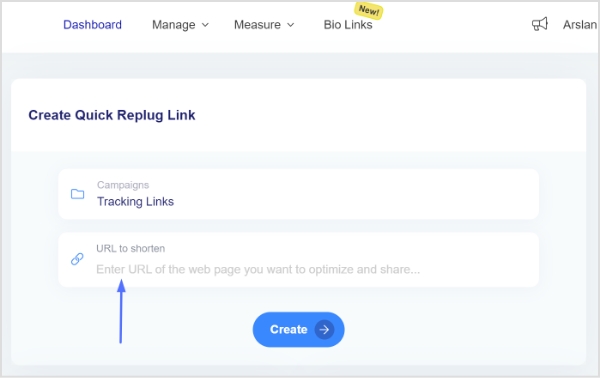
Replug allows you to create shortened and personalized URLs for your converted PDFs, making them more memorable and visually appealing. Follow these steps to use Replug:
Note: Optionally, apply additional settings like UTM parameters, retargeting pixels, or custom domains to further enhance tracking and branding.
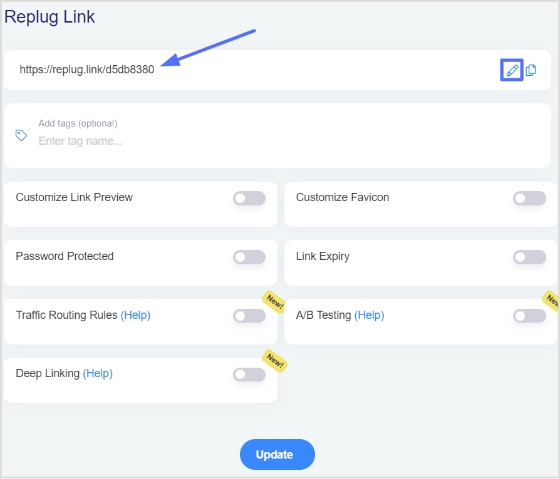
Step 5: Copy the new shortened URL provided by Replug and click on the “Update” button.
Step 6: Share the shortened URL across your desired platforms, such as social media, email newsletters, or websites.
Track and Analyze the Performance
Utilize Replug’s analytics and tracking features to monitor the performance of your shortened URL. You can gain insights into metrics like click-through rates, engagement, and conversion rates.
Conclusion:
By following the steps outlined in this guide, you can easily convert your PDF documents into URL links. Whether you choose the online method using HiPDF or the desktop solution with Wondershare PDFelement, both approaches offer efficient and reliable ways to convert your PDF files.
Remember to consider the security and privacy of your documents when choosing the appropriate method. Now you can easily share your PDF documents as web-friendly and responsive URL links with others.
FAQs
Is it safe to convert PDFs to URL links online?
While online converters can be secure, it’s important to consider data privacy and choose reputable services that encrypt data transmission.
What formats are commonly used for converting PDF to URL?
HTML or HTML5 formats are commonly used for converting PDFs to URL links.
Can I convert a scanned PDF to a URL link?
Yes, with the help of OCR (Optical Character Recognition) technology, scanned PDFs can be converted to URL links.
Will the converted URL link preserve the formatting and layout of the original PDF?
Yes, the converted URL link typically retains the formatting and layout of the original PDF, ensuring a similar visual experience.
Can I embed a PDF as a URL link on a website or blog?
Yes, by using HTML embedding code, you can display the PDF content within a web page as a URL link.
Are there any limitations or file size restrictions when converting PDF to URL?
Some online converters may have file size limitations, so it’s important to check the specific requirements of the conversion service.
Can I password-protect the PDF URL link to restrict access?
Password protection of the PDF URL link depends on the hosting platform or additional security measures you employ.
How do I convert a URL to a PDF if needed?
To convert a URL to a PDF, you can use browser print functions or online PDF conversion tools that accept URL input.
Bookmarking a URL (website) in Google Chrome is a useful way to save and easily access your favorite websites. In this guide, we will walk you through the process of bookmarking a URL in Chrome and show you different methods to find your bookmarks later.
Here’s a step-by-step guide on how to bookmark a URL in Chrome on mobile and computer devices:
How to bookmark a URL in Chrome on a computer device?
Step 2: Visit the website you want to bookmark. You can do this by typing the URL directly into the address bar or by searching for it using a search engine.
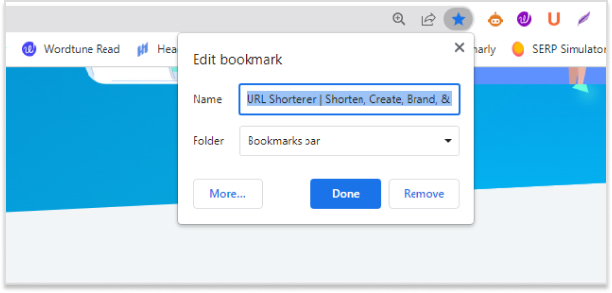
Step 3: Once you are on the desired webpage, locate the star icon next to the address bar. Click on the star icon, and a small dialog box will appear.
Step 4: In the dialog box, you can edit the name of the bookmark if you wish. By default, Chrome will suggest a name based on the page title. You can also choose the folder where you want to save the bookmark. If you don’t specify a folder, the bookmark will be saved in the default folder called “Other bookmarks.”
Step 5: After making any desired changes, click the “Done” button. The webpage is now bookmarked.
Now that you have bookmarked a URL, let’s explore different ways to find your bookmarks in Chrome:
Method 1: Using the Bookmarks Bar
The easiest way to access your bookmarks is through the Bookmarks Bar, a toolbar located just below the address bar. If the Bookmarks Bar is not visible, you can enable it by following these steps:
Step 1: Open Chrome on your computer.
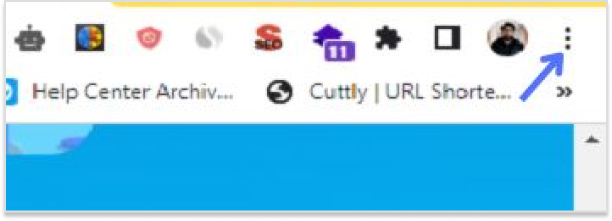
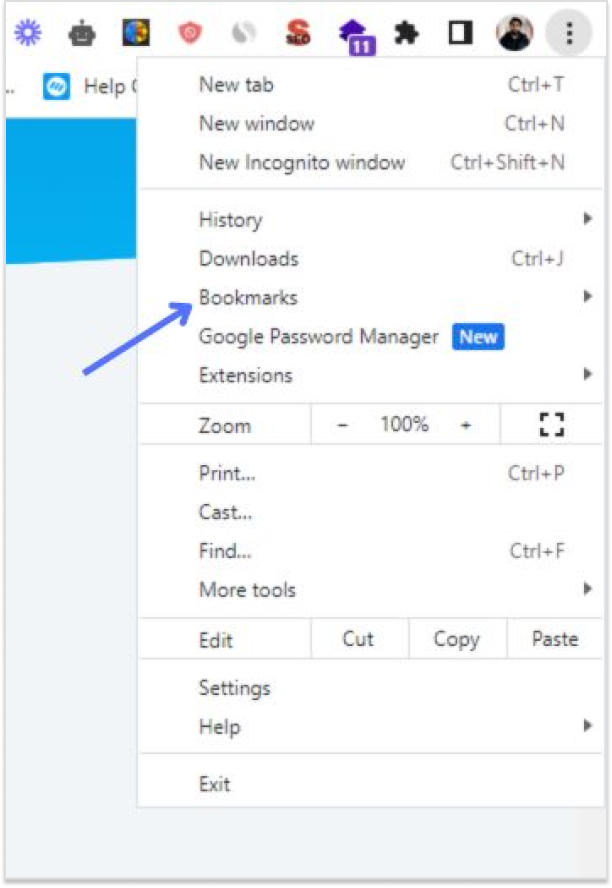
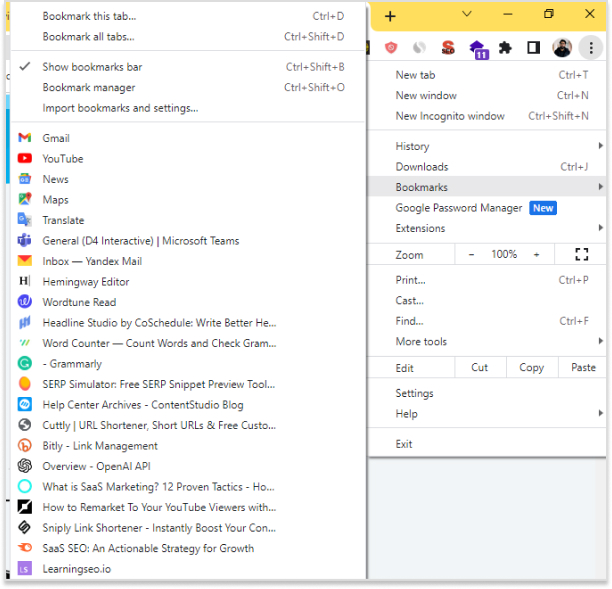
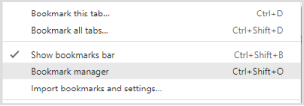
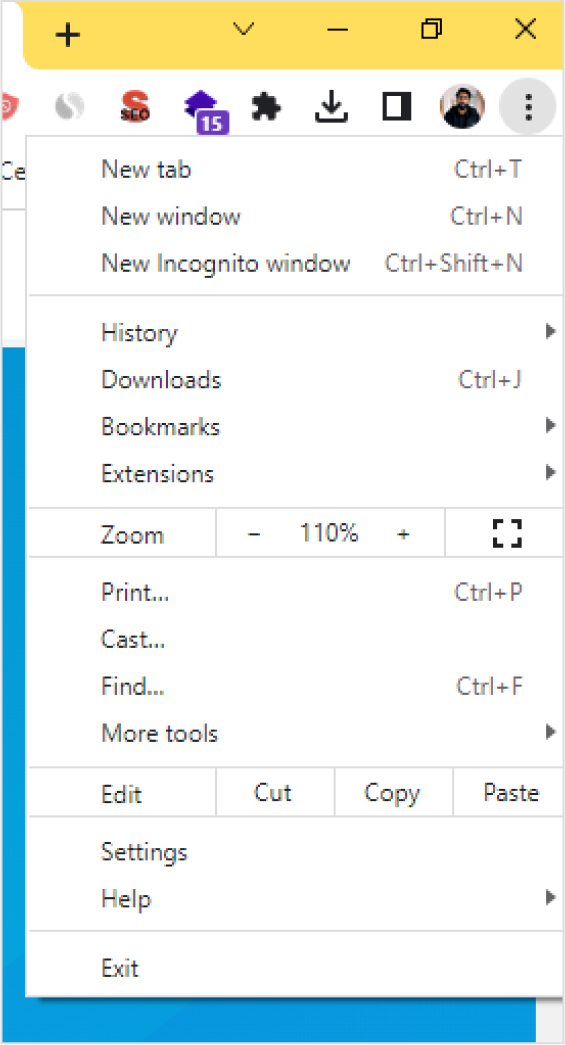
Step 2: At the top right corner of the browser, click the “More” button (represented by three vertical dots).
Step 3: From the drop-down menu, hover over “Bookmarks.”
Step 4: Once the Bookmarks Bar is visible, you can simply click on any bookmark to open the corresponding webpage.
Chrome also provides a Bookmarks Menu, where you can organize your bookmarks into folders for easy access. Here’s how to access your bookmarks using the Bookmarks Menu:
Step 1: Open Chrome on your computer.
Step 2: At the top right corner of the browser, click the “More” button (represented by three vertical dots).
Step 3: From the drop-down menu, hover over “Bookmarks.”
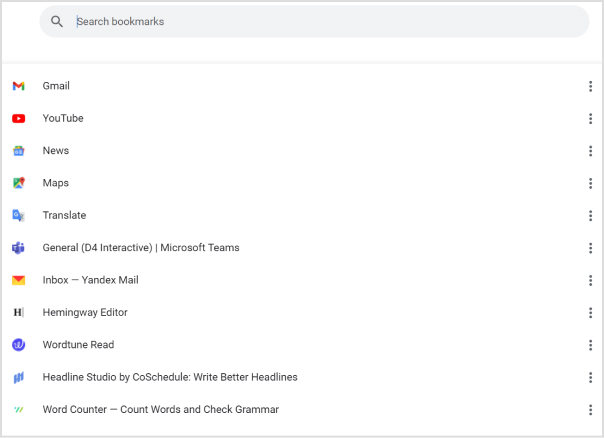
Step 4: In the expanded menu, click on “Bookmarks Manager.”
Step 5: In the Bookmarks Manager tab that opens, you will see a list of your bookmarks organized into folders.
Step 6: Click on a folder to view its contents, and then click on a bookmark to open the webpage.
By following these methods, you can easily bookmark URLs in Chrome and access them whenever you need to revisit your favorite websites.
Can I sync my bookmarks across multiple devices in Chrome?
Yes, you can sync your bookmarks across multiple devices in Chrome by signing in with the same Google account on each device and enabling sync in the Chrome settings.
How do I organize my bookmarks in the Chrome app on iPhone/iPad?
To organize your bookmarks in the Chrome app on iPhone/iPad, tap the “More” button, select “Bookmarks,” and then tap and hold a bookmark to rearrange or drag it into a folder.
Can I import bookmarks from another browser to Chrome on my mobile device?
Yes, you can import bookmarks from another browser to Chrome on your mobile device by using the Chrome settings. Look for the “Import bookmarks” or “Import browser data” option.
Can I add bookmarks to my home screen for quick access on my Android device?
Yes, you can add bookmarks to your home screen for quick access on your Android device. Tap the “More” button, select “Bookmarks,” find the bookmark you want, tap and hold it, and select “Add to Home screen.”
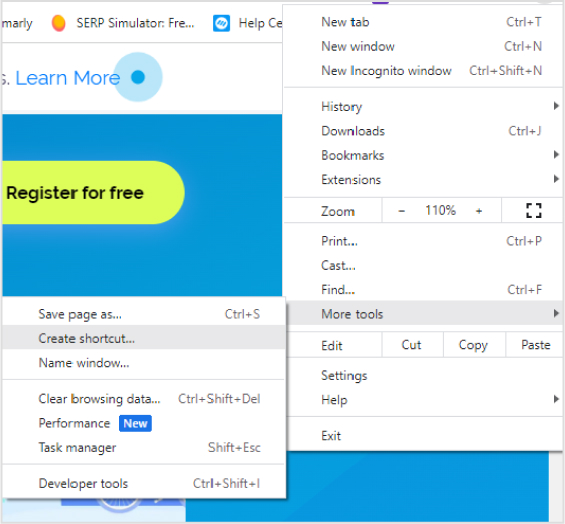
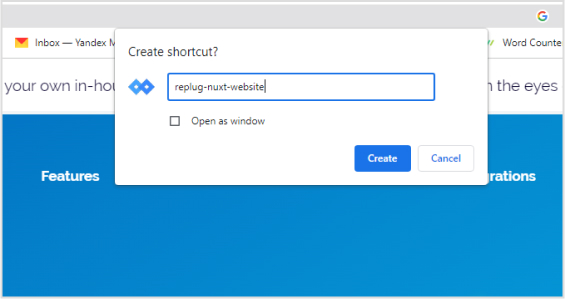
Want quick access to your favorite websites? Create desktop shortcuts for easy navigation.
Imagine the convenience of being able to open your most visited sites with just a single click, without the need to search or type in lengthy URLs. Well, the good news is that you can make this a reality by saving URLs to your desktop. Whether you’re using a Windows 10 computer or a Mac, we’re here to guide you through the simple steps of creating desktop shortcuts for your favorite websites.
How to save a URL to a desktop using Safari on a Mac?
To save a URL to your desktop using Safari on a Mac, follow these steps:
Step 1: Open Safari on your Mac.
Step 2: Go to the website you want to create a desktop shortcut for.
Step 3: Select the URL in the address bar.
Step 4: Drag the URL to your desktop to create the shortcut.
Step 5: By default, the shortcut will have a long name and a generic icon. If you want to change the name and icon, right-click the shortcut and select “Get Info” or press Command + I.
Step 6: In the “Get Info” window, click the arrow next to “Name & Extension” and enter a new name for the shortcut.
Note: The steps provided are specific to Google Chrome and Safari browsers. Other browsers may have different methods for creating desktop shortcuts. You should also update Safari and Google Chrome to improve performance and ensure you have the latest features.
Can I create a desktop shortcut for a specific website?
Yes, you can create a desktop shortcut for a specific website. It allows you to open that website directly with just a click on the shortcut icon.
Which web browsers support creating desktop shortcuts?
Most popular web browsers, such as Google Chrome, Mozilla Firefox, Safari, and Microsoft Edge, support creating desktop shortcuts.
Are desktop shortcuts available on both Windows and Mac computers?
Yes, desktop shortcuts are available on both Windows and Mac computers. You can create and use them on either operating system.
Can I delete or remove a desktop shortcut for a website?
Yes, you can delete or remove a desktop shortcut for a website. Simply right-click on the shortcut icon and select the option to delete or remove it.
Can I create a desktop shortcut for a specific page within a website?
In most web browsers, you can only create desktop shortcuts for the main website URL. However, you can bookmark specific pages within a website for quick access within the browser itself.
How can I add a desktop shortcut to my taskbar or dock?
To add a desktop shortcut to your taskbar in Windows or dock on a Mac, simply right-click on the desktop shortcut and select the option to pin or add to the taskbar/dock.
How do I change the name of a desktop shortcut for a website?
To change the name of a desktop shortcut for a website, right-click on the shortcut icon, select the option to rename, and enter the desired name.
In today’s fast-paced online world, staying updated with the latest content from your favorite websites can be quite a challenge. Luckily, there’s a handy tool called an RSS feed that can make this task a breeze. But what is a RSS feed URL, and how can you find it?
Don’t worry, we’ve got you covered!
In this guide, we’ll clarify the concept of RSS feeds and show you step-by-step how to locate their URLs. So, if you’re ready to unlock a world of effortless content consumption, let’s dive right in and discover the wonders of RSS feed URLs together!
What is a RSS feed URL?
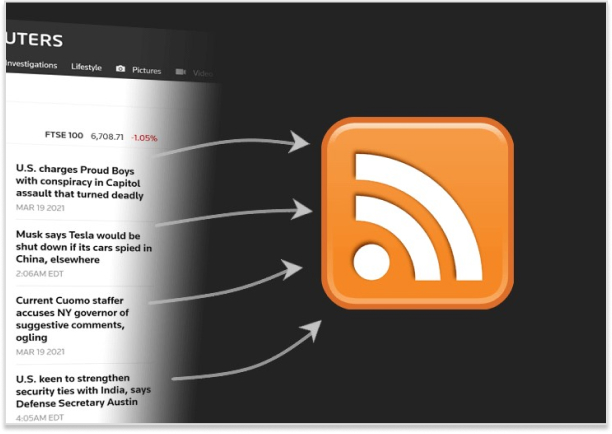
At its core, an RSS feed URL is like a personal delivery address for receiving updates from your favorite websites. It stands for Really Simple Syndication (RSS), a technology that allows websites to distribute their content in a standardized format. Think of it as a digital pipeline that funnels articles, blog posts, news updates, and other information directly to you.
An RSS feed URL is a specific web address that points to the location of an RSS feed for a particular website or blog. It acts as a unique identifier, enabling you to subscribe to that feed using an RSS reader or aggregator. Once subscribed, you’ll receive automatic updates whenever new content is published on the website, eliminating the need to manually visit each site.
RSS feed URLs are typically formatted as a web link, often indicated by the RSS icon (usually an orange square with white radio waves). By accessing this URL, you gain access to a stream of regularly updated content, tailored to your interests and preferences.
How to find the RSS feed URL for the most popular websites?
When it comes to finding RSS feed URLs for most websites, the process can sometimes feel like searching for buried treasure. However, there are some tried-and-true methods that can simplify the hunt. Let’s explore these techniques together:
WordPress Websites:
Since a significant number of websites use WordPress, locating their RSS feeds is often a breeze. Simply add “/feed” to the end of the website’s URL. For instance, if the website is “https://justinpot.com,” the RSS feed URL would be “https://justinpot.com/feed.” This method works like a charm in most cases.
Tumblr Websites:
If the website is hosted on Tumblr, unveiling its RSS feed is a snap. Append “/rss” to the website’s URL. For example, if the website is “https://example.tumblr.com,” the RSS feed URL would be “https://example.tumblr.com/rss.”
Blogger Websites:
Websites hosted on Blogger follow a similar pattern. Add “feeds/posts/default” to the end of the website’s URL. For instance, if the website is “example.blogspot.com,” the RSS feed URL would be “example.blogspot.com/feeds/posts/default.”
Medium Publications:
Medium makes it relatively simple to discover RSS feeds for publications. Just add “/feed/” before the name of the publication in the URL. For example, if the publication is “medium.com/example-site,” the RSS feed URL would be “medium.com/feed/example-site.”
YouTube Channels:
YouTube channel pages serve as convenient RSS feeds. All you need to do is copy and paste the URL of the channel into your preferred RSS reader. Additionally, you can access an OPML file containing all your subscriptions for easy management.
By employing these techniques, you can navigate the vast online landscape with confidence, effortlessly finding and subscribing to RSS feeds across various platforms. So go ahead, and embark on your quest for knowledge, armed with the power of RSS feeds!
Boost your conversion rates with irresistable CTAs with
How to find an RSS feed of a website from its source code?
If the previous methods didn’t lead you to the desired RSS feed URL, there’s still hope! By checking a web page’s source code, you can often uncover the hidden gem you’re seeking. Follow these simple steps to find an RSS feed via source code:
Step 1: Visit the website for which you’d like to find the RSS feed.
Step 2: Right-click on an empty area of the webpage. A context menu will appear. In the context menu, look for an option called “View Page Source” or something similar. Click on it. This action will open a new tab or window displaying the website’s source code.
Step 3: Once you’re viewing the source code, you can search for the RSS feed URL. Press “Ctrl+F” on Windows or Linux, or “Command+F” on Mac, to bring up the search feature.
Step 4: In the search bar, type “RSS” and hit enter. The browser will highlight any instances of the term “RSS” within the source code.
Step 5: If the search for “rss” doesn’t yield any results, try searching for “atom” instead. Atom is another common format for syndication feeds.
Step 6: Once you’ve located the RSS feed URL, copy it by selecting the entire URL and pressing “Ctrl+C” (Windows or Linux) or “Command+C” (Mac).
Step 7: Open your preferred feed reader or RSS aggregator and paste the URL into the appropriate field for adding a new feed. This step allows you to start receiving updates from the website.
By venturing into the source code, you can often discover the RSS feed URL that eluded you through other methods. So don’t be intimidated—embrace your inner digital explorer and uncover the treasure trove of RSS feeds that await you!
Maximize marketing ROI
by transforming ordinary URLs into branded short links that convert.
Try Replug for free
Shorten Your RSS feed URL with Replug:
If you wish to shorten an entire RSS feed and utilize it on a third-party platform, Replug offers a convenient solution. Follow these simple steps to get started:
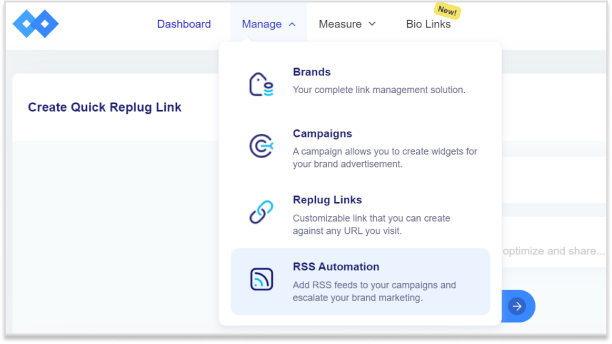
Step 1: Visit the Replug dashboard and navigate to the Manage section and select “RSS Automation.”
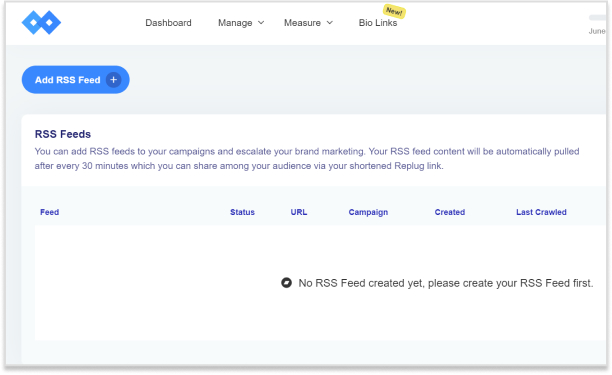
Step 2: On the next screen, locate and click the “Add RSS Feed” button situated in the top left corner.
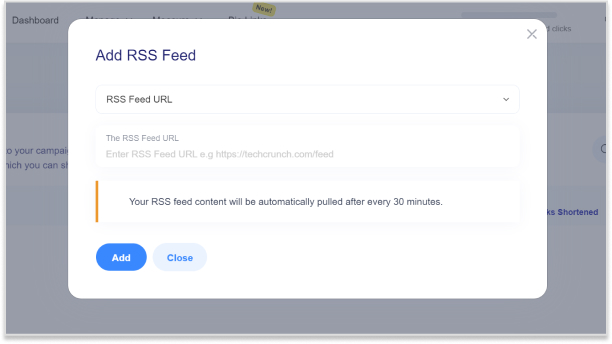
Step 3: A pop-up window will appear, prompting you to select a campaign and enter the RSS feed URL. Once done, click “Add” to proceed.
At this point, your RSS feed has been successfully created. Copy the shortened RSS feed URL provided by Replug and add it to your desired third-party platform.
Step 4: You can now perform various actions with your newly created RSS feed:
Edit: Modify or update the added RSS feed as needed.
Re-crawl: Instantly re-crawl the entire RSS feed to fetch any new links that have been added.
Preview: Get a preview of the list of posts from the converted RSS feeds.
Remove: Remove the RSS feed if desired, allowing you to create a new one or take alternative actions.
By utilizing Replug’s services, you can easily shorten and manage your RSS feeds, empowering you to seamlessly integrate them into third-party platforms. Enjoy the benefits of concise and efficient RSS feed URLs as you streamline your content distribution process.
FAQs
What is an RSS feed and how does it work?
An RSS feed is a standardized format for delivering regularly updated content from a website. It works by providing a stream of information that users can subscribe to using an RSS reader or aggregator.
How can I subscribe to an RSS feed?
To subscribe to an RSS feed, you need an RSS reader or aggregator. Copy the RSS feed URL of the website or blog you want to subscribe to and paste it into your RSS reader, or use the built-in subscription functionality of some web browsers.
What are the benefits of using RSS feeds?
RSS feeds allow you to stay updated with the latest content from multiple websites in one place. They save time by delivering new posts or articles directly to you, eliminating the need to visit each website individually.
Can I use RSS feeds on my mobile device?
Yes, you can use RSS feeds on mobile devices. Many RSS reader apps are available for both Android and iOS platforms, allowing you to access and manage your subscribed feeds on the go.
Are RSS feeds still relevant in the age of social media?
Absolutely! While social media platforms offer content discovery, RSS feeds provide a more personalized and focused experience. They allow you to curate specific sources and receive updates without the algorithmic filtering and distractions of social media feeds.
How often are RSS feeds updated?
The frequency of RSS feed updates varies depending on the website or blog. Some may update several times a day, while others may have less frequent updates. You can set your RSS reader to check for updates at regular intervals.
Though it’s not “its-Crap” instead it’s,“IT-Scrap”. A blunder that they quickly realized and redirected their website to a new name. i.e. regency technologies.
3) Hireatease
This is an Indian IT recruitment company. I ain’t joking around, you can check by clicking the link yourself.
It is not at all “Hire a Tease”, actually it is “Hire at Ease”.
That’s what happens when you dont learn grammar and the importance of punctuations.
Because one can’t guess whether it’s “Speedo-Fart” or “Speed of art”
There’s always some naughty office colleague. And I have too many of them ????. When i received this link i was too skeptical to click on the link.
But then again, i had to find out so i clicked on this link hoping something to be else.
Thank God! I was relieved to find out its just a silly domain name mistake. That how it made the list.
But this is another example of how wordplay can get you.
5) Oldmanshaven
Old Man Shaven… Yikes!
Old Man’s Haven is a website for cabin rentals, not a barber shop or whatever you are thinking ????.
6) Wintersexpress
The mistake is quite evident here. Winters is a city in California, USA. Winters Express is a news media website of the city to keep residents updated with the latest news, opinions and other happenings in the city. It’s not about winter sex press news and media reports.
Another funny url example, a mistake which the owners realized and redirected their visitors from viagra-fix.net to a new domain name. i.e.https://www.fullnet.net/ They must have got many emails at the customer’s support end for ED support. ???? ????
The name change makes it even more funnier, as the new domain name has the word “Net” twice in it.
8) Fagray
It’s definitely not “fag-ray” (ROFL), it’s Fa Gray, a full-service painting contractors website. It’s providing services since the early 1990’s.
The person that owns this domain name surely was out of gas or had gas while buying this domain name. The domain is up for sale now for obvious reasons ????.
10) Poolife
Either it’s negative marketing or a mistake, as the website is not about Poo Life.
The funny URL address takes users to Pool Life, a brand selling pool maintenance and pool care products.
Now let’s talk about some of the worst domain names.
These domain names should be in a wall of shame with silly wordplay that will confuse when you will share your business link on socials or with your customers.
We can all make silly errors, so we also got the solution for your URL letters problem.
If you mistakenly chosen a wrong domain name and it’s affecting your business, then it’s time to get a new domain name.
While changing a domain name can be challenging, taking these steps can help mitigate the impact of a wrong domain choice and ensure a smoother transition to a more suitable domain for your business.
Step 1: Register a New Domain:
If feasible, register a new domain name that aligns better with your brand, business, and target audience. Choose a domain that is memorable, easy to spell, and reflects your core offerings.
Step 2: Redirect the Old Domain:
Set up a redirect from the wrong domain to the new one. This ensures that visitors who type in the old domain or click on old links are automatically redirected to your new domain, minimizing any potential loss of traffic or customer confusion.
Update your website, marketing materials, and online listings to reflect the new domain name. Inform customers, clients, and stakeholders about the change through email newsletters, social media posts, and other relevant channels to ensure a smooth transition.
Step 4: Update Online Presence
Update your email addresses, social media profiles, and any other online platforms associated with the old domain. Ensure consistency across all your digital channels to avoid confusion among your audience.
What to do if you mistakenly created a wrong slug?
Method 1: Set up Redirection
First, it’s important to determine the type of redirect you want to implement.
One method to set up a redirection is by using a URL shortener.
Here’s how it works:
Link shorteners let you customize your slugs of your links with your brand name or a relevant keyword. Further, use of a URL shortening service allows you to generate a short and catchy URL that redirects to your main domain. Such URLs are easier to share, visually appealing and encourage click-throughs.
Server-side redirects (using .htaccess or server configuration)
CMS plugins (WordPress, Joomla, Drupal, etc.)
Website builder or hosting platform features
JavaScript redirects
Meta refresh redirects
PHP header redirects
Redirect plugins or modules for specific platforms (Magento, Shopify, etc.)
API-based redirects (using programming languages like Python or Ruby)
DNS-level redirects
Reverse proxy redirects
Note: Redirects are valuable for preserving SEO value, maintaining user experience, and managing website changes. However, avoid excessive redirect chains, which can negatively impact performance and user satisfaction.
Method 2: Disavow the wrong URL
To disavow a wrong URL, typically referring to that page, you wish to remove from your site or you no longer associate with, follow these steps:
Identify the Wrong URL:
Determine the specific URL or URLs that you want to disavow. This could be a page on your own website or an external website linking to your site.
Contact Website Owners (if applicable):
If the wrong URL is hosted on another website, reach out to the website owner or administrator. Request the removal or correction of the link pointing to your site.
Create a Disavow File:
Create a text file (.txt) using a plain text editor like Notepad. List the URLs you want to disavow, with one URL per line. Include both the domain and the specific URL, if necessary.
Format the Disavow File: Use the following format for each URL:
To disavow a specific page: disavow: http://www.example.com/wrong-page.html
To disavow an entire domain: domain:example.com
Submit the Disavow File:
Log in to Google Search Console (formerly known as Google Webmaster Tools) and navigate to the Disavow Links tool. Select your website, click on “Disavow Links,” and upload the disavow file you created. Follow the on-screen instructions to complete the submission.
Monitor and Assess:
After submitting the disavow file, monitor your website’s performance and search rankings. It may take some time for search engines to process the disavow request and adjust the way they treat the links. Keep an eye on any changes and assess the impact of the disavowal on your website’s visibility.
Note: Remember, disavowing links should be used cautiously and as a last resort. It’s recommended to first attempt to have the wrong URLs removed or corrected by contacting the website owners directly.
8 Mistakes to Avoid When Choosing A Domain Name
When selecting a domain name, it’s essential to be mindful of grammar mistakes that can adversely impact your online presence. Here are some common errors to avoid:
Lengthy URLs:
Opt for concise and easy-to-remember URLs. Long URLs are prone to typos and can be challenging for users to type accurately.
Irrelevant Keywords:
Ensure that your URL reflects the content or purpose of your website. Irrelevant keywords can mislead users and negatively impact search engine optimization.
Inconsistent Branding:
Maintain brand consistency between your URL and your brand. Using a URL that deviates significantly from your brand can confuse users and weaken your online identity.
Misspelling:
Double-check for any misspelled words in your domain name, as it can confuse visitors and make it harder for them to find your website.
Improper word usage:
Ensure that you’re using words correctly and in the right context. Using homophones or similar-sounding words can lead to confusion.
Incorrect punctuation:
Be cautious with the use of hyphens, underscores, or other punctuation marks. They can make your domain name look unprofessional or difficult to remember.
Subject-verb agreement:
Maintain proper subject-verb agreement in your domain name to ensure grammatical correctness and clarity.
Pluralization and singularization:
Pay attention to whether a word should be singular or plural in your domain name. Using the wrong form can lead to confusion or incorrect assumptions.
Concluding Remarks
At the end, i would say choose a good branded domain. If you won’t add the dash at the right places, then your funny URL will add a dash of humor to your customers’ everyday browsing.
FAQs
Q: What are funny URLs?
A: Funny URLs are web addresses or domain names that are intentionally humorous, clever, or quirky. They often use wordplay, puns, or unexpected combinations of words to create a memorable and amusing web address.
Q: Why would someone use a funny URL?
A: Funny URLs can be used for various reasons, including branding, marketing, and creating a memorable online presence. They can help businesses or individuals stand out, evoke positive emotions, and make a lasting impression on visitors.
Q: Are funny URLs suitable for all types of businesses?
A: Funny URLs may not be suitable for every business, as their appropriateness depends on the industry, target audience, and brand image. While they can work well for creative or entertainment-focused businesses, others may prefer more professional or straightforward URLs.
Q: Do funny URLs impact SEO?
A: Funny URLs alone do not directly impact SEO. However, it’s important to consider relevant keywords, readability, and user experience when choosing any URL, including funny ones. Clear and descriptive URLs tend to perform better in search engine rankings.
Q: Can funny URLs be memorable and shareable?
A: Yes, funny URLs have the potential to be memorable and shareable due to their unique and entertaining nature. If the humor aligns with the target audience’s preferences, it can increase the likelihood of users remembering and sharing the URL with others.
Q: Are there any drawbacks to using funny URLs?
A: While funny URLs can be attention-grabbing, they may also be harder to communicate verbally or remember accurately. Some people might not immediately associate the funny URL with the corresponding business or content, potentially leading to confusion.
Q: How can I create a funny URL for my website?
A: To create a funny URL, brainstorm wordplay, puns, or creative combinations related to your business or industry. Consider the humor’s relevance to your target audience and the brand image you want to convey. However, ensure the URL remains clear, readable, and easy to type.
Remember that while funny URLs can be engaging and memorable, they should align with your overall brand strategy and be appropriate for your specific business and target audience.
Are you tired of encountering dead ends and frustrating error messages while browsing the web? Well, get ready to bid farewell to those exasperating moments because we have a game-changer for you: URL redirection. It’s like having your very own digital GPS that ensures every click you make leads you straight to your desired online destination.
In this guide, we’re going to unravel the mysteries of URL redirection and make it crystal clear why it’s a must-know concept for anyone navigating the digital realm. No jargon, no complicated technicalities – just straightforward explanations and practical tips that will empower you to redirect URLs like a pro.
Ready? Let’s dive in and discover how to redirect a URL in WordPress!
What is URL Redirection?
URL redirection, also known as URL forwarding, is the process of directing a user from one web address (URL) to another. It is a technique used to ensure that when a user clicks on a specific URL, they are automatically redirected to a different URL, typically to a new location or destination.
URL redirection serves multiple purposes in the digital landscape. It allows website owners to manage changes such as rebranding, domain changes, or restructuring their website’s content without breaking existing links or causing inconvenience to users. It also helps to maintain search engine rankings by preserving the authority and relevance associated with the original URL.
Types of URL redirects:
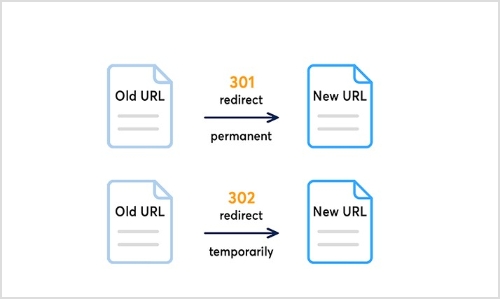
There are two primary types of URL redirection:
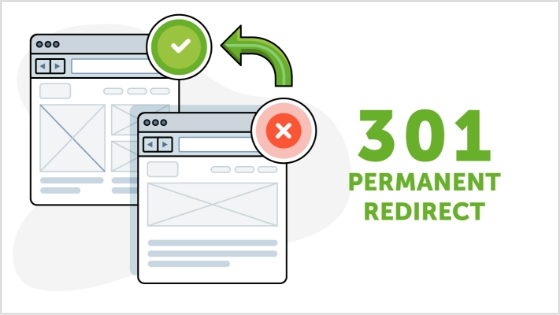
Permanent redirect (HTTP 301):
This type of redirect indicates that the original URL has moved permanently to a new location. It informs search engines and web browsers that the new URL should be considered the main and preferred address for the content. Permanent redirects are commonly used for situations like domain changes or when merging multiple web pages into a single page.
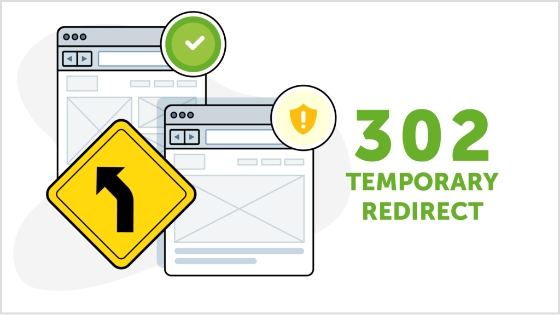
Temporary redirects are used when the original URL is only temporarily unavailable or has moved to a different location for a short period. It instructs web browsers and search engines to visit the new URL temporarily, while still recognizing the original URL. Temporary redirects are often used during website maintenance or when testing new pages before making them permanent.
Other unusual redirects include:
Besides the commonly used permanent redirect (HTTP 301) and temporary redirect (HTTP 302), there are a few other types of redirects that serve specific purposes. These include:
303 see other:
This redirect is similar to the temporary redirect (HTTP 302) but has a specific meaning defined in the HTTP protocol. It indicates to the browser that the requested resource can be found at a different location, and the response to the redirected request should be a GET method.
307 temporary redirect:
This is another type of temporary redirect, similar to HTTP 302. It indicates to the browser that the requested resource has temporarily moved to a different location. However, unlike HTTP 302, the browser should continue to use the same HTTP method (e.g., POST) for the redirected request.
308 permanent redirect:
Similar to the permanent redirect (HTTP 301), the 308 status code indicates that the requested resource has permanently moved to a new location. The key difference is that the browser should use the same HTTP method (e.g., POST) for the redirected request, whereas HTTP 301 may convert a POST request to a GET request.
These additional redirect types (303, 307, and 308) have specific use cases and are less commonly utilized compared to HTTP 301 and HTTP 302 redirects. The choice of which redirect type to use depends on the specific requirements of your website and the desired behavior for the redirected requests.
How to redirect a URL in WordPress?
To redirect a URL in WordPress, you can use either a plugin or modify the .htaccess file. Here are two methods you can follow:
Method 1: Using a WordPress redirection plugin
Step 1: Install and activate a redirection plugin
Go to your WordPress dashboard, navigate to “Plugins” > “Add New,” and search for a redirection plugin such as “Redirection” or “Yoast SEO.” Install and activate the plugin of your choice.
Step 2: Set up the redirect
Once the plugin is activated, go to the plugin’s settings or options page (usually located under “Tools” or “SEO” in the dashboard menu). Look for a section related to URL redirection or redirects.
Step 3: Add a new redirection rule
In the plugin’s settings, you should find an option to add a new redirection rule. Enter the old URL (source) and the new URL (target) where you want the redirect to point. Choose the appropriate redirect type (301 or 302) as needed.
Step 4: Save the redirection rule
After filling in the necessary details, save the redirection rule. The plugin will handle the redirection, and when someone accesses the old URL, they will be automatically redirected to the new URL you specified.
Connect to your website’s hosting account using FTP (File Transfer Protocol) or access the file manager in your hosting control panel.
Step 2: Backup the .htaccess file
Before making any changes, it’s important to create a backup of the existing .htaccess file in case anything goes wrong. Simply download a copy of the .htaccess file to your local computer.
Step 3: Edit the .htaccess file
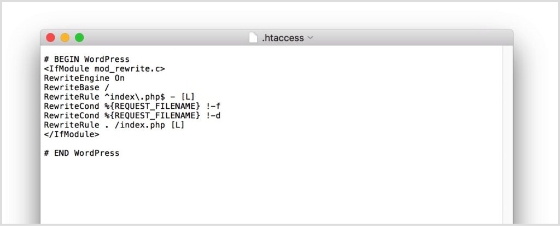
Open the .htaccess file using a text editor. Add the following code at the beginning or end of the file, depending on your preference:
Replace “/old-url/” with the actual URL slug or path of the old URL you want to redirect, and “http://www.example.com/new-url” with the desired destination URL.
Step 4: Save and upload the modified .htaccess file
Save the changes to the .htaccess file and upload it back to the root directory of your WordPress installation, overwriting the existing file.
Step 5: Test the redirection
Visit the old URL in your web browser and verify that it correctly redirects to the new URL you specified. If the redirection is working as expected, you have successfully redirected the URL in WordPress.
Remember, modifying the .htaccess file requires caution, as any mistakes in the code can cause issues with your website. Make sure to double-check the changes and keep a backup of the original .htaccess file for safety purposes.
Why you should create a redirect?
There are several scenarios in which you may need to create a redirect. Here are some common situations where redirects are useful:
1. Rebranding or website restructuring:
If you undergo a rebranding process or make significant changes to your website’s structure, you may need to redirect old URLs to their new equivalents. This ensures that users who access the old URLs are seamlessly directed to the updated content.
2. Changing domain names:
When you change your website’s domain name, it’s essential to set up redirects from the old domain to the new one. This preserves your website’s traffic, and search engine rankings, and ensures that visitors who may have bookmarked or shared your old URLs are still able to access your content.
3. Handling outdated or expired content:
When you remove or archive certain pages or posts on your website, you can create redirects to guide users to relevant and up-to-date content. This prevents visitors from encountering dead ends or 404 error pages and helps maintain a positive user experience.
4. Managing affiliate or marketing campaigns:
If you’re running specific marketing campaigns or affiliate programs that involve unique URLs, you might need to create redirects to track and direct visitors to the intended landing pages. This allows you to monitor campaign performance and ensure visitors land at the correct destination.
5. Correcting broken or mistyped URLs:
If you discover broken or mistyped URLs on your website, creating redirects can fix these issues. By redirecting the incorrect URLs to the correct ones, you can ensure a smooth browsing experience for your users and prevent them from encountering frustrating dead ends.
Remember, redirects are powerful tools that can help you maintain website functionality, improve user experience, and preserve SEO efforts. Whenever you make changes to your website that impact URLs, consider whether a redirect is necessary to ensure a seamless transition and to guide users and search engines to the right content.
In the vast realm of the internet, URL redirection is the key to unlocking seamless navigation and preserving your online presence. By mastering the art of redirection, you can ensure a flawless user experience, maintain search engine rankings, and adapt to changes with ease.
Whether you’re rebranding, restructuring, or simply seeking to enhance your website’s performance, redirecting URLs is your secret weapon. So, embrace the power of redirection, navigate the digital landscape with confidence, and watch as your online presence soars to new heights. Get ready to redirect your way to success!
FAQs
FAQs
What is the difference between a permanent redirect (HTTP 301) and a temporary redirect (HTTP 302)?
A permanent redirect (HTTP 301) informs search engines and browsers that the original URL has permanently moved to a new location. A temporary redirect (HTTP 302) indicates a temporary move or change. It’s important to choose the appropriate type depending on the situation.
How can URL redirection impact my website’s search engine rankings?
URL redirection can impact search engine rankings by preserving the authority and relevance associated with the original URL. If implemented correctly, redirects can transfer link equity and prevent loss of traffic and rankings when URLs change or move.
Can I implement URL redirection without a plugin?
Yes, you can implement URL redirection without a plugin by modifying the .htaccess file on your server. This method allows you to set up server-side redirects using rules defined in the .htaccess file.
Are there any SEO best practices to consider when setting up URL redirects?
Yes, when setting up URL redirects, it’s important to ensure that the redirect is a one-to-one mapping from the old URL to the new URL. Additionally, update internal links and notify relevant parties to update their references. Monitor and maintain redirects to address any issues promptly.
How do I test if my URL redirection is working correctly?
To test URL redirection, simply access the old URL and verify that you are automatically redirected to the new URL. Test on different devices and browsers to ensure compatibility and functionality.
What should I do if I encounter redirect loops or broken redirects?
If you encounter redirect loops or broken redirects, review your redirect configurations and ensure they are set up correctly. Check for any circular redirections or incorrect rules. Make necessary corrections and retest the redirects.
Is it possible to redirect multiple URLs at once?
Yes, it is possible to redirect multiple URLs at once. In WordPress, you can use a plugin that supports bulk or wildcard redirects. Alternatively, with server-side redirects, you can set up rules in the .htaccess file to redirect multiple URLs simultaneously.
Permalinks are permanent URLs that lead to specific webpages, enhancing navigation and SEO.
In the vast landscape of SEO, where digital trails intertwine and vie for attention, there emerges a significant factor known as the permalink. Permalinks give your content a digital identity, helping search engines understand what it’s all about. They’re like carefully crafted labels that can boost your website’s position in search engine rankings.
In simpler terms, permalinks are like digital fingerprints that help search engines find and rank your website. Using the right words in your permalinks can improve your website’s visibility and attract more visitors. So, let’s discover how they can boost your website’s presence online!
1.1 What are the characteristics of a Permalink?
The characteristics of a Permalink contribute to effective navigation, accessibility, and search engine optimization for web content. Here are the characteristics of a permalink:
Permanent: Designed to remain unchanged over time.
Descriptive: Includes keywords that describe the webpage’s content.
Readable: Easy to read and understand.
Consistent: Follows a consistent structure across the website.
SEO-friendly: Optimized with relevant keywords for search engine visibility.
Shareable: Allows easy sharing of specific web pages.
1.2 What is the structure and examples of a Permalink?
The structure of a permalink typically consists of the base URL of the website followed by additional elements that identify the specific webpage. Here is a common structure for permalinks: https://www.example.com/category/post-title In this structure, “https://www.example.com” represents the base URL of the website, “category” indicates the category or section of the webpage, and “post-title” denotes the unique title of the specific post. Examples of permalinks based on the given structure:
https://www.example.com/events/upcoming-conference-detailsThese examples demonstrate how permalinks incorporate the website’s base URL, relevant category or section, and a descriptive element that represents the specific content of the webpage. Related: How to Make a Url Link in Word?
1.3 Why should permalinks remain unchanged?
Here are the reasons why permalinks should remain unchanged:
Consistency: Unchanged permalinks provide a consistent and reliable web address.
Accessibility: They allow users to confidently bookmark, share, and reference specific web pages.
SEO Impact: Consistent permalinks help search engines establish a historical record of the webpage and improve search engine rankings.
Backlinks: Changing permalinks can invalidate existing backlinks, leading to traffic loss and credibility.
User Experience: Unchanged permalinks improve user experience by avoiding broken links and confusion. Related:How to rename a link?
2.0 Why Do Permalinks Matter & How Do Permalinks Affect SEO?
Permalinks play an important role in search engine optimization (SEO) as they impact how search engines understand and rank your web pages.Here are some of the factors and tips to keep in mind for optimizing permalinks in the light of SEO:
Include relevant keywords: Incorporate keywords that accurately reflect the content of the page. This helps search engines understand the topic and improves your chances of ranking for relevant searches.
Keep it concise and readable: Create permalinks that are easy to read and understand.Use hyphens (-) to separate words and avoid using numbers or special characters. A clear and concise permalink improves user experience and SEO.
Use a hierarchical structure: Organize your permalinks in a logical and hierarchical structure that reflects the structure of your website. This helps search engines understand the relationships between different pages and sections.
Exclude stop words:Remove unnecessary words like “and,” “the,” or “of” from your permalinks. Focus on the essential keywords that convey the main topic of the page.
Avoid changing permalinks frequently:Once you set a permalink structure, try to stick with it to maintain consistency. Changing permalinks frequently can lead to broken links and negatively impact your SEO. If you need to change a permalink, set up proper redirects to maintain SEO value.
Customize permalink settings:
If you’re using a content management system (CMS) like WordPress, utilize its permalink settings to customize the URL structure. Choose a format that includes post titles or categories to optimize for SEO.
Consider user experience:Permalinks should not only be optimized for search engines but also for users. Create permalinks that are descriptive and provide a clear idea of what the page is about. This helps users understand the content before clicking.
Monitor and update:Regularly monitor your website’s performance, rankings, and user behavior. If you notice any issues or changes in search engine visibility, review and update your permalinks as needed.
Set up proper 301 redirects:
When you change the permalink, make sure to set up 301 redirects from the old URL to the new URL. This tells search engines that the content has permanently moved and preserves your SEO value.
Keep the keywords consistent:Try to include the same or similar keywords in the new permalink as in the old one. This helps search engines understand the relevance of the content and maintain your rankings.
Update internal links:Don’t forget to update any internal links within your website that point to the old permalink. Make sure they now point to the new permalink to provide a seamless user experience and maintain your SEO value.
Reach out to external websites:If you have control over external websites linking to your old permalink, it’s a good idea to contact them and ask if they can update the links. This way, you preserve the link equity and SEO value associated with those backlinks.
Submit your sitemap and fetch as Google:Update your website’s sitemap to include the new permalink and submit it to search engines. Additionally, use the “Fetch as Google” tool in Google Search Console to prompt search engines to crawl and index the new permalink.
Keep an eye on your website’s performance:Monitor your website’s rankings and performance after the permalink change. Check for any fluctuations or issues and make adjustments if necessary.
Keyword relevance:
Permalinks that include relevant keywords help search engines understand the content of a page. Including targeted keywords in the permalink can improve the page’s visibility for those specific search terms.
Click-through rates: A well-structured and descriptive permalink can attract more clicks from users in search engine results pages (SERPs). When the permalink accurately reflects the content, it provides a clear idea to users about what they can expect on the page, leading to higher click-through rates.
Backlink anchor text: When other websites link to your content, they often use the URL as the anchor text. Having relevant keywords in the permalink contributes to the anchor text of those backlinks, which can positively influence SEO and keyword rankings.
Indexing and crawling: Permalinks play a role in search engine crawling and indexing processes. Clear and logical permalink structures make it easier for search engine bots to understand the organization and hierarchy of your website, leading to better indexing and potentially improved search visibility.
URL sharing:
When people share your content via social media, email, or other platforms, they often include the URL. Having a permalink that is concise, descriptive, and visually appealing can encourage more sharing and engagement, amplifying the reach of your content.
Credibility and trust: Permalinks that are readable and consistent convey a sense of professionalism and trustworthiness to users. A clean and well-formatted URL is more likely to be clicked and shared by users, contributing to increased traffic and potential backlinks.
2.1 What are the steps to follow to create permalinks?
Following the steps given below and create effective and SEO-friendly permalinks that accurately represent your content and enhance your website’s visibility in search engine results.
Determine the permalink structure: Decide on the format and structure you want to use for your permalinks. Consider including elements such as the post title, category, or date.
Access your content management system (CMS): If you’re using a CMS like WordPress, log in to the admin panel or dashboard.
Navigate to the permalink settings: In the CMS settings, locate the section related to permalinks. This may be under the “Settings” or “Permalinks” menu.
Customize the permalink structure: Within the permalink settings, choose the desired permalink structure that aligns with your preferences and website organization. Many CMS platforms offer predefined options or allow for customization.
Incorporate relevant keywords: When creating permalinks, include relevant keywords that accurately describe the content of the page. This helps search engines understand the topic and improve your chances of ranking for relevant searches.
Ensure readability and clarity: Create permalinks that are concise, easy to read, and understand. Use hyphens (-) to separate words and avoid unnecessary characters, numbers, or special symbols. Clear and readable permalinks benefit both search engines and users.
Test the permalink: Before finalizing the permalink, click on it to ensure it directs to the correct page. Verify that the URL structure accurately represents the content and is free from any errors.
Avoid frequent permalink changes: It is generally advisable to maintain a consistent permalink structure to avoid broken links and negative impacts on SEO. If you must change a permalink, set up proper redirects to preserve SEO value and user experience.
2.2 How to Change a Permalink in the WordPress Editor?
In order to change a permalink in the WordPress Editor, follow these steps:
Step 1: Log in to your WordPress dashboard.
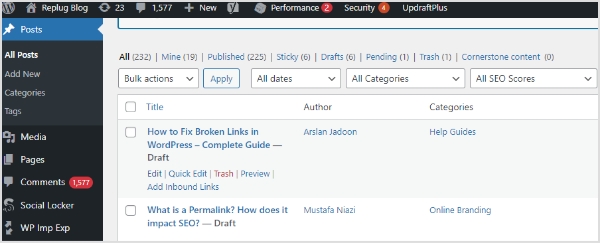
Step 2: Navigate to the “Posts” or “Pages” section, depending on where the content with the permalink is located.
Find the specific post or page you want to edit and click on it to open it in the editor.
Step 3: In the editor, look for the section that displays the permalink. It is usually located below the title of the post or page. Click on the “Edit” button next to the permalink. This will allow you to modify the existing URL.
Make the desired changes to the permalink. You can edit the text, remove certain words, or add new keywords.
After making the changes, click on the “OK” or “Save” button to update the permalink.
Once the permalink is updated, click on the “Update” or “Publish” button to save the changes to the post or page.
Note: It’s important to note that changing the permalink will result in a new URL for that specific content. This may affect any existing links pointing to the old permalink. To mitigate this, WordPress automatically sets up redirects from the old URL to the new one.
3.2 What is the difference between permalinks, slugs, and links?
Permalinks are the permanent URLs that point to specific pages or posts on a website.
Slugs are the user-friendly and readable portion of the permalink that comes after the domain name.
Links, in general, refer to clickable URLs that direct users to web pages.
3.3 What is the difference between permalinks and dynamic links?
Permalinks are static and permanent URLs that remain constant over time and point to specific pages or posts on a website. Dynamic links, on the other hand, are generated dynamically and often include query strings or parameters that change based on user interactions or database queries.
3.4 What is a permalink in wordpress?
In WordPress, a permalink refers to the permanent URL structure assigned to each post, page, or custom post type. It is a web address that remains unchanged over time and provides a direct link to a specific piece of content on a WordPress website. Permalinks play a crucial role in identifying and accessing individual pages or posts, and they can be customized to reflect the content’s title, category, or other elements.
3.5 What Happens If I Change My WordPress Permalinks?
If you change your WordPress permalinks, it can affect your search engine rankings and lead to broken links. To mitigate this, set up proper redirects and update internal links to preserve SEO value and maintain user access to content. You may also like:
In WordPress, permalinks play a crucial role in defining the structure of your website’s URLs. Changing the permalink structure can improve your site’s search engine optimization (SEO) and make your links more user-friendly. This guide will walk you through the process of changing permalinks in WordPress by providing step-by-step instructions. Let’s dive in!
Here’s how to change Permalink in WordPress:
Step 1: Log in to your WordPress admin dashboard
To begin, log in to your WordPress admin dashboard using your credentials. Once logged in, you’ll have access to the necessary settings to modify your permalink structure.
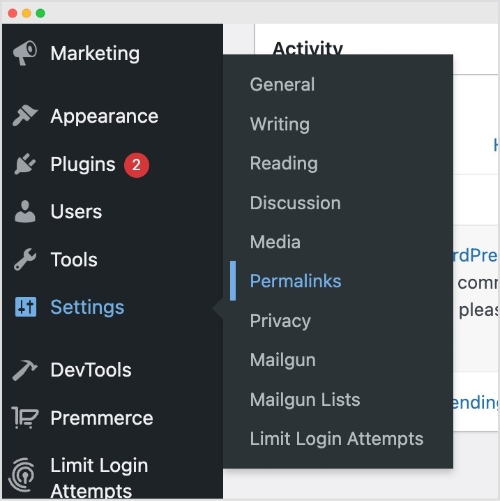
From the left-hand menu, locate and click on “Settings,” and then select “Permalinks.” This action will take you to the Permalink Settings page, where you can customize your Permalink structure.
Step 3: Choose a common Permalink structure or create a custom one
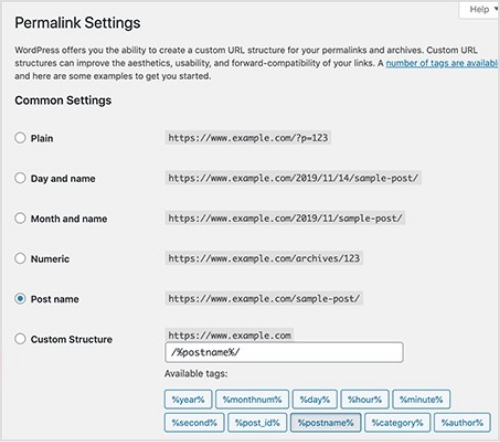
On the Permalink Settings page, you’ll find various pre-defined options for permalink structures, including plain, day and name, month and name, numeric, post name, and more. Select the one that best suits your needs. If you prefer a custom permalink structure, proceed to Step 4.
Step 4: Create a custom Permalink structure (optional)
If you want a custom permalink structure, select the “Custom Structure” option on the Permalink Settings page. This will reveal a text field where you can enter your desired permalink structure using tags. Utilize tags like %year%, %monthnum%, %day%, %post_id%, %postname%, %category%, %author%, and %pagename% to craft a unique permalink structure.
Step 5: Save changes
After selecting a common or custom permalink structure, click on the “Save Changes” button located at the bottom of the Permalink Settings page. By doing so, your new permalink settings will be saved, and WordPress will automatically update the URLs accordingly.
A permalink, short for “permanent link,” is a URL (Uniform Resource Locator) that points to a specific web page or post on a website. It is called a “permanent” link because it is intended to remain unchanged and accessible over time, even if the content of the page or post is updated or moved.
Permalinks determine the structure and format of URLs for individual posts, pages, categories, and other content types. They provide a unique and stable address that can be used to access a specific piece of content directly. Permalinks are often used in navigation menus, hyperlinks, search engine results, social media shares, and other online references.
Will changing my permalink structure affect my website’s SEO?
Yes, changing the permalink structure can impact your SEO. It’s advisable to set up redirects or use a plugin to manage redirects in order to preserve the SEO value of your URLs and prevent broken links.
Can I change the permalink structure for existing posts and pages?
Yes, when you modify the permalink structure, it will apply to all new posts and pages you create. However, for existing content, the URLs will change, which may result in broken links. Implementing redirects can help mitigate this issue.
What if I change my mind after modifying the permalink structure?
A3: WordPress allows you to revert to your previous permalink structure. Simply revisit the Permalink Settings page, choose the desired structure, and save the changes. However, keep in mind that this will once again alter the URLs of your posts and pages.
Are there any performance implications of changing the permalink structure?
Generally, changing the permalink structure itself doesn’t have a significant impact on website performance. However, if you have a large number of posts or pages, updating the URLs may require additional server resources during the redirect process.
Can I localize my permalinks for different languages?
Yes, if you have a multilingual website, you can utilize plugins like WPML or Polylang to set up language-specific permalink structures. These plugins enable you to create separate URLs for different language versions of your content.
Are you looking to give your YouTube channel a more professional look? Do you want to make it easier for your viewers to find and remember your channel? One great way to do that is by getting a custom YouTube URL.
Please note that YouTube no longer allows the creation of new custom URLs, and existing ones cannot be modified. However, your current custom URL will still work. If you need to permanently delete your custom URL, you’ll have to delete your entire channel, which is a permanent action.
If you want to create a new URL for your channel, you can change your handle. Whenever you do this, a new handle URL will be generated automatically, such as youtube.com/@youtubecreators.
But don’t worry, changing your handle is a quick and easy process, and it can be well worth it to have a custom URL that reflects your brand or channel name.
In this article, we’ll guide you through the steps on how to change your YouTube handle and get a custom YouTube URL, so you can take your channel to the next level. Let’s dive in!
How to get a custom YouTube URL?
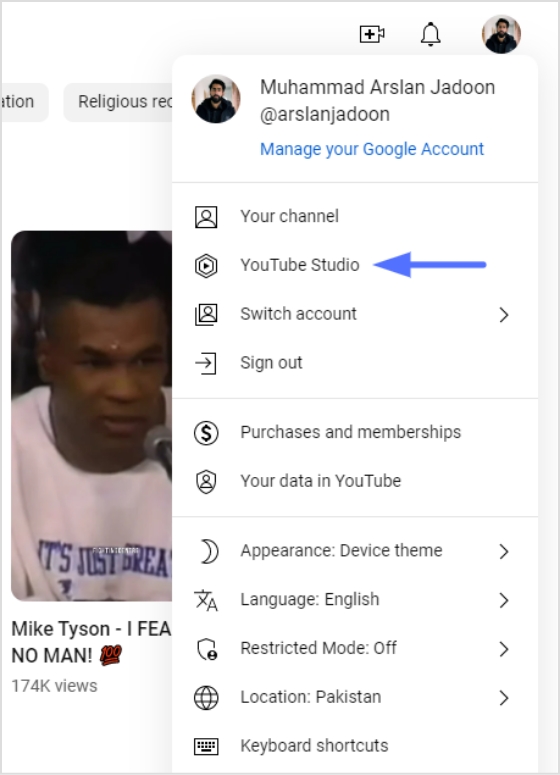
Step 1: Open YouTube and sign in you your account.
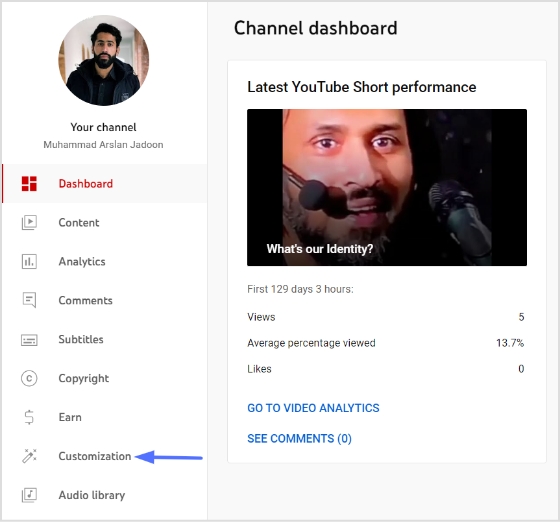
Step 2: Click your profile icon in the top right corner and select YouTube Studio from the drop-down menu.
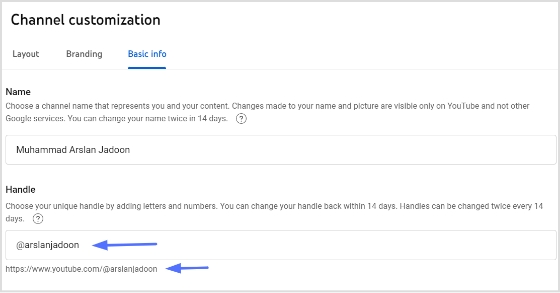
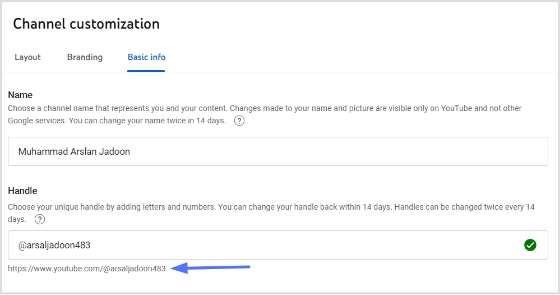
Step 5: Type in your new handle name to see available handles. When the green tick icon appears, it means the handle is available.
Note: Copy your handle URL below the handle name. That’s also your YouTube channel URL, you can share it with your audience.
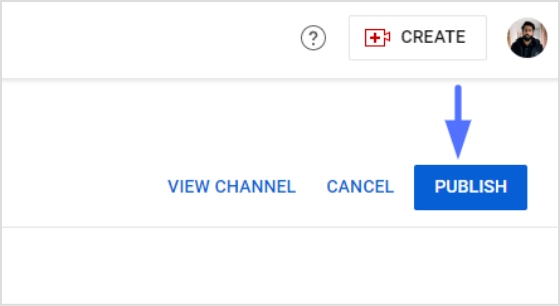
Step 6: Click the publish button and you’re done.
Final words
To sum up, obtaining a custom URL for your YouTube channel can be an effective way to enhance your channel’s branding and make it easier for viewers to find you. Although YouTube no longer offers the option to create new custom URLs, you can still change your existing URL by updating your handle. Following the steps and tips outlined in this article, you can successfully obtain a custom YouTube URL that reflects your brand and helps you stand out on the platform.
FAQs
Can I change my custom YouTube URL?
YouTube no longer allows changing of custom URLs. However, you can still update your handle, which will automatically create a new handle URL for your channel.
Can I delete my custom YouTube URL?
Yes, you can delete your custom YouTube URL by deleting your entire channel. However, please note that deleting your channel is a permanent action and cannot be undone.
How many subscribers do I need to get a custom YouTube URL?
To be eligible for a custom YouTube URL, you need to have at least 100 subscribers, be at least 30 days old, have an uploaded profile picture, and have uploaded channel art.
What happens if I change my YouTube channel name?
If you change your YouTube channel name, your custom URL will still work. However, your handle URL will be updated with your new channel name.
Are you an avid gamer or just a casual viewer of gaming streams? Then you’ve likely come across Twitch, the popular live-streaming platform that has taken the gaming world by storm.
Whether you’re watching your favorite gamer or streaming your own gameplay, sharing your Twitch URL link is essential to getting more viewers and building your online presence.
But with all the different types of links available, from stream links to PDF links to channel URL links, it can be confusing to know which one to share and how to do it.
In this article, we’ll walk you through the process of sharing your Twitch URL link and give you some tips on how to make the most of it. So, let’s get started and make sure your Twitch channel gets the recognition it deserves!
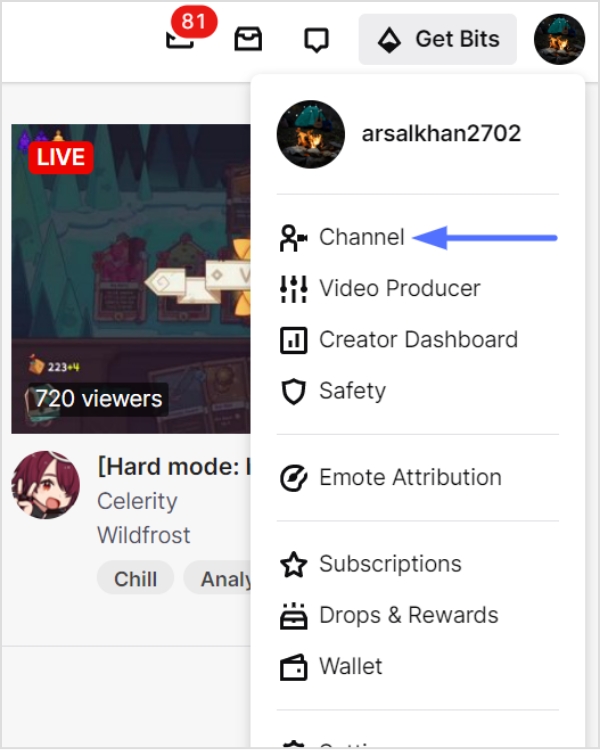
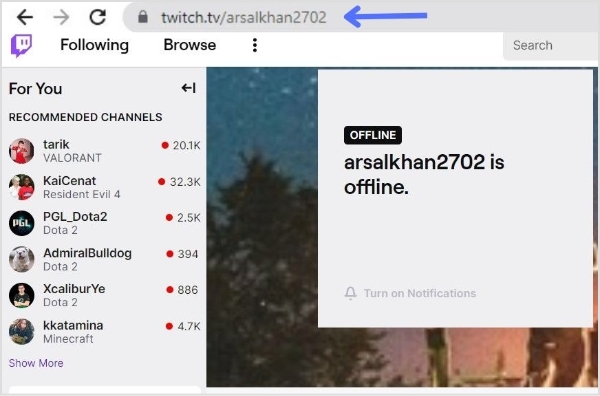
How to find and share your Twitch channel URL?
Your Twitch Channel URL is the link to your Twitch profile, which viewers can use to find and follow your channel. Here’s how to find and share your Twitch Channel URL:
Step 1: Follow the above steps and copy the URL by selecting it and pressing Ctrl+C.
Step 2: Open the platform or social media where you want to share the link (e.g., Twitter, Discord, or Facebook).
Step 3: Create a new post or message and paste the copied URL into the text field.
Noteworthy Tip: Promoting your Twitch Channel URL on social media and other platforms is a great way to attract new viewers and build your audience. Consider joining Twitch communities and groups to connect with other gamers and potential viewers.
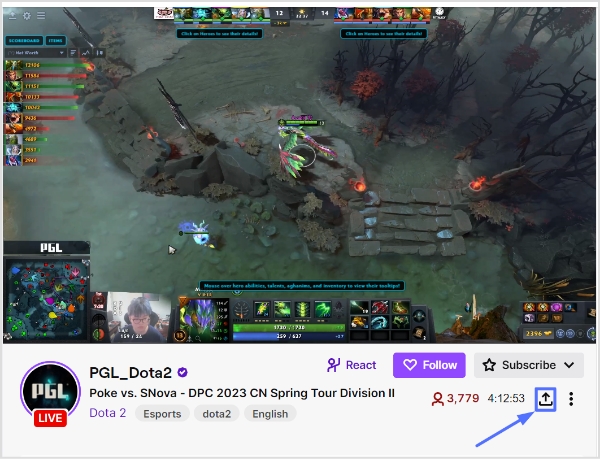
How to share a Twitch Link of a stream you’re watching?
Sharing a Twitch link of a stream you’re watching is a great way to introduce your friends and followers to new content and support your favorite streamers. Here’s how to do it:
Step 1: Open the Twitch stream you want to share on your preferred device.
Step 2: Click on the “Share” button located below the video player.
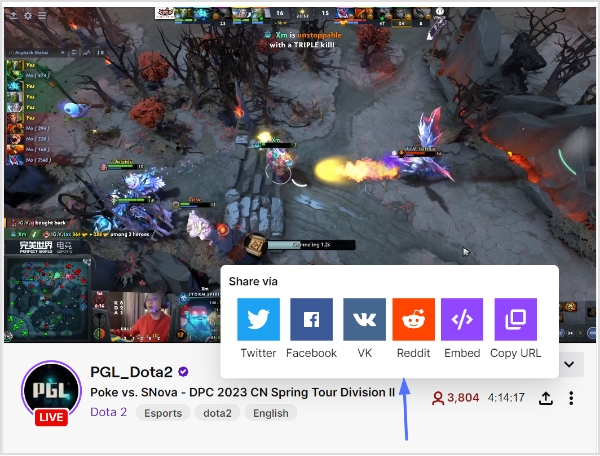
Step 3: Choose how you want to share the link – you can copy the link to share it on other platforms or share it directly to social media platforms like Twitter, Facebook, or Reddit.
Step 4: Add a message or comment to your post to provide context for your followers and encourage them to check out the stream.
Step 5: Publish your post and wait for your followers to start watching the stream!
Sharing Twitch links is an essential part of building an audience and connecting with other gamers on the platform. Whether you’re sharing your own stream link, your Twitch Channel URL, or a link to a stream you’re watching, it’s important to provide context and encourage viewers to tune in. By promoting your Twitch content on social media and other platforms, and by supporting other streamers in the community, you can build your audience and create a thriving Twitch channel.
So don’t be afraid to share your links and get involved in the Twitch community – the more you engage with other gamers and viewers, the more successful your channel will be!
FAQs
How to change your Twitch URL link?
Yes, Twitch allows you to change your Twitch URL (also known as your Twitch Channel URL) once every 60 days. Here’s how to do it:
Log in to your Twitch account and click on your profile picture in the top right corner.
Select “Settings” from the dropdown menu.
Scroll down to the “Profile” section and locate the “Profile URL” field.
Click on the “Edit” button next to the field.
Type in your desired username, making sure to follow Twitch’s guidelines for usernames.
Click on the “Check Availability” button to make sure the username is available.
If the username is available, click on the “Update” button to change your Twitch URL.
How do I share my Twitch stream link?
To share your Twitch stream link, navigate to your stream page and copy the URL from the address bar. Then, paste it into a post on your preferred social media platform or messaging app, along with a message encouraging viewers to tune in.
What is the best way to promote my Twitch channel?
The best way to promote your Twitch channel is to engage with your audience on social media and other platforms and to collaborate with other streamers in the community. You can also consider creating content for other platforms like YouTube or Instagram to attract new viewers.
How often should I share my Twitch links?
There’s no set rule for how often you should share your Twitch links, but it’s important to strike a balance between promoting your content and not overwhelming your followers. Aim to share your links a few times a week, and make sure to provide context and encourage viewers to tune in.