Category: Help Guides

  • What is a RSS Feed URL and How to Find It?

    What is a RSS Feed URL and How to Find It?

    In today’s fast-paced online world, staying updated with the latest content from your favorite websites can be quite a challenge. Luckily, there’s a handy tool called an RSS feed that can make this task a breeze. But what is a RSS feed URL, and how can you find it? 

    Don’t worry, we’ve got you covered! 

    In this guide, we’ll clarify the concept of RSS feeds and show you step-by-step how to locate their URLs. So, if you’re ready to unlock a world of effortless content consumption, let’s dive right in and discover the wonders of RSS feed URLs together!

    What is a RSS feed URL?

    At its core, an RSS feed URL is like a personal delivery address for receiving updates from your favorite websites. It stands for Really Simple Syndication (RSS), a technology that allows websites to distribute their content in a standardized format. Think of it as a digital pipeline that funnels articles, blog posts, news updates, and other information directly to you.

    An RSS feed URL is a specific web address that points to the location of an RSS feed for a particular website or blog. It acts as a unique identifier, enabling you to subscribe to that feed using an RSS reader or aggregator. Once subscribed, you’ll receive automatic updates whenever new content is published on the website, eliminating the need to manually visit each site.

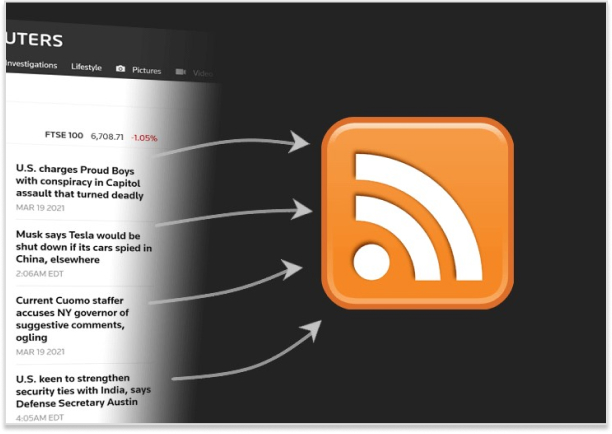
    RSS feed URLs are typically formatted as a web link, often indicated by the RSS icon (usually an orange square with white radio waves). By accessing this URL, you gain access to a stream of regularly updated content, tailored to your interests and preferences.

    What-is-a-rss-feed-url

    Also read: How to automatically shorten URLs in an RSS Feed

    How to find the RSS feed URL for the most popular websites?

    When it comes to finding RSS feed URLs for most websites, the process can sometimes feel like searching for buried treasure. However, there are some tried-and-true methods that can simplify the hunt. Let’s explore these techniques together:

    WordPress Websites: 

    Since a significant number of websites use WordPress, locating their RSS feeds is often a breeze. Simply add “/feed” to the end of the website’s URL. For instance, if the website is “https://justinpot.com,” the RSS feed URL would be “https://justinpot.com/feed.” This method works like a charm in most cases.

    Tumblr Websites: 

    If the website is hosted on Tumblr, unveiling its RSS feed is a snap. Append “/rss” to the website’s URL. For example, if the website is “https://example.tumblr.com,” the RSS feed URL would be “https://example.tumblr.com/rss.”

    Blogger Websites: 

    Websites hosted on Blogger follow a similar pattern. Add “feeds/posts/default” to the end of the website’s URL. For instance, if the website is “example.blogspot.com,” the RSS feed URL would be “example.blogspot.com/feeds/posts/default.”

    Medium Publications: 

    Medium makes it relatively simple to discover RSS feeds for publications. Just add “/feed/” before the name of the publication in the URL. For example, if the publication is “medium.com/example-site,” the RSS feed URL would be “medium.com/feed/example-site.”
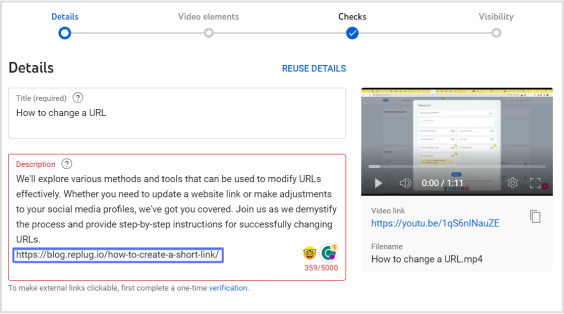
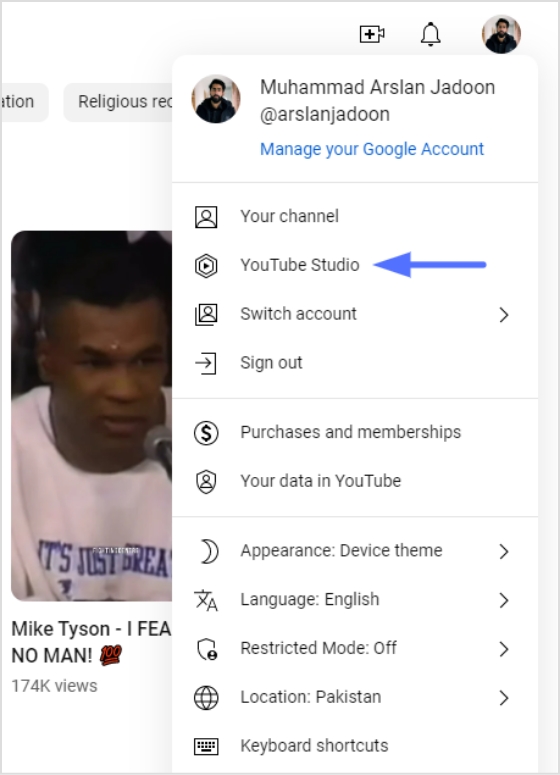
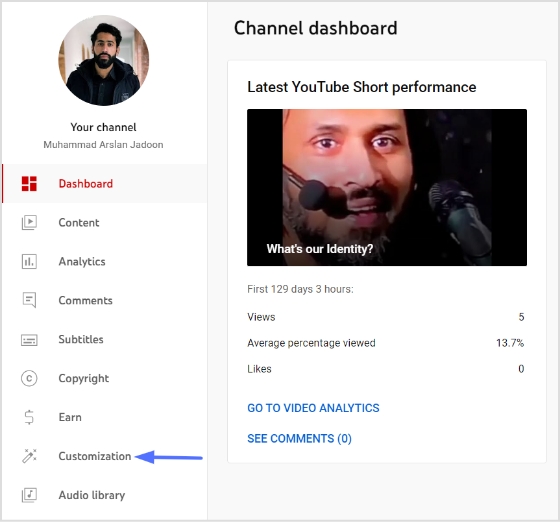
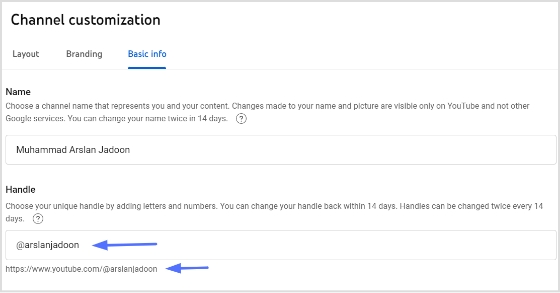
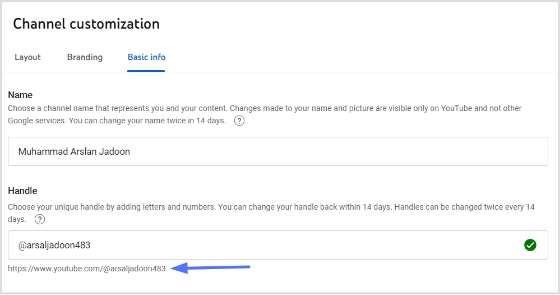
    YouTube Channels: 

    YouTube channel pages serve as convenient RSS feeds. All you need to do is copy and paste the URL of the channel into your preferred RSS reader. Additionally, you can access an OPML file containing all your subscriptions for easy management.

    By employing these techniques, you can navigate the vast online landscape with confidence, effortlessly finding and subscribing to RSS feeds across various platforms. So go ahead, and embark on your quest for knowledge, armed with the power of RSS feeds!

    Boost ROI with branded URLs - Replug dashboard showing performance metrics and branded URL creation
    Replug Logo
    Boost your conversion rates with irresistable CTAs with

    for your marketing campaigns.

    Check

    Higher clicks

    Check

    More leads

    Check

    Better ROI

    Generate free CTAs

    How to find an RSS feed of a website from its source code?

    If the previous methods didn’t lead you to the desired RSS feed URL, there’s still hope! By checking a web page’s source code, you can often uncover the hidden gem you’re seeking. Follow these simple steps to find an RSS feed via source code:

    Step 1: Visit the website for which you’d like to find the RSS feed.

    Step 2: Right-click on an empty area of the webpage. A context menu will appear. In the context menu, look for an option called “View Page Source” or something similar. Click on it. This action will open a new tab or window displaying the website’s source code.

    Step 3: Once you’re viewing the source code, you can search for the RSS feed URL. Press “Ctrl+F” on Windows or Linux, or “Command+F” on Mac, to bring up the search feature.

    Step 4: In the search bar, type “RSS” and hit enter. The browser will highlight any instances of the term “RSS” within the source code.

    Step 5: If the search for “rss” doesn’t yield any results, try searching for “atom” instead. Atom is another common format for syndication feeds.

    Step 6: Once you’ve located the RSS feed URL, copy it by selecting the entire URL and pressing “Ctrl+C” (Windows or Linux) or “Command+C” (Mac).

    Step 7: Open your preferred feed reader or RSS aggregator and paste the URL into the appropriate field for adding a new feed. This step allows you to start receiving updates from the website.

    By venturing into the source code, you can often discover the RSS feed URL that eluded you through other methods. So don’t be intimidated—embrace your inner digital explorer and uncover the treasure trove of RSS feeds that await you!

    Replug Branded Short Links CTA
    Replug Logo
    Maximize marketing ROI
    by transforming ordinary URLs into
    branded short links that convert.
    Try Replug for free

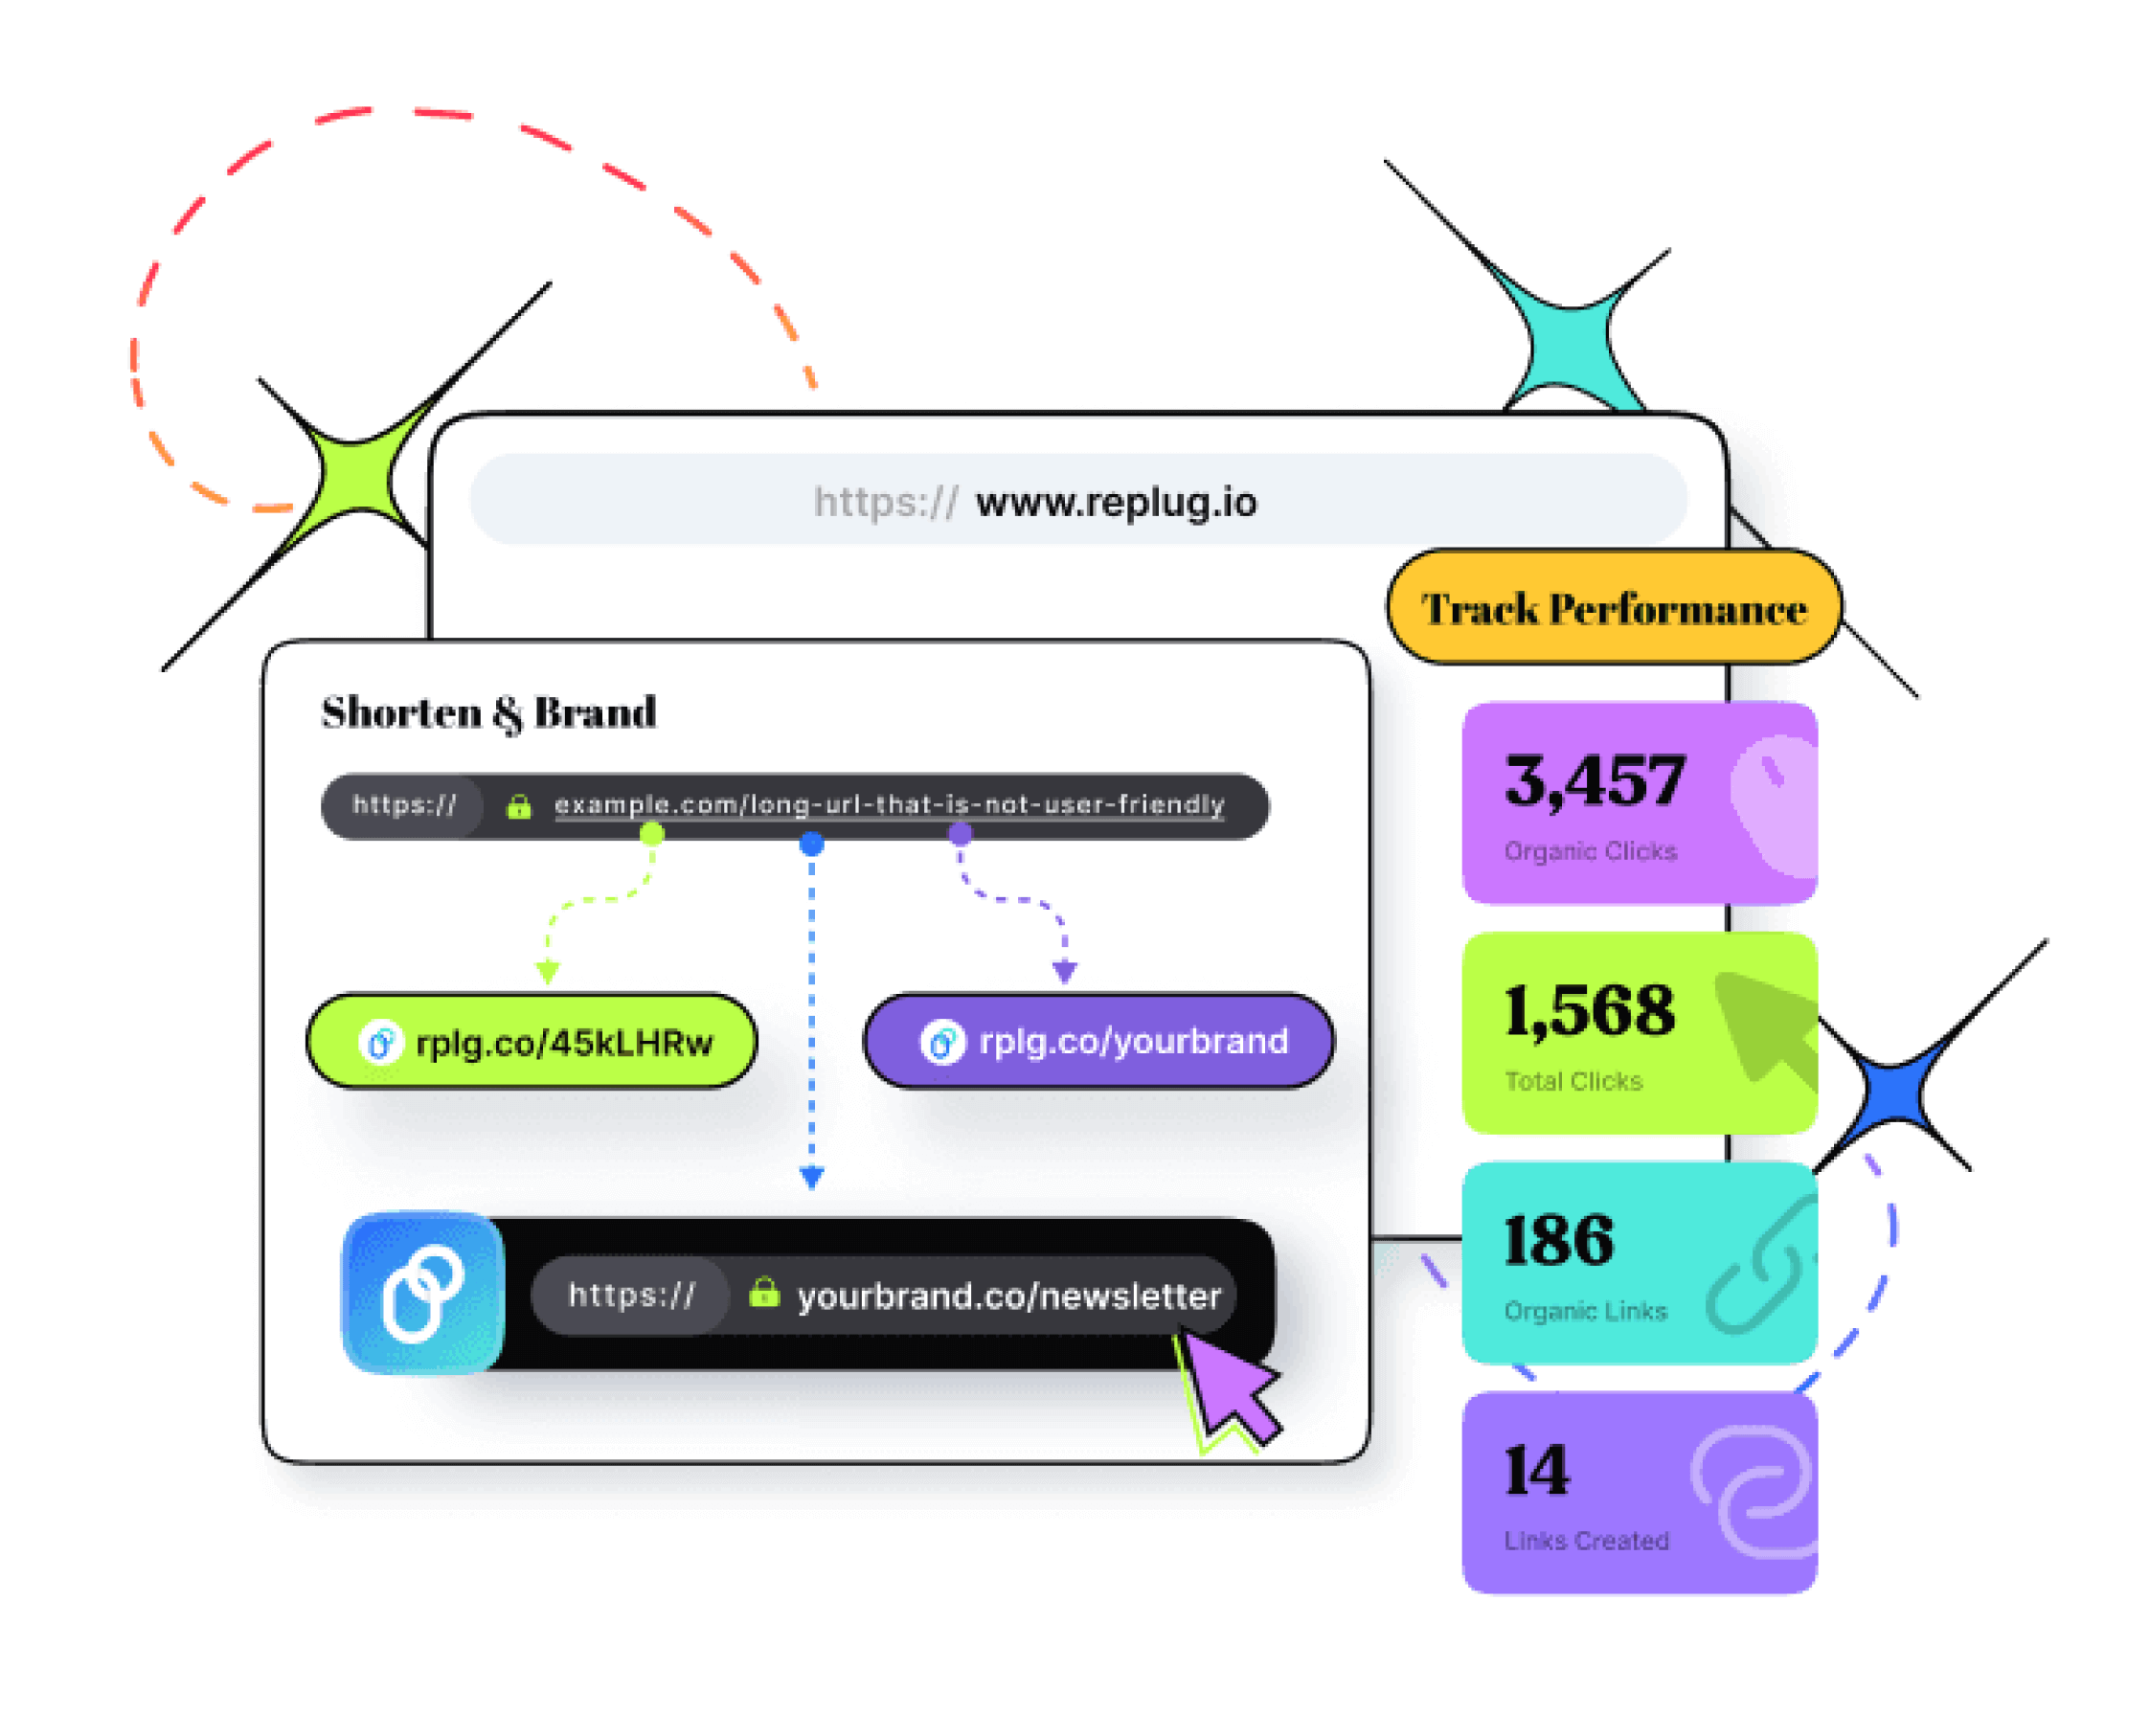
    Shorten Your RSS feed URL with Replug:

    If you wish to shorten an entire RSS feed and utilize it on a third-party platform, Replug offers a convenient solution. Follow these simple steps to get started:

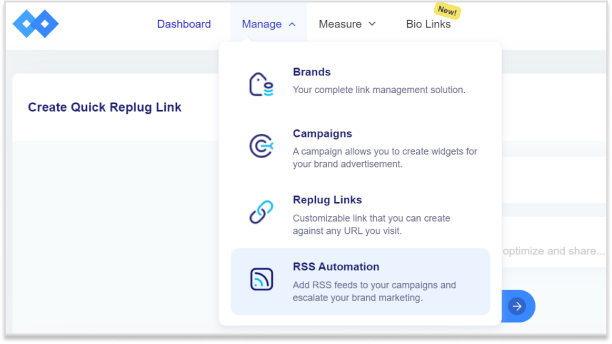
    Step 1: Visit the Replug dashboard and navigate to the Manage section and select “RSS Automation.”

    what-is-a-rss-feed-url

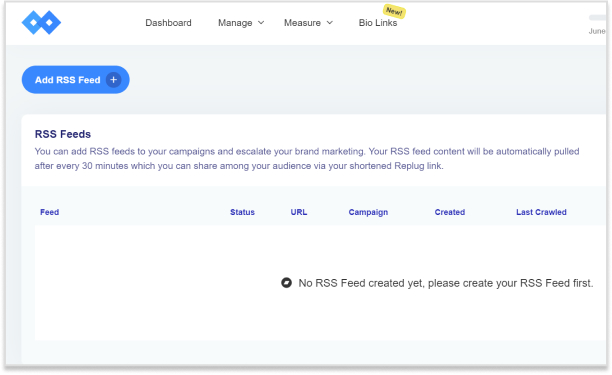
    Step 2: On the next screen, locate and click the “Add RSS Feed” button situated in the top left corner.

    what-is-a-rss-feed-url

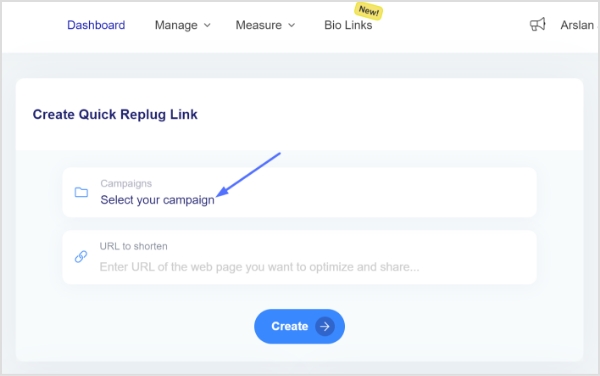
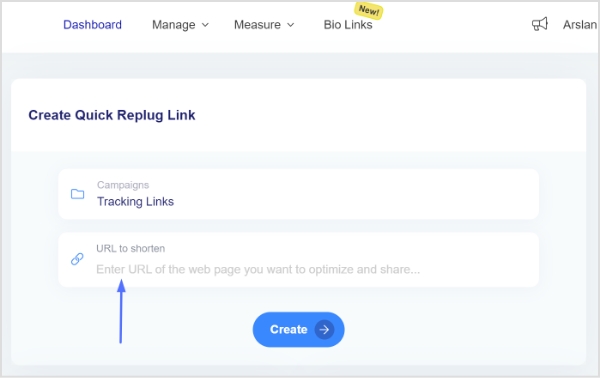
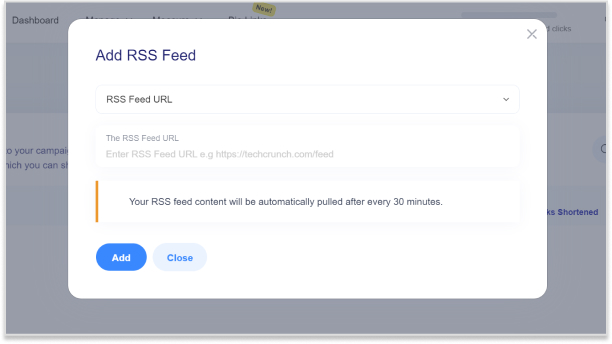
    Step 3: A pop-up window will appear, prompting you to select a campaign and enter the RSS feed URL. Once done, click “Add” to proceed.

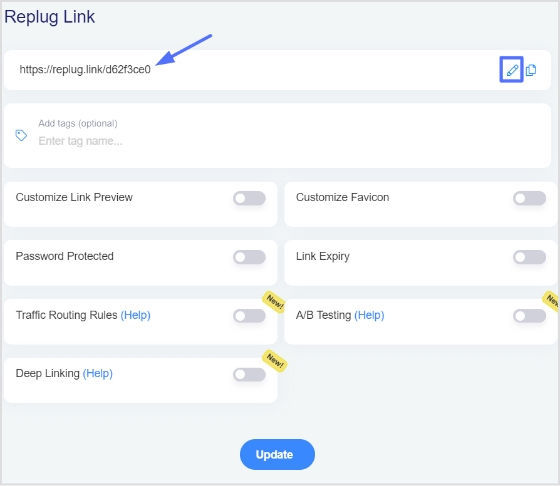
    At this point, your RSS feed has been successfully created. Copy the shortened RSS feed URL provided by Replug and add it to your desired third-party platform.

    what-is-a-rss-feed-url

    Step 4: You can now perform various actions with your newly created RSS feed:

    • Edit: Modify or update the added RSS feed as needed.
    • Re-crawl: Instantly re-crawl the entire RSS feed to fetch any new links that have been added.
    • Preview: Get a preview of the list of posts from the converted RSS feeds.
    • Remove: Remove the RSS feed if desired, allowing you to create a new one or take alternative actions.

    By utilizing Replug’s services, you can easily shorten and manage your RSS feeds, empowering you to seamlessly integrate them into third-party platforms. Enjoy the benefits of concise and efficient RSS feed URLs as you streamline your content distribution process.

    FAQs

    What is an RSS feed and how does it work?

    An RSS feed is a standardized format for delivering regularly updated content from a website. It works by providing a stream of information that users can subscribe to using an RSS reader or aggregator.

    How can I subscribe to an RSS feed?

    To subscribe to an RSS feed, you need an RSS reader or aggregator. Copy the RSS feed URL of the website or blog you want to subscribe to and paste it into your RSS reader, or use the built-in subscription functionality of some web browsers.

    What are the benefits of using RSS feeds?

    RSS feeds allow you to stay updated with the latest content from multiple websites in one place. They save time by delivering new posts or articles directly to you, eliminating the need to visit each website individually.

    Can I use RSS feeds on my mobile device?

    Yes, you can use RSS feeds on mobile devices. Many RSS reader apps are available for both Android and iOS platforms, allowing you to access and manage your subscribed feeds on the go.

    Are RSS feeds still relevant in the age of social media?

    Absolutely! While social media platforms offer content discovery, RSS feeds provide a more personalized and focused experience. They allow you to curate specific sources and receive updates without the algorithmic filtering and distractions of social media feeds.

    How often are RSS feeds updated?

    The frequency of RSS feed updates varies depending on the website or blog. Some may update several times a day, while others may have less frequent updates. You can set your RSS reader to check for updates at regular intervals.

    Trending:

     How to create a custom CTA for maximum conversion?

    How to add a Twitter link to Instagram bio?

  • How to Insert Links in YouTube Descriptions: Step-by-Step

    How to Insert Links in YouTube Descriptions: Step-by-Step

    Are you eager to level up your YouTube descriptions and engage your viewers like never before? Well, look no further! Inserting links in your YouTube description can be a game-changer, and we’re here to show you how step-by-step. 

    Whether you want to share additional resources, promote your social media channels, or drive traffic to your website, we’ve got you covered. Get ready to unlock the full potential of your video descriptions and captivate your audience effortlessly. 

    Let’s dive in and master the art of inserting links on YouTube, making your content shine brighter than ever! 

    YouTube descriptions: Why are they important?

    YouTube video description plays a crucial role in maximizing the impact of your videos. Not only can it improve your YouTube SEO and video rankings, but it also provides valuable information about your content. Let’s explore why video descriptions are so important.

    Also read: Step-by-Step: How to Get a Custom YouTube URL

    1. Boosting YouTube SEO:

    A well-crafted video description can significantly enhance your YouTube SEO. Including relevant keywords and phrases in your description increase the chances of your video appearing in search results. This means more visibility and potential viewership for your content.

    1. Providing Context:

    YouTube video description allows you to provide additional context and details about your video. You can break down your video into chapters or sections, making navigating and finding specific information easier for viewers. This enhances the overall viewer experience and encourages engagement.

    1. Channel Introduction: 

    YouTube video description is an excellent opportunity to introduce your channel to new viewers. You can give a brief overview of your content, highlight your unique selling points, and encourage viewers to subscribe for more exciting videos.

    1. Driving Traffic:

    Additionally, the description box enables you to include links to external websites, such as your personal website or affiliate offers. This allows you to drive traffic to other platforms or monetize your content through partnerships.

    Also read: How to put YouTube link in Instagram bio?

    How to insert links in YouTube descriptions?

    Adding a link to your YouTube description is a breeze, whether you’re using a mobile device or a desktop computer.

    On a desktop device:

    Let’s start with the steps for desktop devices:

    Step 1: Access your YouTube Studio by clicking on your profile picture in the top right corner of the YouTube interface.

    Also read: How to share YouTube videos using deep links?

    Step 2: On the left side of the dashboard, click on “Content.”

    Step 3: Locate the video you want to add a link to and click on the pencil icon to edit its description.

    Step 4: In the description box, type “https://” followed by the URL of the link you want to include.

    Step 5: Save your changes by clicking on the “Save” button.

    Congratulations! You have successfully added a link to your YouTube video description.

    Please note that the above steps are applicable to videos that are already uploaded or published. If you wish to add a link to the description of a video you are currently uploading or planning to upload, simply include “https://” and the URL in the description field during the upload process.

    Also read: How to share youtube playlist using deep links?

    Here’s how to insert links in YouTube Descriptions on a mobile device:

    On a mobile device:

    Adding a link to your YouTube description on mobile devices is just as simple as on a desktop. Follow these steps:

    Step 1: Open the YouTube app on your mobile device and sign in to your account.

    Step 2: Find the video for which you want to add a link in the description.

    Step 3: Tap on the video to open it and then tap on the “More” button (represented by three dots) below the video.

    Step 4: From the options that appear, select “Edit video.”

    Step 5: Scroll down to the description field and locate the spot where you want to add the link.

    Step 6: Type “https://” followed by the URL you want to include in the description.

    Step 7: Once you have entered the link, tap on the “Save” or “Publish” button to save your changes.

    Congratulations! You have successfully added a link to your YouTube video description using a mobile device.

    Remember, the process of adding a link remains the same: simply include “https://” followed by the URL in the description field. Now you can seamlessly include links in your YouTube video descriptions, whether you’re using a desktop computer or a mobile device. Happy linking!

    Also read: How to add YouTube links to Instagram story?

    Replug Branded Short Links CTA
    Replug Logo
    A complete link management solution
    for marketing professionals & agencies.
    Try Replug for free

    Shorten your YouTube Links for maximum impact:

    Shortening your YouTube links can be the secret ingredient to maximizing your impact. With shorter, more concise links, you’ll capture your audience’s attention, drive more clicks, and achieve higher engagement. 

    Here’s how to shorten YouTube Links using Replug:

    If you’re looking to shorten your YouTube links effectively, Replug provides a seamless solution. Follow these steps to shorten YouTube links using Replug:

    Step 1: Sign in to your Replug account or create a new account if you haven’t already.

    Step 2: On the main dashboard page, click “Select your campaign’’ or create a new campaign in just a few seconds. 

    select-campaign

    Step 3: Paste your YouTube link or any link your want to shorten in the “URL to shorten” section below “Select your campaign” and click “Create”. 

    Also read: How to put YouTube link in Instagram bio?

    url-to-shorten

    Step 4: You’ll have your YouTube link shortened, now, click the edit icon to customize your link. 

    customize url

    Step 5: Copy your link, click the “update button” and you’re done.

    By using Replug’s link-shortening feature, you not only get concise and visually appealing YouTube links, but you also gain access to advanced analytics and tracking capabilities. These insights will enable you to measure the performance of your links, understand audience engagement, and optimize your marketing strategies accordingly.

    Replug Branded Short Links CTA
    Replug Logo
    Maximize marketing ROI
    by transforming ordinary URLs into
    branded short links that convert.
    Try Replug for free

    Also read: How to Build Your Brand on YouTube – Branding on Youtube the Right Way!

    FAQs

    Why is it important to include links in my YouTube video description?

    Including links in your YouTube video description is important because it allows you to provide additional resources, redirect viewers to relevant websites, promote affiliate offers, and enhance the overall viewer experience. Links can also drive traffic to your website or social media profiles, increasing engagement and conversions.

    Can I include multiple links in my YouTube video description?

    Yes, you can include multiple links in your YouTube video description. However, it’s essential to ensure that the links are relevant and add value to your viewers. Avoid overwhelming the description with too many links, as it may appear cluttered and distract from the main content.

    Are there any restrictions or guidelines for the types of links I can add to my YouTube description?

    YouTube has community guidelines and policies that you must adhere to when adding links. Ensure that the links are not spammy, violate copyright or community standards, or redirect to malicious websites. Familiarize yourself with YouTube’s policies to ensure compliance.

    Can I add clickable links in the description that viewers can directly click on?

    Yes, YouTube automatically converts URLs in the video description to clickable links. As long as you include the full URL (e.g., https://www.example.com), viewers will be able to click on the link and be redirected to the desired webpage.\

    You may also like:

    Online Branding: The Roadmap to Stand Out and Succeed Online

    How to Create a Short Link With Ease: A Step-by-Step Guide\

    Unique URLs: What They Are and How to Use Them?

  • How to Redirect a URL in WordPress – Ultimate Guide

    How to Redirect a URL in WordPress – Ultimate Guide

    Are you tired of encountering dead ends and frustrating error messages while browsing the web? Well, get ready to bid farewell to those exasperating moments because we have a game-changer for you: URL redirection. It’s like having your very own digital GPS that ensures every click you make leads you straight to your desired online destination.

    In this guide, we’re going to unravel the mysteries of URL redirection and make it crystal clear why it’s a must-know concept for anyone navigating the digital realm. No jargon, no complicated technicalities – just straightforward explanations and practical tips that will empower you to redirect URLs like a pro.

    Ready? Let’s dive in and discover how to redirect a URL in WordPress!

    What is URL Redirection?

    URL redirection, also known as URL forwarding, is the process of directing a user from one web address (URL) to another. It is a technique used to ensure that when a user clicks on a specific URL, they are automatically redirected to a different URL, typically to a new location or destination.

    URL redirection serves multiple purposes in the digital landscape. It allows website owners to manage changes such as rebranding, domain changes, or restructuring their website’s content without breaking existing links or causing inconvenience to users. It also helps to maintain search engine rankings by preserving the authority and relevance associated with the original URL.

    Types of URL redirects:

    Types-of-url-redirects

    There are two primary types of URL redirection:

    Permanent redirect (HTTP 301): 

    types-of-url-redirect-301

    This type of redirect indicates that the original URL has moved permanently to a new location. It informs search engines and web browsers that the new URL should be considered the main and preferred address for the content. Permanent redirects are commonly used for situations like domain changes or when merging multiple web pages into a single page.

    Also read: How to Change Permalink in WordPress: Step-by-Step

    Temporary redirect (HTTP 302): 

    types-of-url-redirect-302

    Temporary redirects are used when the original URL is only temporarily unavailable or has moved to a different location for a short period. It instructs web browsers and search engines to visit the new URL temporarily, while still recognizing the original URL. Temporary redirects are often used during website maintenance or when testing new pages before making them permanent.

    Other unusual redirects include:

    Besides the commonly used permanent redirect (HTTP 301) and temporary redirect (HTTP 302), there are a few other types of redirects that serve specific purposes. These include:

    303 see other: 

    This redirect is similar to the temporary redirect (HTTP 302) but has a specific meaning defined in the HTTP protocol. It indicates to the browser that the requested resource can be found at a different location, and the response to the redirected request should be a GET method.

    307 temporary redirect: 

    This is another type of temporary redirect, similar to HTTP 302. It indicates to the browser that the requested resource has temporarily moved to a different location. However, unlike HTTP 302, the browser should continue to use the same HTTP method (e.g., POST) for the redirected request.

    308 permanent redirect: 

    Similar to the permanent redirect (HTTP 301), the 308 status code indicates that the requested resource has permanently moved to a new location. The key difference is that the browser should use the same HTTP method (e.g., POST) for the redirected request, whereas HTTP 301 may convert a POST request to a GET request.

    These additional redirect types (303, 307, and 308) have specific use cases and are less commonly utilized compared to HTTP 301 and HTTP 302 redirects. The choice of which redirect type to use depends on the specific requirements of your website and the desired behavior for the redirected requests.

    How to redirect a URL in WordPress?

    To redirect a URL in WordPress, you can use either a plugin or modify the .htaccess file. Here are two methods you can follow:

    Method 1: Using a WordPress redirection plugin

    Step 1: Install and activate a redirection plugin

    redirection-plugin

    Go to your WordPress dashboard, navigate to “Plugins” > “Add New,” and search for a redirection plugin such as “Redirection” or “Yoast SEO.” Install and activate the plugin of your choice.

    Step 2: Set up the redirect

    Once the plugin is activated, go to the plugin’s settings or options page (usually located under “Tools” or “SEO” in the dashboard menu). Look for a section related to URL redirection or redirects.

    Step 3: Add a new redirection rule

    In the plugin’s settings, you should find an option to add a new redirection rule. Enter the old URL (source) and the new URL (target) where you want the redirect to point. Choose the appropriate redirect type (301 or 302) as needed.

    Step 4: Save the redirection rule

    After filling in the necessary details, save the redirection rule. The plugin will handle the redirection, and when someone accesses the old URL, they will be automatically redirected to the new URL you specified.

    Also read: How To Change A URL Of Any Website?

    Method 2: Modifying the .htaccess file

    Step 1:Access your website’s files 

    Connect to your website’s hosting account using FTP (File Transfer Protocol) or access the file manager in your hosting control panel.

    Step 2: Backup the .htaccess file 

    Before making any changes, it’s important to create a backup of the existing .htaccess file in case anything goes wrong. Simply download a copy of the .htaccess file to your local computer.

    Step 3: Edit the .htaccess file 

    open-htaccess-file

    Open the .htaccess file using a text editor. Add the following code at the beginning or end of the file, depending on your preference:

    redirection-in-cpanel

    Replace “/old-url/” with the actual URL slug or path of the old URL you want to redirect, and “http://www.example.com/new-url” with the desired destination URL.

    Also read: URL Hijacking Uncovered: A Complete Guide to Protecting Your Online Presence

    Step 4: Save and upload the modified .htaccess file 

    Save the changes to the .htaccess file and upload it back to the root directory of your WordPress installation, overwriting the existing file.

    Step 5: Test the redirection 

    Visit the old URL in your web browser and verify that it correctly redirects to the new URL you specified. If the redirection is working as expected, you have successfully redirected the URL in WordPress.

    Remember, modifying the .htaccess file requires caution, as any mistakes in the code can cause issues with your website. Make sure to double-check the changes and keep a backup of the original .htaccess file for safety purposes.

    Why you should create a redirect?

    There are several scenarios in which you may need to create a redirect. Here are some common situations where redirects are useful:

    1. Rebranding or website restructuring: 

    If you undergo a rebranding process or make significant changes to your website’s structure, you may need to redirect old URLs to their new equivalents. This ensures that users who access the old URLs are seamlessly directed to the updated content.

    2. Changing domain names: 

    When you change your website’s domain name, it’s essential to set up redirects from the old domain to the new one. This preserves your website’s traffic, and search engine rankings, and ensures that visitors who may have bookmarked or shared your old URLs are still able to access your content.

    3. Handling outdated or expired content: 

    When you remove or archive certain pages or posts on your website, you can create redirects to guide users to relevant and up-to-date content. This prevents visitors from encountering dead ends or 404 error pages and helps maintain a positive user experience.

    4. Managing affiliate or marketing campaigns: 

    If you’re running specific marketing campaigns or affiliate programs that involve unique URLs, you might need to create redirects to track and direct visitors to the intended landing pages. This allows you to monitor campaign performance and ensure visitors land at the correct destination.

    5. Correcting broken or mistyped URLs: 

    If you discover broken or mistyped URLs on your website, creating redirects can fix these issues. By redirecting the incorrect URLs to the correct ones, you can ensure a smooth browsing experience for your users and prevent them from encountering frustrating dead ends.

    Remember, redirects are powerful tools that can help you maintain website functionality, improve user experience, and preserve SEO efforts. Whenever you make changes to your website that impact URLs, consider whether a redirect is necessary to ensure a seamless transition and to guide users and search engines to the right content.

    Also read: How to Make a Url Link in Word?

    Final words:

    In the vast realm of the internet, URL redirection is the key to unlocking seamless navigation and preserving your online presence. By mastering the art of redirection, you can ensure a flawless user experience, maintain search engine rankings, and adapt to changes with ease. 

    Whether you’re rebranding, restructuring, or simply seeking to enhance your website’s performance, redirecting URLs is your secret weapon. So, embrace the power of redirection, navigate the digital landscape with confidence, and watch as your online presence soars to new heights. Get ready to redirect your way to success!

    FAQs

    FAQs

    What is the difference between a permanent redirect (HTTP 301) and a temporary redirect (HTTP 302)?

    A permanent redirect (HTTP 301) informs search engines and browsers that the original URL has permanently moved to a new location. A temporary redirect (HTTP 302) indicates a temporary move or change. It’s important to choose the appropriate type depending on the situation.

    How can URL redirection impact my website’s search engine rankings?

    URL redirection can impact search engine rankings by preserving the authority and relevance associated with the original URL. If implemented correctly, redirects can transfer link equity and prevent loss of traffic and rankings when URLs change or move.

    Can I implement URL redirection without a plugin?

    Yes, you can implement URL redirection without a plugin by modifying the .htaccess file on your server. This method allows you to set up server-side redirects using rules defined in the .htaccess file.

    Are there any SEO best practices to consider when setting up URL redirects?

    Yes, when setting up URL redirects, it’s important to ensure that the redirect is a one-to-one mapping from the old URL to the new URL. Additionally, update internal links and notify relevant parties to update their references. Monitor and maintain redirects to address any issues promptly.

    How do I test if my URL redirection is working correctly?

    To test URL redirection, simply access the old URL and verify that you are automatically redirected to the new URL. Test on different devices and browsers to ensure compatibility and functionality.

    What should I do if I encounter redirect loops or broken redirects?

    If you encounter redirect loops or broken redirects, review your redirect configurations and ensure they are set up correctly. Check for any circular redirections or incorrect rules. Make necessary corrections and retest the redirects.

    Is it possible to redirect multiple URLs at once?

    Yes, it is possible to redirect multiple URLs at once. In WordPress, you can use a plugin that supports bulk or wildcard redirects. Alternatively, with server-side redirects, you can set up rules in the .htaccess file to redirect multiple URLs simultaneously.

    You may also like:

    How to automatically shorten URLs in an RSS Feed

    What Is a Permalink? How Does It Impact SEO Ranking?

    Step-by-Step: How to Get a Custom YouTube URL

    How to Convert video too Link?

  • How to Change Permalink in WordPress: Step-by-Step

    How to Change Permalink in WordPress: Step-by-Step

    In WordPress, permalinks play a crucial role in defining the structure of your website’s URLs. Changing the permalink structure can improve your site’s search engine optimization (SEO) and make your links more user-friendly. This guide will walk you through the process of changing permalinks in WordPress by providing step-by-step instructions. Let’s dive in!

    Here’s how to change Permalink in WordPress:

    Step 1: Log in to your WordPress admin dashboard

    To begin, log in to your WordPress admin dashboard using your credentials. Once logged in, you’ll have access to the necessary settings to modify your permalink structure.

    wordpress-login

    Also read: Track Your Success: How to Create a Tracking Link?

    Step 2: Access Permalink settings

    From the left-hand menu, locate and click on “Settings,” and then select “Permalinks.” This action will take you to the Permalink Settings page, where you can customize your Permalink structure.

    setting-permalinks

    Step 3: Choose a common Permalink structure or create a custom one

    On the Permalink Settings page, you’ll find various pre-defined options for permalink structures, including plain, day and name, month and name, numeric, post name, and more. Select the one that best suits your needs. If you prefer a custom permalink structure, proceed to Step 4.

    permalink setting

    Also read: How to rename a link using Repug?

    Step 4: Create a custom Permalink structure (optional)

    If you want a custom permalink structure, select the “Custom Structure” option on the Permalink Settings page. This will reveal a text field where you can enter your desired permalink structure using tags. Utilize tags like %year%, %monthnum%, %day%, %post_id%, %postname%, %category%, %author%, and %pagename% to craft a unique permalink structure.

    Step 5: Save changes

    After selecting a common or custom permalink structure, click on the “Save Changes” button located at the bottom of the Permalink Settings page. By doing so, your new permalink settings will be saved, and WordPress will automatically update the URLs accordingly.

    Also read: How to shorten a link?

    FAQs

    What is a Permalink?

    A permalink, short for “permanent link,” is a URL (Uniform Resource Locator) that points to a specific web page or post on a website. It is called a “permanent” link because it is intended to remain unchanged and accessible over time, even if the content of the page or post is updated or moved.

    Permalinks determine the structure and format of URLs for individual posts, pages, categories, and other content types. They provide a unique and stable address that can be used to access a specific piece of content directly. Permalinks are often used in navigation menus, hyperlinks, search engine results, social media shares, and other online references.

    Will changing my permalink structure affect my website’s SEO?

    Yes, changing the permalink structure can impact your SEO. It’s advisable to set up redirects or use a plugin to manage redirects in order to preserve the SEO value of your URLs and prevent broken links.

    Can I change the permalink structure for existing posts and pages?

    Yes, when you modify the permalink structure, it will apply to all new posts and pages you create. However, for existing content, the URLs will change, which may result in broken links. Implementing redirects can help mitigate this issue.

    What if I change my mind after modifying the permalink structure?

    A3: WordPress allows you to revert to your previous permalink structure. Simply revisit the Permalink Settings page, choose the desired structure, and save the changes. However, keep in mind that this will once again alter the URLs of your posts and pages.

    Are there any performance implications of changing the permalink structure?

    Generally, changing the permalink structure itself doesn’t have a significant impact on website performance. However, if you have a large number of posts or pages, updating the URLs may require additional server resources during the redirect process.

    Can I localize my permalinks for different languages?

    Yes, if you have a multilingual website, you can utilize plugins like WPML or Polylang to set up language-specific permalink structures. These plugins enable you to create separate URLs for different language versions of your content.

    Trending:

    How To Put A Link In TikTok Bio?

    How to Get Followers on Instagram Fast?

  • How to Unblock Websites: 7 Ways to Access Restricted Content

    How to Unblock Websites: 7 Ways to Access Restricted Content

    In today’s digital age, the internet has become an essential part of our daily lives, allowing us to access information, connect with others, and conduct business anywhere. 

    However, some websites and online content may be blocked or restricted in certain regions, making accessing the information they need difficult. Being blocked can be frustrating if you’re trying to stream your favorite TV show or access a website for work or research purposes. 

    Luckily, there are several ways to unblock websites and gain access to restricted content. In this guide, we’ll explore seven effective methods for accessing blocked websites and content, so you can get back to browsing the internet freely and securely.

    Why do websites get blocked?

    There are various reasons why websites can get blocked. Some of the common reasons include:

    • Government censorship

    In some countries, the government may block certain websites that they consider to be a threat to national security, or that they deem inappropriate.

    • Workplace or school restrictions

    Employers and schools often use web filters to prevent employees or students from accessing websites that are not related to work or studies.

    • Geo-restrictions

    Some websites may be blocked in certain countries due to licensing agreements or legal restrictions.

    • Website maintenance: 

    Occasionally, websites may be temporarily blocked for maintenance or updates.

    • Hacking and cyber threats 

    Websites that have been hacked or are susceptible to cyber-attacks may be temporarily or permanently blocked to prevent further damage.

    The reasons for website blocking can vary widely, and it’s important to understand why a website has been blocked before attempting to access it using any of the methods mentioned above.

    Also read: How to Block a URL in Chrome?

    How to unblock websites?   

    Here’s how to unblock websites using seven different ways:

    1. Use a VPN

    use-vpn

    If you’re looking for a reliable and secure way to access restricted websites, a Virtual Private Network (VPN) is a great option. A VPN encrypts your internet traffic and routes it through a secure server in another location, making it look like you’re accessing the internet from that location. This not only lets you unblock websites that are restricted in your region, but it also adds an extra layer of security to your online activities.

    VPNs are easy to use, simply download and install a reputable VPN service on your device, select a server location, and connect to the internet. 

    2. Use a Proxy

    use-a-proxy

    Another way to unblock restricted websites is by using a proxy server. A proxy acts as a middleman between your device and the internet, allowing you to access websites that may be blocked in your region. Proxies are typically free to use, but they may not always be reliable or secure. For affordable and secure proxy solutions, websites like ProxyCoupons can help you find deals and discounts on trusted proxy providers.

    For example, you can use a web-based proxy site such as KProxy to access the blocked website by entering the website URL into the proxy site’s search bar. To use a proxy, you’ll need to find a proxy server and configure your device to use it. You can find free proxy servers online, but it’s important to be cautious when using them, as they may not be trustworthy. Using a free online proxy checker is a helpful way to verify the functionality and security of a proxy server before relying on it for your online activities.

    Also read: URL Hijacking Uncovered: A Complete Guide to Protecting Your Online Presence

    3. Use Tor

    tor-browser

    Tor is a free and open-source software that lets you browse the internet anonymously. It works by encrypting your internet traffic and routing it through a network of volunteer-run servers, making it difficult for anyone to track your online activities.

    To use Tor, simply download and install the Tor browser on your device, and you’ll be able to access the internet anonymously. However, it’s worth noting that Tor can be slower than other methods of accessing the internet, so it may not be the best option if you need to access websites quickly.

    4. Use a URL Shortener

    use-a-url-shortener

    If a website is blocked due to its URL, you can try using a URL shortener to access it. URL shorteners like Replug or Rebrandly take a long website address and shorten it to a shorter, more manageable URL. By using a URL shortener, you may be able to bypass website blocks that are based on the website’s URL.

    When using a URL shortener, simply visit the website of your chosen service, enter the URL of the blocked website, and click “shorten.” You’ll be provided with a new, shortened URL that you can use to access the website.

    Also read: How to Strengthen Your Social Media Presence Using Replug and ContentStudio

    5. Access the Website via Its Crawl History

    use-way-back-machine

    If a website has been recently blocked in your region, you may still be able to access it via its crawl history. Search engines like Google and Bing regularly crawl websites and store cached versions of the website’s pages. By accessing the cached version of the website, you may be able to bypass any website blocks that are currently in place.

    To access a website’s crawl history, simply search for the website on a search engine and look for the “cached” option next to the search results. Clicking on the cached version will take you to a version of the website that was saved by the search engine. For example, you can use the Wayback Machine website to access a website’s previous versions and find the version of the website that was not blocked.

    6. Change Your Device Settings

    In some cases, website blocks may be based on your device settings. For example, if you’re using a public Wi-Fi network, the network’s administrator may have blocked certain websites. To bypass these blocks, you can try changing your device’s DNS settings or using a different Wi-Fi network.

    To change your device’s DNS settings, go to your device’s network settings and enter a new DNS server address. Some popular DNS servers include Google DNS, OpenDNS, and Cloudflare DNS.

    Also read: Easy Guide For Fixing URL Blacklist

    7. Open a New Account

    If a website is blocked due to your account being banned or suspended, you may need to create a new account to access the website. However, this method may not work for all websites, as some may block your IP address from accessing their content even if you create a new account.

    To open a new account, you will need to create a new email address, username, and password. Make sure to use a different email address than the one you used for your previous account, as some websites may block your new account if they detect that it is associated with a previously banned or suspended account.

    This method is useful if the website has banned your previous account, but it may not be effective if the website has blocked your IP address. Additionally, creating multiple accounts on a website can be against their terms of service, so be sure to read the website’s policies before creating a new account.

    For example, social media platforms like Twitter and Facebook may ban accounts for violating their community guidelines. In such cases, creating a new account with a different email address and username can help you regain access to the website. However, some websites like Netflix may not allow users to create multiple accounts, and may even block the new account if they detect that it is associated with a previously banned or suspended account.

    Also read: 5 Top Link Rotators: Convert More With Traffic Routing & A/B Testing

    FAQs

    Is it safe to use a proxy to unblock websites?

    While using a proxy can be a quick and easy way to access blocked websites, it’s important to be cautious about the security implications. Some proxies may collect and store your personal information, or be used by hackers to steal your data. Make sure to choose a reputable and secure proxy provider, and use HTTPS websites to ensure that your browsing activity is encrypted.

    How do I know if a website is blocked?

    If you’re unable to access a website, the first step is to check whether the site is actually down or blocked. You can use online tools such as DownForEveryoneOrJustMe.com to see if the site is unavailable to everyone, or just to you. You can also try accessing the site using a different device or network to rule out any issues with your own connection.

    Can I unblock websites on my mobile phone?

    Yes, many of the methods for unblocking websites described above can also be used on mobile devices. For example, you can use a VPN app to access blocked sites, or use a browser with built-in proxy support. However, keep in mind that some mobile networks may have more aggressive content filtering in place, so you may need to use more advanced methods to bypass these restrictions.

    Is it legal to unblock websites?

    The legality of unblocking websites can vary depending on the country and the circumstances. In some countries, it is illegal to use VPNs or proxies to access blocked websites. However, in most cases, unblocking websites for personal use is not considered illegal. It is always recommended to research the local laws and regulations related to internet usage and unblocking websites before attempting to do so.

    Why is my internet blocking websites?

    There can be various reasons why your internet is blocking websites. One common reason is the use of content filtering software or parental controls, which block access to certain categories of websites. Another reason could be the use of firewalls or antivirus software that blocks websites with malicious content or phishing attempts. In some cases, your internet service provider (ISP) may be blocking certain websites due to legal or regulatory reasons.

    How do I stop my browser from blocking a website?

    If your browser is blocking a website, you can try the following steps:

    – Check if the website is included in your browser’s block list and remove it if necessary.

    – Disable any browser extensions that may be causing the issue.

    – Clear your browser cache and cookies.

    – Reset your browser settings to default.

    How do I unblock a website on a school Chromebook?

    If you are using a school Chromebook, the ability to unblock websites may be restricted by the school’s IT policies. However, you can try the following steps:

    – Use a VPN or proxy to access the blocked website.

    – Try accessing the website through a different browser.

    – Ask the school’s IT department to unblock the website if it is necessary for academic purposes.

    Trending:

    How to create a vanity URL?

    What is TikTok Pixel?: Learn To Set Up TikTok Pixel

    How to put a YouTube link in the Instagram bio?

  • How to download Facebook videos?

    How to download Facebook videos?

    Facebook is among the most popular social media platforms billions of people use worldwide. Its vast collection of videos has become a go-to source for entertainment, information, and education. However, users may want to download Facebook videos for offline viewing, sharing with friends, or reposting on other platforms. 

    In this context, downloading Facebook videos can be helpful for those who want to save their favorite videos, access them without an internet connection, or keep a backup copy. However, it’s essential to remember that downloading videos without the owner’s consent violates copyright laws and Facebook’s terms of service. 

    Therefore, respecting the creator’s rights and using downloaded videos ethically and responsibly is crucial.

    Also Read: How To Utilize Replug for Facebook Retargeting Ads?

    Here’s how to download Facebook videos on mobile and computer devices:

    How to download Facebook videos on a mobile device?

    There are several ways to download Facebook videos on a mobile device. Here’s how:

    Step 1: Log in to Facebook from your mobile phone. 

    Step 2: Play the video you want to download and tap “3 dots” in the upper right corner of the video.

    3 dots

    Step 3: Tap “copy link”

    copy link

    Also Read: How to Change Facebook URL on Mobile and Desktop?

    Open Chrome on your mobile device: 

    Step 4: Paste the link in the search bar to open the video in Chrome. 

    Step 5: Play the video and long-tap on it. 

    play video

    Step 6: Tap “download video,” and your video will be downloaded.  

    download video

    [branded_short_links]

    How to download Facebook videos on a computer device?

    Step 1: Log in to Facebook on a computer using a browser. 

    Step 2: Open the video you want to download and click “3 dots” on the upper right side of the video. 

    3 dots

    Step 3: Click “copy link” to copy the video link. 

    copy link

    Also Read: How To Turn Off Vanish Mode On Instagram?

    Step 4: Open another tab on your computer browser and writeFacebook video downloader”. 

    Step 5: Open a facebook Video Downloader online tool from the search results, paste the video link, click the download button, and select the preferred quality. Your video will be downloaded within a few moments.

    Facebook Video Downloader- ContentStudio

    Also Read: How To Save TikTok Videos Without The Watermark?

    How to download reel videos from Facebook?

    To download Reels videos from Facebook, you can use the following method:

    1. Open the Facebook app and find the Reels video you want to download.
    2. Tap on the Reels video to open it in full screen.
    3. Tap on the three dots in the bottom right corner of the screen.
    4. Select “Save Video” or “Save Reel” from the options.

    The Reels video will be saved to your device’s camera roll or gallery.

    If the “Save Video” or “Save Reel” option is not available, it may be because the creator has disabled the option to save their videos. For a case like this, you can download Facebook reels with FBDownloader, an online option for saving Facebook reels for offline use.

    However, downloading videos without the owner’s consent violates copyright laws and Facebook’s terms of service. Therefore, using downloaded videos ethically and responsibly is essential, respecting the creator’s rights.

    Also Read: How To Utilize Replug for Facebook Retargeting Ads?

    FAQs

    Is it legal to download Facebook videos?

    It depends on the copyright laws of your country and Facebook’s terms of service. Downloading videos without the owner’s consent is generally considered a violation of copyright laws, and Facebook’s terms of service prohibit the downloading of videos without permission.

    Can I download live videos from Facebook?

    Live videos cannot be downloaded directly from Facebook, but some third-party tools can help you record and download live videos from Facebook.

    How do I download private Facebook videos?

    Private Facebook videos cannot be downloaded unless you can access the video or the owner’s permission. If you have access to the video, you can use the same methods as downloading public videos. You can try contacting the owner to request permission if you don’t have access.

    Is there any app to download Facebook videos on iOS devices?

    Yes, several apps, such as “Video Downloader for Facebook” or “MyMedia,” can be used to download Facebook videos on iOS devices.

    Can I download Facebook videos in high quality?

    Yes, some video downloader apps and websites allow you to download videos of high quality. However, remember that higher-quality videos take up more space on your device.

    Trending Topics:

    15 Proven Facebook SEO Techniques To Increase Brand Visibility

    How to link Instagram to TikTok?

    Top 5 Paid URL Shorteners Worth Paying For!

    Social Media Risks For Brands. How To Avoid Them?

  • How to post TikTok on Instagram: Step-by-step Guide

    How to post TikTok on Instagram: Step-by-step Guide

    Are you an avid TikTok user and want to share your content with your Instagram followers? Do you wish to showcase your TikTok creations to a broader audience? Well, you’re in luck! In this guide, we’ll show you how to post TikTok videos on Instagram, so you can double up your social media reach and get more eyes on your entertaining content. So, get ready to learn the ropes and become a social media sensation!

    Here’s how to share TikTok videos on Instagram:

    TikTok has become a popular platform for creating and sharing short-form videos. But, if you want to share your TikTok content with your Instagram followers, you might be wondering how to do it. The good news is that it’s relatively easy to post TikTok videos on Instagram, and you can share them in various formats such as feeds, stories, and reels.

    Plus, if you need a handy tool to download your TikTok videos for Instagram, consider using a TikTok video downloader to streamline the process.

    How to post TikTok to your Instagram feed?

    To post a TikTok video on your Instagram feed, follow these steps:

    Step 1: Open the TikTok app and find the video you want to share.

    Step 2: Tap on the “3 dots” or “share” icon located on the right side of the screen.

    3-dots-share-button

    Also read: How to get more followers on TikTok?

    Step 3: Tap on the “Instagram” option.

    select-instagram

    Also read: How To Save TikTok Videos Without The Watermark?

    Step 4: Choose to post the video to your Instagram feed.

    Instagram-feed

    Step 5: Edit the video as desired, add filters, captions, or other adjustments, and then tap “Next.”

    edit-video

    Also read: How to Get Followers on Instagram Fast?

    Step 6: Tap “share” and your video will be shared on your Instagram feed. 

    How to post a TikTok to Instagram stories?

    To post a TikTok video on your Instagram stories, follow these steps:

    Step 1: Open the TikTok app and find the video you want to share.

    Step 2: Tap on the “Share” or “3-dots” icon located on the right side of the screen.

    Step 3: Tap on the “Instagram” option.

    Step 4: Choose to post the video to your Instagram story. 

    Step 5: Edit the video as desired, add filters, captions, or other adjustments, and share. 

    Also read: How To Add A Instagram Link In Bio?

    How to post a TikTok to Instagram Reels?

    To post a TikTok video on your Instagram reels, follow these steps:

    Step 1: Open the TikTok app and find the video you want to share.

    Step 2: Tap on the “Share” icon located on the right side of the screen.

    Step 3: Tap on the “Save video” option to save the video to your device.

    save-video

    Also read: How To Get More TikTok Views? 15 Hacks That Work

    Step 4: Open the Instagram app and tap on the “Reels” option.

    reels-option

    Also read: How to Make Money on TikTok?

    Step 5: Select the video you want to share from your device’s camera roll, add filters or other adjustments, and then tap “Share.”

    And there you have it! Now you know how to post TikTok videos on Instagram, whether it’s for your feed, stories, or reels. So, go ahead and share your creative TikTok content with your Instagram followers and watch your social media presence grow!

    FAQs

    Can I post TikTok videos directly to Instagram?

    No, you cannot post TikTok videos directly to Instagram. You need to save the TikTok video to your device first and then upload it to Instagram.

    Will my TikTok video lose quality when I upload it to Instagram?

    It’s possible that your TikTok video may lose some quality when you upload it to Instagram due to differences in compression and resolution. To minimize quality loss, try to save the TikTok video in the highest possible solution and choose the best Instagram video settings for your device.

    Can I automate the process of sharing TikTok videos on Instagram?

    While there is no direct way to automatically share TikTok videos to Instagram, you can use third-party apps or tools like Content Studio to automate the process to some extent. However, monitoring the results and making any necessary adjustments is important to ensure your content is shared accurately and effectively.

    Trending:

    TikTok For Business: Strategies to Promote Small Businesses

    7 Ways You Can Use Instagram Bio Links to Your Advantage

    How to download Facebook videos?

    What is the Best Time to Post on TikTok

  • Step-by-Step: How to Get a Custom YouTube URL

    Step-by-Step: How to Get a Custom YouTube URL

    Are you looking to give your YouTube channel a more professional look? Do you want to make it easier for your viewers to find and remember your channel? One great way to do that is by getting a custom YouTube URL. 

    However, there’s a catch: If you need to change your URL, you can do this by updating your handle at youtube.com/handle

    Important note: 

    Please note that YouTube no longer allows the creation of new custom URLs, and existing ones cannot be modified. However, your current custom URL will still work. If you need to permanently delete your custom URL, you’ll have to delete your entire channel, which is a permanent action.

    If you want to create a new URL for your channel, you can change your handle. Whenever you do this, a new handle URL will be generated automatically, such as youtube.com/@youtubecreators.

    But don’t worry, changing your handle is a quick and easy process, and it can be well worth it to have a custom URL that reflects your brand or channel name. 

    In this article, we’ll guide you through the steps on how to change your YouTube handle and get a custom YouTube URL, so you can take your channel to the next level. Let’s dive in!

    How to get a custom YouTube URL?

    Step 1: Open YouTube and sign in you your account. 

    Step 2: Click your profile icon in the top right corner and select YouTube Studio from the drop-down menu. 

    youtube-studio

    Also read: How to put YouTube link in Instagram bio?

    Step 3: Click “customization” from the left side menu. 

    customization

    Step 4: Click “basic-info” and you’ll find your YouTube handle and URL under the Handle section. 

    basic-info-handle

    Also read: How to share a youtube playlist using deep links?

    Step 5: Type in your new handle name to see available handles. When the green tick icon appears, it means the handle is available. 

    Note: Copy your handle URL below the handle name. That’s also your YouTube channel URL, you can share it with your audience.  

    new-handle-url

    Step 6: Click the publish button and you’re done. 

    publish-button

    Final words

    To sum up, obtaining a custom URL for your YouTube channel can be an effective way to enhance your channel’s branding and make it easier for viewers to find you. Although YouTube no longer offers the option to create new custom URLs, you can still change your existing URL by updating your handle. Following the steps and tips outlined in this article, you can successfully obtain a custom YouTube URL that reflects your brand and helps you stand out on the platform.

    FAQs

    Can I change my custom YouTube URL?

    YouTube no longer allows changing of custom URLs. However, you can still update your handle, which will automatically create a new handle URL for your channel.

    Can I delete my custom YouTube URL?

    Yes, you can delete your custom YouTube URL by deleting your entire channel. However, please note that deleting your channel is a permanent action and cannot be undone.

    How many subscribers do I need to get a custom YouTube URL?

    To be eligible for a custom YouTube URL, you need to have at least 100 subscribers, be at least 30 days old, have an uploaded profile picture, and have uploaded channel art.

    What happens if I change my YouTube channel name?

    If you change your YouTube channel name, your custom URL will still work. However, your handle URL will be updated with your new channel name.

    Trending:

    How to add YouTube links to Instagram stories?

    How to Add Spotify Link to TikTok Bio?

    How to Convert video to Link?

    How to add a Twitter link to your Instagram bio?


  • A Complete Guide To Use QR Code Marketing

    A Complete Guide To Use QR Code Marketing

    What is QR Code Marketing?

    QR code is the bridge between your online and offline marketing efforts. Nurturing your consumers through the marketing funnel by giving them the correct information at the right time is the key to a successful marketing campaign.

    Technology is meant to complement traditional print marketing and advertising instead of replacing it. The most successful and engaging marketing campaigns have one thing in common: integrating digital marketing approaches with conventional advertising.

    What is QR Code?

    QR are 2D barcodes that are scanned through smartphone devices through cameras or their QR code scanning capability.

    The strategic use and placement of QR codes with access to the updated and relevant information can be the most significant asset.

    qr-code-marketing-

    Why does QR code marketing matter?  

    The QR codes were used by a Toyota subsidiary named Denso in 1994. They helped in tracking the vehicle parts and streamline the manufacturing process.

    This allowed the fast-decoding process and thus called Quick Response Code.

    Back when it was introduced, there was a minimum number of people leveraging this technology. With a tiny number of use-cases, marketers predicted the QR code trend not to last too long. 

    Fast forward to 2020; the pandemic catapulted the QR code adoption not because of its versatility but for the fact that it was a safe, hygienic and cost-effective solution.

    Not just that, it also gave an option to collect data from the traditional marketing campaigns.

    Is QR code marketing here to stay?

    According to Bank My Cell, there are 6.648 billion smartphone users globally, which means 83.40% of the world population owns a smartphone. With the growing rate of QR code adoption, they can help increase brand awareness, increase sales and enhance customer engagement with the brand.

    Modern way to create QR codes is through URL shorteners. Tools like Replug, Bitly and other allows users to create custom shortened URLs without needing to know anything about HTML. When sharing these shortened links, users just need to scan the link with their smartphone camera. This method is great because no technical skills are required, and any recipient can access the shortened URL.

    How can you use QR codes for your marketing goals?

    Increase social media following:

    Social media presence for any business is no longer an option. It’s a necessity. You can use QR codes on the products for your marketing material to direct users to your social media pages like Facebook, Instagram.

    This is a great way to maximize reach on social media networks. You can also ask them for a review of your product or tag them in the user-generated content with your product.

    Get app downloads:

    If used strategically, QR code marketing can be one of the fastest ways to increase app downloads and drive users into the mobile app marketing funnel. Burger King used them during 2020 MTV VMAs to let viewers download the Burger King app. These ads encouraged the viewers to scan the codes to download the app and avail various discounts.

    Related: QR code sharing with bio links 

    Drive more traffic to your website:

    You can use the QR code to direct viewers to a page or website with detailed information. The information not covered in the print ad, such as product description, pricing list, dates and time, the procedure to place an order, can be communicated via the code. The luxury brand, Burberry, introduced sustainable labeling where they outlined the product attributes through this.

    QR-code-shopping-

    Source

    Build email marketing lists:

    QR codes can be used on marketing materials from billboards, print ads and business cards to direct users to webpages. This helps marketers to build email lists by asking users to sign up to avail certain offers.
    This will be a good strategy to boost your email marketing strategy.

    Enhance the user experience:

    You can improve the user experience by offering them valuable and necessary information in the QR code—for example, an instructional video to set up the product or printable sheet or link to the recipe on food products. 

    Product QR code


    Source 

    Increase leads:
    QR codes can be strategically used for lead generation according to the kind of business. For example, a real estate agency had to sell a large office building.
    They used these to generate and track leads.

    qr real estate

    Source 

    Win customer’s trust and loyalty:

    You can use QR codes for establishing product transparency through product packaging. This will help you to win your customer’s trust.  It will increase the customer’s loyalty and engagement which is why they are more likely will stick to the brand.

    combibloc_bifruit


    Source

    Share contact details:
    With the vCard QR code, you can share your contact details such as email, work address, phone details, location etc., with your customers. The dynamic one gives you the freedom to edit the information many times without reprinting the code.

    QR-code

    Source

    Personalize the experience:
    With the flexibility to embed multiple content formats into QR codes, brands have attracted customers with personalized shopping experiences. JC Penny on Christmas released “Santa tags”. The idea was to allow the giver to record a personalized message played when the recipient scans the code.

    Increase post purchase engagement:
    Avail the opportunity to engage your customer after the purchase. QR codes for rating and review pages are the one way to go about it. You can also link these to discount coupons for their future purchases, so they continue shopping with you. The Amazon QR codes drive repeat purchases and thus increasing the website traffic.

    packaging-QR


    Source

    Related: 8 Ways to Increase eCommerce Sales Using Social Media 

    Get reviews and feedback:
    According to writers block hive, 86% of people said they trust online reviews as much as they believe in word of mouth.
    You can use a QR code to ask for product reviews and build the customer’s trust by providing them with the information they are looking for.

    yelp reviews QR


    Source 

    QR code marketing Use Cases:

    1-Restaurant Menus:
    With the pandemic, restaurants looked for safe and hygienic options for their customers. From menus to payments, restaurants used QR codes to design a contactless experience for their customers.

    QR code menus lower the printing price and are also more convenient to update about the availability of items, price, details etc., without reprinting.

    QR code scanner

    Source

    2-OOH Advertising:

    One cannot deny the effectiveness of OOH advertising. According to Dash Two’s study, 71% of consumers said digital billboards are more appealing than online ads. Pairing the billboard with a QR code strategically can drive consumers to take action and thus getting you data.

    Walmart, during the 2020 holidays, when their sales are supposed to be high, didn’t observe the shoppers due to the covid-19 pandemic, they launched virtual billboards at places where they did not have brick and mortar stores. 

    These virtual stores allowed people to scan and buy the products on the spot from their online stores.

    QR code marketing

    Source

    3-Adding a twist to museum:

    Sukiennice Museum in Poland used QR codes to tell the “secrets behind paintings”.

    Visitors scan the code next to a painting, and they get a series of stories about the artwork, its history and the painter themselves.

    The intriguing stories about war, deception, insanity, love and romance added to the experience of the museum visitors.

    4- Recycling:

    PepsiCo used an integrated hydration platform with QR codes in their soda stream style dispenser. For single-use plastic, PepsiCo used an integrated hydration platform. Other companies are embracing this innovation as well. Waste Direct, a leading waste disposal and recycling service in the UK, is leveraging QR codes to simplify waste management for convenient waste collection scheduling and more.

    The users can bring their bottles to fill them with still or carbonated options. Thus, replacing the vending machine with dispensers that use QR code stickers. The system was launched in schools and offices, but it was later expanded into public places.

    pepsico QR


    Source

    How to get more scans with QR code:

    1. Add a call for action next to your QR code:
      A QR code is like the door opening into the experience your customer wants to have. But if there is no sign on the door, nobody will enter. A compelling call to action is therefore necessary.
    2. QR code Placement:
      Make sure your QR code is strategically placed in a well visible place where your target user can notice it and quickly scan it. It should be set against a bright background to increase its readability.
    3. Brand your QR code:
      Make sure the QR code reflects your brand identity. Branding is an essential part of it as well to generate more scans. Make them more attractive by customising them with brand colours and logos.
      QR code branding


      Source


    4. Mind QR code proportion:
      While using it on the marketing material or packaging, make sure not to distort the ratio since it can make the scanning difficult.
    5. Minimize the number of QR codes:
      If there are multiple QR codes on the package or your print ad, it’ll confuse the audience, and thus you’ll miss the opportunity.
      Ideally, you should go with one goal per QR code, but if you want to give them a holistic view of your product, then you should create a universal link and direct them to the information they are looking for.
    6. Use interactive landing pages:
      When linking your QR code to the video, file or landing page, make the content accessible on a smartphone and mobile-friendly.
    7. High-quality QR code:
      Make sure you use a high-quality QR code with well-maintained whitespace so it is easy to read and scan.
    8. Track data:
      Once your QR code marketing goes live, keep track of data. This data will tell you about your best performing and underperforming campaigns, and you can optimise them accordingly.

    Benefits of dynamic QR code:

    1. Editable:
      You can edit your dynamic QR code’s content at any time, allowing you to print your active QR codes, and you can still change the content at any time.
    2. Data tracking:
      You can track data of your dynamic QR code addresses, contact numbers, and names; you can follow the number of scans, time of a scan, location of the scan and even people used it to scan it.
    3. Cost-effective:
      A QR code generator is very cost-effective, and some platforms even offer it for free

    Choosing a QR code generator:

    Making the right choice of a QR code generator is the prerequisite of leveraging QR code marketing for your business. There are unlimited free QR code generators available, but make sure to choose with:

    • The accurate data tracking feature
    • Cost-effective with unlimited scans
    • High-resolution  printable QR codes
    • Excellent documentation

    Excellent customer support service
    Related: How to create a QR code for a URL?

    Frequently Asked Questions:

    What are the data points you can get from QR codes?

    QR codes are easy to use and are a great tool to analyse users’ click behaviour. They offer multiple data points such as time of the scan, location of the scan, times it has been scanned etc. With the right messaging and strategy, you can ask your users for email addresses, contact numbers and names.

    Is there any expiration date for QR codes?

    Some QR code generators offer a limited period or a limited number of scans. Once that is over, your QR code expires. However, some QR codes provide a lifetime of free access, and there is no limit on time or number of scans. In this case, you only have to make sure the URL is not broken.

    How can we use QR codes in marketing?

    QR codes are one of the most widely used tools for marketing by brands and businesses of all sizes.

    You can use QR code for:

    • Directing customers to your website
    • Getting App downloads
    • Share the business and contact details with potential clients
    • Share the address and location
    • Building email lists
    • Encouraging customers to leave a review
    • Engaging the customers for post-purchase
    • Personalized marketing tools the marketing
    • Sending prompted SMS and emails
    • Access AR for marketing

    How to promote QR codes for your business?

    There are various ways in which you can promote QR codes:

    • Include QR codes on the packaging
    • Include QR codes on marketing material both online and offline
    • Include QR codes in email signatures
    • Include QR codes on your business cards
    • Stick QR codes on tables, doors and signage where it can grab customer’s attention 
  • How to Add Spotify Link to TikTok Bio?

    How to Add Spotify Link to TikTok Bio?

    Are you a music lover looking to share your favorite tunes on TikTok? Adding a Spotify link to your bio is a great way to let your followers know what you’re listening to and discover new tracks. However, the process of adding a Spotify link to your TikTok bio may seem confusing at first. 

    Don’t worry, though – in this guide, we’ll show you exactly how to do it in just a few simple steps. Whether you’re a seasoned TikTok user or just starting out, you’ll be able to share your musical taste with the world in no time!

    What is a TikTok link in bio?

    A TikTok link in bio is a clickable hyperlink that can be added to your TikTok profile page. This link appears in the “Bio” section of your profile and can be used to direct your followers to external websites, social media profiles, or any other online destination you want to promote

    By default, TikTok only allows users to add one link to their bio. However, there are third-party tools like Replug that can be used to add multiple links to your bio section. This feature is especially useful for content creators, small business owners, and anyone else looking to promote their online presence to a wider audience.

    Also read: Why can’t I add a Link to my TikTok Bio?

    How to add Spotify link to TikTok bio?

    Adding a link to your TikTok bio is a great way to share more information with your followers and drive traffic to your website or other social media profiles. Here’s how to add a Spotify link to the TikTok bio:

    Step 1: Open Spotify on your device and log in to your account. 

    Step 2: Tap the “setting icon” in the top right of the screen. 

    setting-icon

    Also read: How to add a Twitter link to Instagram bio?

    Step 3: Tap “view profile” under your profile name to open your profile. 

    view-profile

    Step 4: Tap 3 “vertical dots” on your profile page. 

    three-dots

    Step 5: Tap “share”. 

    share

    Also read: How to Add Instagram Link to Facebook Bio?

    Step 6: Tap “copy link”.

    copy-link

    Add this link to your TikTok bio:

    Step 1: Open TikTok on your mobile device and tap the “profile icon” in the bottom right corner. 

    profile-icon

    Also read: How to put YouTube link in Instagram bio?

    Step 2: Tap “edit profile”. 

    edit-profile

    Step 3: Tap “add a bio” to open the bio section. 

    add-a-bio

    Also read: How To Add A Instagram Link In Bio?

    Step 4: Paste your Spotify link, tap “save” and you’re done. 

    paste-link

    Also read: 12 Best Bio Link Tools To Amp Up Your Marketing In 2023

    How to add multiple links to your bio?

    Do you have more than one link you want to add to your TikTok bio? 

    Perhaps you want to share your social media profiles or promote your website alongside your Spotify account. Luckily, there’s an easy solution: Replug. This powerful tool allows you to add multiple links to your TikTok bio, helping you to increase your reach and engagement on the platform.

    With Replug, you can create a single link that directs users to a landing page containing all of your important links. This means that you can easily promote your online presence in one convenient location. 

    Here’s a video showing you how to add multiple links to your TikTok bio using Replug.

    FAQs

    Can I add multiple links to my TikTok bio?

    By default, TikTok only allows you to add one link to your bio. However, third-party tools like Replug can be used to add multiple links to your TikTok bio.

    Is it free to use Replug to add multiple links to my TikTok bio?

    Replug offers a free plan with limited features and paid plans with more advanced functionality.

    How do I use Replug to add multiple links to my TikTok bio?

    To use Replug to add multiple links to your TikTok bio, sign up for an account and create a branded landing page with your desired links. Then, copy the Replug landing page URL and paste it into the “Website” field in your TikTok bio.

    Can I track clicks on my TikTok bio links with Replug?

    Yes, Replug offers advanced analytics that allows you to track clicks and engagement on your TikTok bio links and other links across your online presence.

    Also read: 7 Ways You Can Use Instagram Bio Links to Your Advantage

    Trending:

    Track Your Success: How to Create a Tracking Link?

    How to Share Twitch URL Link?

    How to get your TikTok Profile URL?

    How to Convert video to Link?