Want quick access to your favorite websites? Create desktop shortcuts for easy navigation.
Imagine the convenience of being able to open your most visited sites with just a single click, without the need to search or type in lengthy URLs. Well, the good news is that you can make this a reality by saving URLs to your desktop. Whether you’re using a Windows 10 computer or a Mac, we’re here to guide you through the simple steps of creating desktop shortcuts for your favorite websites.
How to save a URL to a desktop using Safari on a Mac?
To save a URL to your desktop using Safari on a Mac, follow these steps:
Step 1: Open Safari on your Mac.
Step 2: Go to the website you want to create a desktop shortcut for.
Step 3: Select the URL in the address bar.
Step 4: Drag the URL to your desktop to create the shortcut.
Step 5: By default, the shortcut will have a long name and a generic icon. If you want to change the name and icon, right-click the shortcut and select “Get Info” or press Command + I.
Step 6: In the “Get Info” window, click the arrow next to “Name & Extension” and enter a new name for the shortcut.
Note: The steps provided are specific to Google Chrome and Safari browsers. Other browsers may have different methods for creating desktop shortcuts. You should also update Safari and Google Chrome to improve performance and ensure you have the latest features.
Can I create a desktop shortcut for a specific website?
Yes, you can create a desktop shortcut for a specific website. It allows you to open that website directly with just a click on the shortcut icon.
Which web browsers support creating desktop shortcuts?
Most popular web browsers, such as Google Chrome, Mozilla Firefox, Safari, and Microsoft Edge, support creating desktop shortcuts.
Are desktop shortcuts available on both Windows and Mac computers?
Yes, desktop shortcuts are available on both Windows and Mac computers. You can create and use them on either operating system.
Can I delete or remove a desktop shortcut for a website?
Yes, you can delete or remove a desktop shortcut for a website. Simply right-click on the shortcut icon and select the option to delete or remove it.
Can I create a desktop shortcut for a specific page within a website?
In most web browsers, you can only create desktop shortcuts for the main website URL. However, you can bookmark specific pages within a website for quick access within the browser itself.
How can I add a desktop shortcut to my taskbar or dock?
To add a desktop shortcut to your taskbar in Windows or dock on a Mac, simply right-click on the desktop shortcut and select the option to pin or add to the taskbar/dock.
How do I change the name of a desktop shortcut for a website?
To change the name of a desktop shortcut for a website, right-click on the shortcut icon, select the option to rename, and enter the desired name.
In today’s fast-paced online world, staying updated with the latest content from your favorite websites can be quite a challenge. Luckily, there’s a handy tool called an RSS feed that can make this task a breeze. But what is a RSS feed URL, and how can you find it?
Don’t worry, we’ve got you covered!
In this guide, we’ll clarify the concept of RSS feeds and show you step-by-step how to locate their URLs. So, if you’re ready to unlock a world of effortless content consumption, let’s dive right in and discover the wonders of RSS feed URLs together!
What is a RSS feed URL?
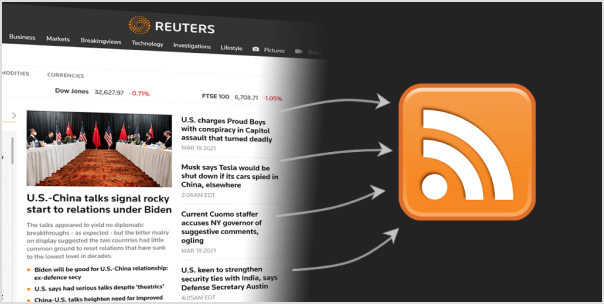
At its core, an RSS feed URL is like a personal delivery address for receiving updates from your favorite websites. It stands for Really Simple Syndication (RSS), a technology that allows websites to distribute their content in a standardized format. Think of it as a digital pipeline that funnels articles, blog posts, news updates, and other information directly to you.
An RSS feed URL is a specific web address that points to the location of an RSS feed for a particular website or blog. It acts as a unique identifier, enabling you to subscribe to that feed using an RSS reader or aggregator. Once subscribed, you’ll receive automatic updates whenever new content is published on the website, eliminating the need to manually visit each site.
RSS feed URLs are typically formatted as a web link, often indicated by the RSS icon (usually an orange square with white radio waves). By accessing this URL, you gain access to a stream of regularly updated content, tailored to your interests and preferences.
How to find the RSS feed URL for the most popular websites?
When it comes to finding RSS feed URLs for most websites, the process can sometimes feel like searching for buried treasure. However, there are some tried-and-true methods that can simplify the hunt. Let’s explore these techniques together:
WordPress Websites:
Since a significant number of websites use WordPress, locating their RSS feeds is often a breeze. Simply add “/feed” to the end of the website’s URL. For instance, if the website is “https://justinpot.com,” the RSS feed URL would be “https://justinpot.com/feed.” This method works like a charm in most cases.
Tumblr Websites:
If the website is hosted on Tumblr, unveiling its RSS feed is a snap. Append “/rss” to the website’s URL. For example, if the website is “https://example.tumblr.com,” the RSS feed URL would be “https://example.tumblr.com/rss.”
Blogger Websites:
Websites hosted on Blogger follow a similar pattern. Add “feeds/posts/default” to the end of the website’s URL. For instance, if the website is “example.blogspot.com,” the RSS feed URL would be “example.blogspot.com/feeds/posts/default.”
Medium Publications:
Medium makes it relatively simple to discover RSS feeds for publications. Just add “/feed/” before the name of the publication in the URL. For example, if the publication is “medium.com/example-site,” the RSS feed URL would be “medium.com/feed/example-site.”
YouTube Channels:
YouTube channel pages serve as convenient RSS feeds. All you need to do is copy and paste the URL of the channel into your preferred RSS reader. Additionally, you can access an OPML file containing all your subscriptions for easy management.
By employing these techniques, you can navigate the vast online landscape with confidence, effortlessly finding and subscribing to RSS feeds across various platforms. So go ahead, and embark on your quest for knowledge, armed with the power of RSS feeds!
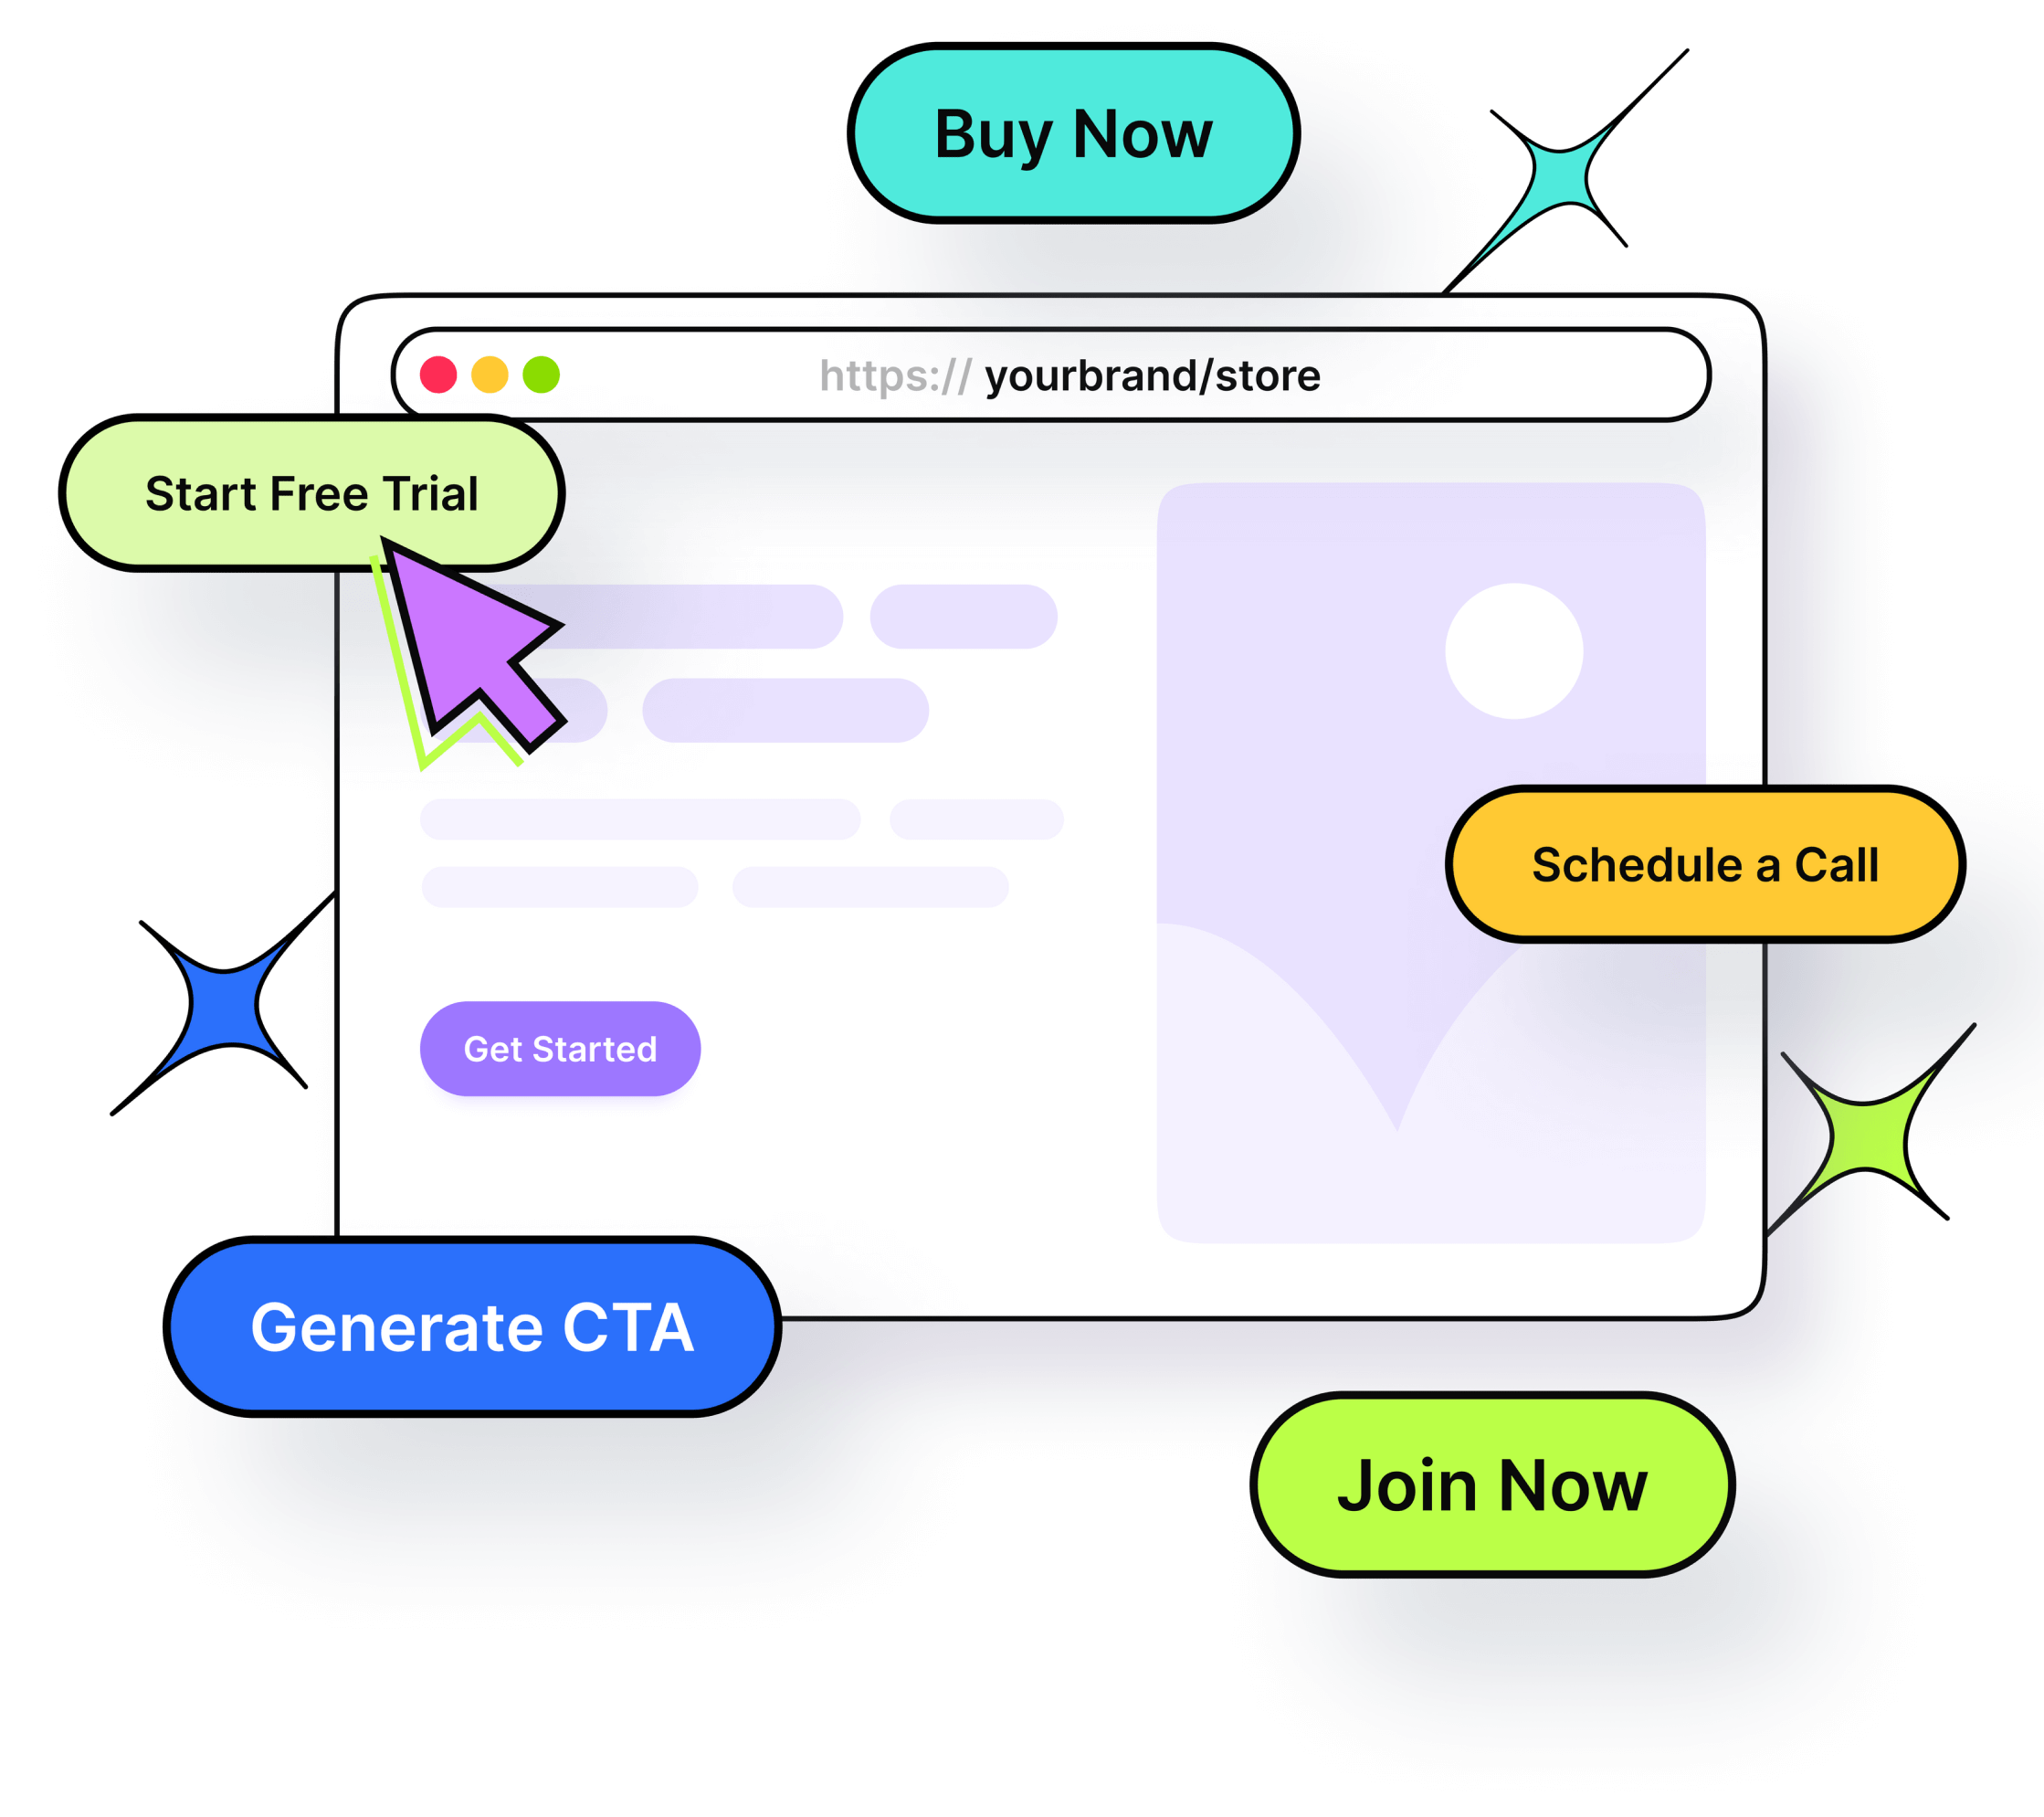
Boost your conversion rates with irresistable CTAs with
How to find an RSS feed of a website from its source code?
If the previous methods didn’t lead you to the desired RSS feed URL, there’s still hope! By checking a web page’s source code, you can often uncover the hidden gem you’re seeking. Follow these simple steps to find an RSS feed via source code:
Step 1: Visit the website for which you’d like to find the RSS feed.
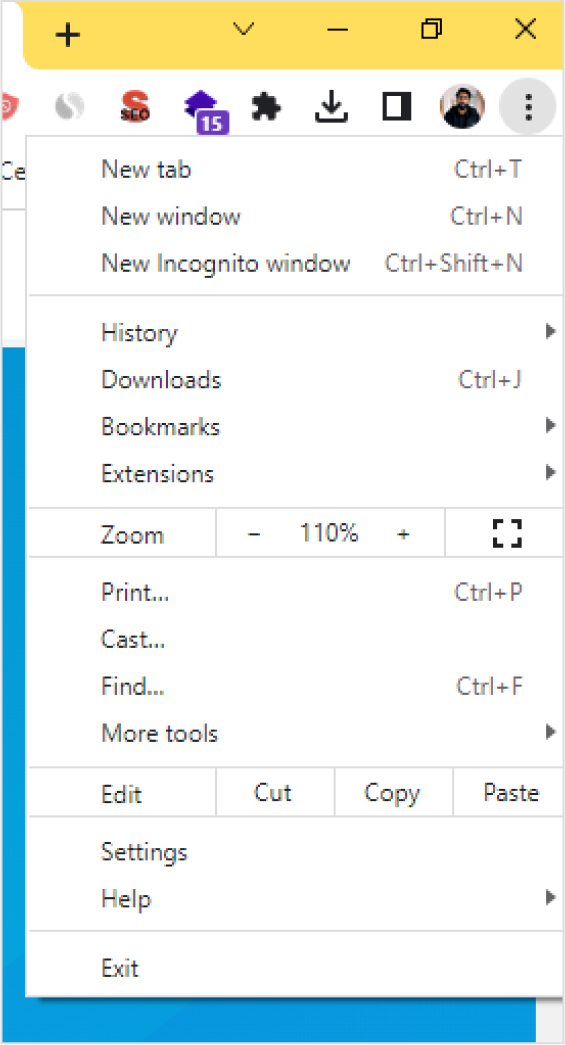
Step 2: Right-click on an empty area of the webpage. A context menu will appear. In the context menu, look for an option called “View Page Source” or something similar. Click on it. This action will open a new tab or window displaying the website’s source code.
Step 3: Once you’re viewing the source code, you can search for the RSS feed URL. Press “Ctrl+F” on Windows or Linux, or “Command+F” on Mac, to bring up the search feature.
Step 4: In the search bar, type “RSS” and hit enter. The browser will highlight any instances of the term “RSS” within the source code.
Step 5: If the search for “rss” doesn’t yield any results, try searching for “atom” instead. Atom is another common format for syndication feeds.
Step 6: Once you’ve located the RSS feed URL, copy it by selecting the entire URL and pressing “Ctrl+C” (Windows or Linux) or “Command+C” (Mac).
Step 7: Open your preferred feed reader or RSS aggregator and paste the URL into the appropriate field for adding a new feed. This step allows you to start receiving updates from the website.
By venturing into the source code, you can often discover the RSS feed URL that eluded you through other methods. So don’t be intimidated—embrace your inner digital explorer and uncover the treasure trove of RSS feeds that await you!
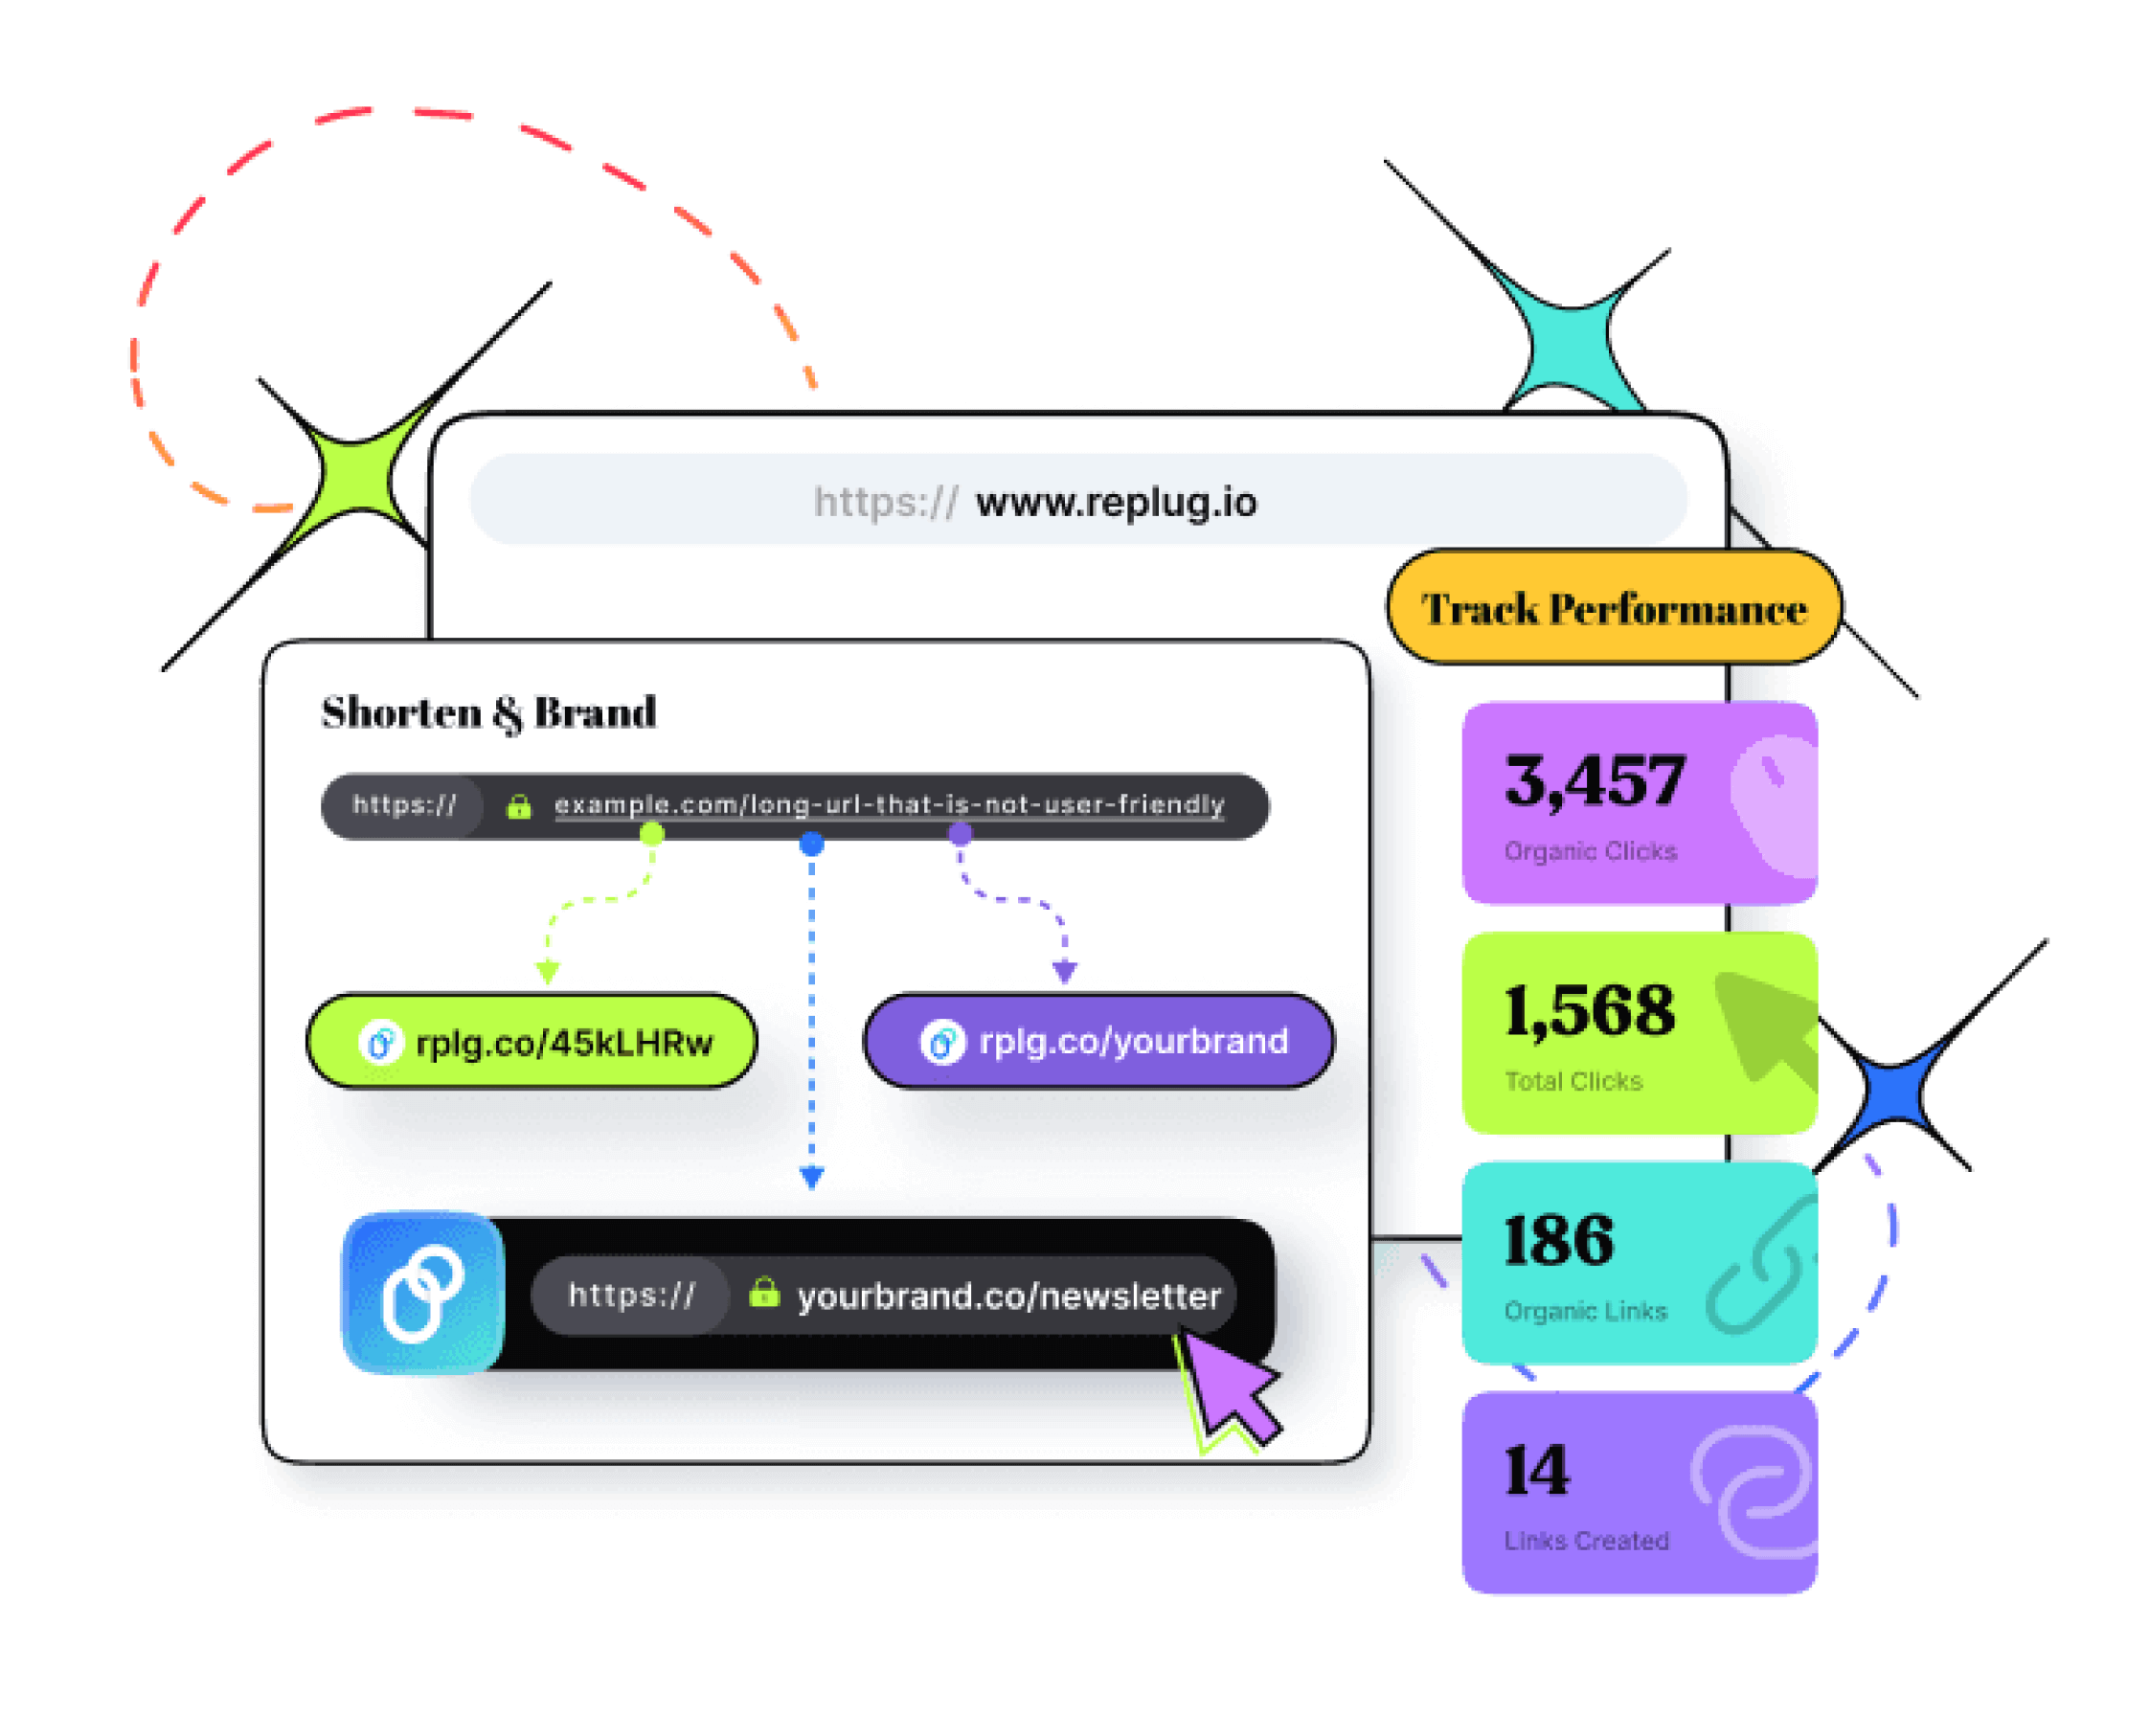
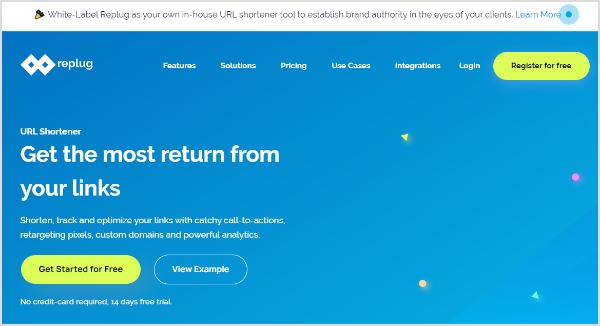
Maximize marketing ROI
by transforming ordinary URLs into branded short links that convert.
Try Replug for free
Shorten Your RSS feed URL with Replug:
If you wish to shorten an entire RSS feed and utilize it on a third-party platform, Replug offers a convenient solution. Follow these simple steps to get started:
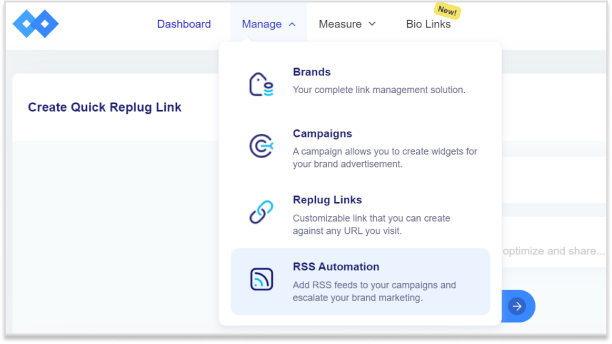
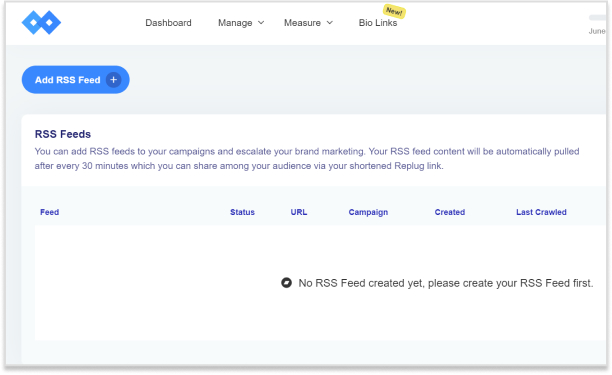
Step 1: Visit the Replug dashboard and navigate to the Manage section and select “RSS Automation.”
Step 2: On the next screen, locate and click the “Add RSS Feed” button situated in the top left corner.
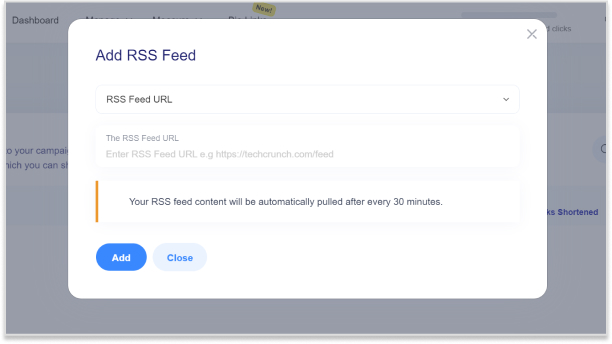
Step 3: A pop-up window will appear, prompting you to select a campaign and enter the RSS feed URL. Once done, click “Add” to proceed.
At this point, your RSS feed has been successfully created. Copy the shortened RSS feed URL provided by Replug and add it to your desired third-party platform.
Step 4: You can now perform various actions with your newly created RSS feed:
Edit: Modify or update the added RSS feed as needed.
Re-crawl: Instantly re-crawl the entire RSS feed to fetch any new links that have been added.
Preview: Get a preview of the list of posts from the converted RSS feeds.
Remove: Remove the RSS feed if desired, allowing you to create a new one or take alternative actions.
By utilizing Replug’s services, you can easily shorten and manage your RSS feeds, empowering you to seamlessly integrate them into third-party platforms. Enjoy the benefits of concise and efficient RSS feed URLs as you streamline your content distribution process.
FAQs
What is an RSS feed and how does it work?
An RSS feed is a standardized format for delivering regularly updated content from a website. It works by providing a stream of information that users can subscribe to using an RSS reader or aggregator.
How can I subscribe to an RSS feed?
To subscribe to an RSS feed, you need an RSS reader or aggregator. Copy the RSS feed URL of the website or blog you want to subscribe to and paste it into your RSS reader, or use the built-in subscription functionality of some web browsers.
What are the benefits of using RSS feeds?
RSS feeds allow you to stay updated with the latest content from multiple websites in one place. They save time by delivering new posts or articles directly to you, eliminating the need to visit each website individually.
Can I use RSS feeds on my mobile device?
Yes, you can use RSS feeds on mobile devices. Many RSS reader apps are available for both Android and iOS platforms, allowing you to access and manage your subscribed feeds on the go.
Are RSS feeds still relevant in the age of social media?
Absolutely! While social media platforms offer content discovery, RSS feeds provide a more personalized and focused experience. They allow you to curate specific sources and receive updates without the algorithmic filtering and distractions of social media feeds.
How often are RSS feeds updated?
The frequency of RSS feed updates varies depending on the website or blog. Some may update several times a day, while others may have less frequent updates. You can set your RSS reader to check for updates at regular intervals.
Are you eager to level up your YouTube descriptions and engage your viewers like never before? Well, look no further! Inserting links in your YouTube description can be a game-changer, and we’re here to show you how step-by-step.
Whether you want to share additional resources, promote your social media channels, or drive traffic to your website, we’ve got you covered. Get ready to unlock the full potential of your video descriptions and captivate your audience effortlessly.
Let’s dive in and master the art of inserting links on YouTube, making your content shine brighter than ever!
YouTube descriptions: Why are they important?
YouTube video description plays a crucial role in maximizing the impact of your videos. Not only can it improve your YouTube SEO and video rankings, but it also provides valuable information about your content. Let’s explore why video descriptions are so important.
A well-crafted video description can significantly enhance your YouTube SEO. Including relevant keywords and phrases in your description increase the chances of your video appearing in search results. This means more visibility and potential viewership for your content.
Providing Context:
YouTube video description allows you to provide additional context and details about your video. You can break down your video into chapters or sections, making navigating and finding specific information easier for viewers. This enhances the overall viewer experience and encourages engagement.
Channel Introduction:
YouTube video description is an excellent opportunity to introduce your channel to new viewers. You can give a brief overview of your content, highlight your unique selling points, and encourage viewers to subscribe for more exciting videos.
Driving Traffic:
Additionally, the description box enables you to include links to external websites, such as your personal website or affiliate offers. This allows you to drive traffic to other platforms or monetize your content through partnerships.
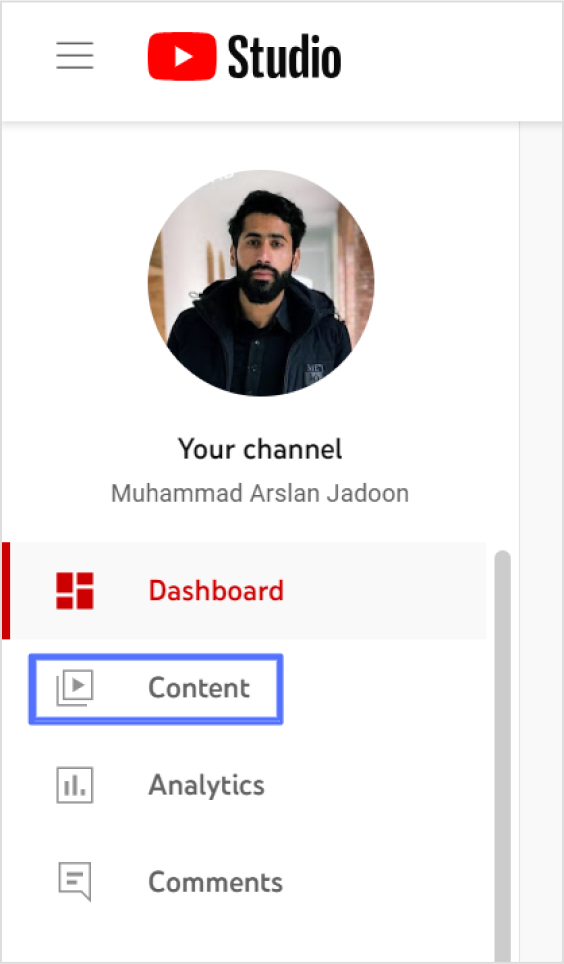
Step 2: On the left side of the dashboard, click on “Content.”
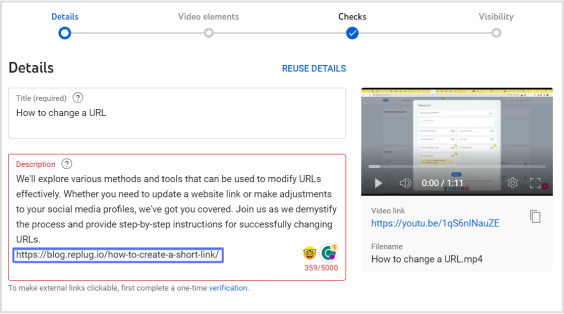
Step 3: Locate the video you want to add a link to and click on the pencil icon to edit its description.
Step 4: In the description box, type “https://” followed by the URL of the link you want to include.
Step 5: Save your changes by clicking on the “Save” button.
Congratulations! You have successfully added a link to your YouTube video description.
Please note that the above steps are applicable to videos that are already uploaded or published. If you wish to add a link to the description of a video you are currently uploading or planning to upload, simply include “https://” and the URL in the description field during the upload process.
Here’s how to insert links in YouTube Descriptions on a mobile device:
On a mobile device:
Adding a link to your YouTube description on mobile devices is just as simple as on a desktop. Follow these steps:
Step 1: Open the YouTube app on your mobile device and sign in to your account.
Step 2: Find the video for which you want to add a link in the description.
Step 3: Tap on the video to open it and then tap on the “More” button (represented by three dots) below the video.
Step 4: From the options that appear, select “Edit video.”
Step 5: Scroll down to the description field and locate the spot where you want to add the link.
Step 6: Type “https://” followed by the URL you want to include in the description.
Step 7: Once you have entered the link, tap on the “Save” or “Publish” button to save your changes.
Congratulations! You have successfully added a link to your YouTube video description using a mobile device.
Remember, the process of adding a link remains the same: simply include “https://” followed by the URL in the description field. Now you can seamlessly include links in your YouTube video descriptions, whether you’re using a desktop computer or a mobile device. Happy linking!
A complete link management solution
for marketing professionals & agencies.
Try Replug for free
Shorten your YouTube Links for maximum impact:
Shortening your YouTube links can be the secret ingredient to maximizing your impact. With shorter, more concise links, you’ll capture your audience’s attention, drive more clicks, and achieve higher engagement.
Here’s how to shorten YouTube Links using Replug:
If you’re looking to shorten your YouTube links effectively, Replug provides a seamless solution. Follow these steps to shorten YouTube links using Replug:
Step 1: Sign in to your Replug account or create a new account if you haven’t already.
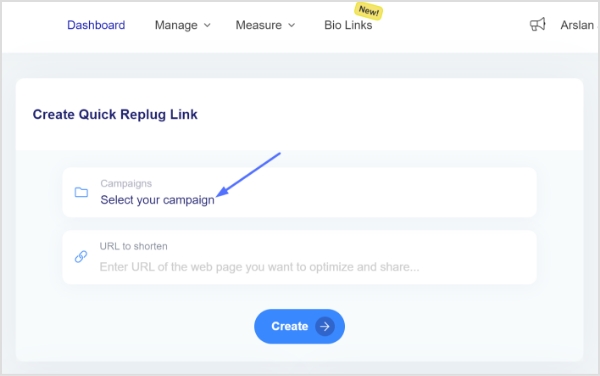
Step 2: On the main dashboard page, click “Select your campaign’’ or create a new campaign in just a few seconds.
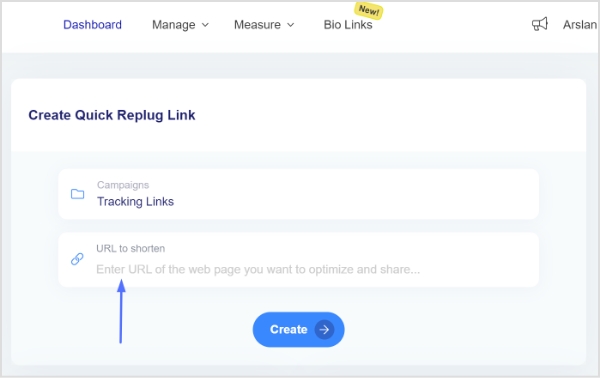
Step 3: Paste your YouTube link or any link your want to shorten in the “URL to shorten” section below “Select your campaign” and click “Create”.
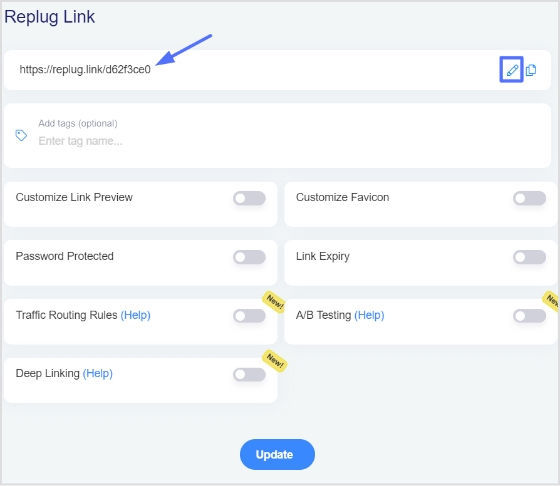
Step 4: You’ll have your YouTube link shortened, now, click the edit icon to customize your link.
Step 5: Copy your link, click the “update button” and you’re done.
By using Replug’s link-shortening feature, you not only get concise and visually appealing YouTube links, but you also gain access to advanced analytics and tracking capabilities. These insights will enable you to measure the performance of your links, understand audience engagement, and optimize your marketing strategies accordingly.
Maximize marketing ROI
by transforming ordinary URLs into branded short links that convert.
Try Replug for free
Why is it important to include links in my YouTube video description?
Including links in your YouTube video description is important because it allows you to provide additional resources, redirect viewers to relevant websites, promote affiliate offers, and enhance the overall viewer experience. Links can also drive traffic to your website or social media profiles, increasing engagement and conversions.
Can I include multiple links in my YouTube video description?
Yes, you can include multiple links in your YouTube video description. However, it’s essential to ensure that the links are relevant and add value to your viewers. Avoid overwhelming the description with too many links, as it may appear cluttered and distract from the main content.
Are there any restrictions or guidelines for the types of links I can add to my YouTube description?
YouTube has community guidelines and policies that you must adhere to when adding links. Ensure that the links are not spammy, violate copyright or community standards, or redirect to malicious websites. Familiarize yourself with YouTube’s policies to ensure compliance.
Can I add clickable links in the description that viewers can directly click on?
Yes, YouTube automatically converts URLs in the video description to clickable links. As long as you include the full URL (e.g., https://www.example.com), viewers will be able to click on the link and be redirected to the desired webpage.\
In a world where countless brands vie for attention, how can you ensure your voice is heard, and your brand rises above the noise? The answer lies in mastering the art of online branding. Whether you’re an aspiring entrepreneur, a seasoned business owner, or a marketer looking to enhance your digital strategy, this guide is your compass to navigate the exciting world of online branding and emerge as a true digital champion.
In this guide, we will take a deep dive into the strategies, tactics, and insider secrets that can help you stand out, gain visibility, and create a lasting impact in the digital realm. From crafting a compelling brand identity to leveraging social media, content creation, and online advertising, we will leave no stone unturned on this journey to online branding excellence.
Online branding, also known as digital branding or internet branding, refers to the process of establishing and promoting a brand’s identity, image, and reputation through various online channels and platforms. It involves using digital marketing strategies and techniques to build brand awareness, engage with the target audience, and create a consistent and positive brand perception online.
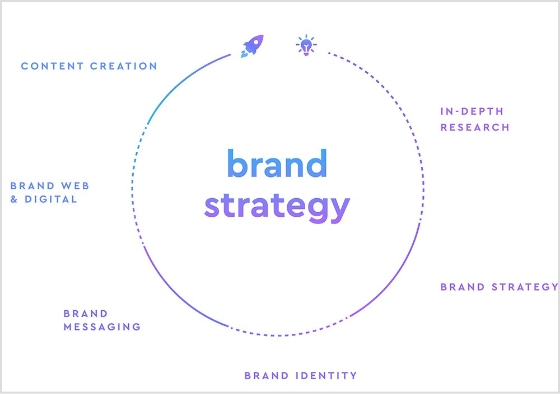
To master online branding, start by laying a strong foundation. Define your brand identity, understand your target audience, and craft a compelling brand story. With a clear purpose and authentic presence, you can then dive into building a stellar website, creating engaging content, and leveraging social media.
These steps pave the way to online branding success, helping your brand stand out and thrive in the digital landscape.
Defining your brand identity sets the foundation for a cohesive and compelling online presence. It ensures that your brand communicates a clear and consistent message to your target audience, establishing a strong brand image and connection with your customers.
Here’s a breakdown of key aspects to consider when defining your brand identity:
Brand purpose and mission:
Start by defining the purpose of your brand—why it exists beyond selling products or services. Consider the impact you want to make and the value you aim to provide to your target audience. Your brand mission should be concise, meaningful, and aligned with the needs and aspirations of your customers.
Target audience:
Identify and understand your target audience. Develop detailed buyer personas to gain insights into their demographics, behaviors, preferences, and pain points. This knowledge will help you tailor your brand identity and messaging to resonate with your intended audience.
Define the core values that your brand stands for. These values should guide your decision-making processes, business practices, and interactions with customers. Aligning your brand values with your target audience’s values fosters a sense of authenticity and connection.
Brand personality:
Determine the personality traits and characteristics that represent your brand. Think about how you want your brand to be perceived—whether it’s playful, sophisticated, authoritative, or friendly. This personality should align with your target audience’s preferences and resonate with them on an emotional level.
Visual identity:
Develop a visual identity that reflects your brand’s personality and resonates with your target audience. This includes designing a unique “logo design” and selecting appropriate color schemes, typography, and imagery that communicate your brand’s essence. Consistency across all visual elements strengthens brand recognition.
Brand voice:
Establish a distinct brand voice that reflects your brand’s personality and resonates with your target audience. Determine the tone, language, and communication style that align with your brand identity. Whether it’s conversational, formal, or playful, your brand voice should be consistent across all communication channels.
Consistency:
Consistency is key to brand identity. Ensure that your brand identity elements—such as visuals, messaging, tone, and values—are consistently applied across all touchpoints, including your website, social media profiles, advertising materials, and customer interactions. This builds trust, reinforces brand recognition, and strengthens your brand’s impact.
Maximize marketing ROI
by transforming ordinary URLs into branded short links that convert.
Try Replug for free
2. Building a stellar website
Building a stellar website is a crucial component of online branding. Your website serves as a digital storefront, representing your brand and engaging visitors.
Here are key steps to create a standout website:
Define your website’s purpose:
Clarify your website’s objectives. Is it to showcase products/services, provide information, generate leads, or facilitate online transactions? Align your website’s purpose with your overall brand strategy.
User-centric design:
Prioritize user experience by designing an intuitive and visually appealing website. Ensure easy navigation, clear calls-to-action, and responsive design for seamless viewing across devices.
Consistent branding:
Infuse your brand identity into the website design. Use your logo, colors, fonts, and imagery that align with your brand. Consistency reinforces brand recognition and builds trust.
Engaging content:
Create high-quality, relevant, and compelling content. Craft persuasive copy, incorporate visuals, and include engaging multimedia elements to captivate visitors and convey your brand’s message.
Clear value proposition:
Clearly communicate the unique value your brand offers. Highlight key benefits and differentiators that make your products or services stand out from the competition.
Optimize for search engines:
Implement search engine optimization (SEO) techniques to improve your website’s visibility on search engines. Research relevant keywords, optimize meta tags, and create informative and keyword-rich content.
With the increasing use of mobile devices, ensure your website is mobile-friendly. Responsive design and fast-loading pages are essential for providing an optimal user experience on smartphones and tablets.
Integration with social media:
Incorporate social media integration to encourage sharing and engagement. Display social media icons, integrate social sharing buttons, and embed feeds to enhance your brand’s online presence.
Clear contact information:
Make it easy for visitors to get in touch. Display your contact information prominently, including phone numbers, email addresses, and physical addresses. Consider adding a contact form for easy communication.
Regular updates and maintenance:
Keep your website fresh and up-to-date. Regularly update content, monitor functionality, and fix any issues. A well-maintained website reflects professionalism and reliability.
Creating engaging content is a crucial aspect of online branding that helps capture and retain the attention of your target audience.
Here are key steps to creating content that resonates and drives meaningful connections:
Know your audience:
Understand your target audience’s demographics, preferences, and pain points. Conduct research and develop detailed buyer personas to guide your content creation process.
Define your brand voice:
Establish a consistent brand voice that aligns with your brand identity. Determine the tone, style, and language that best represents your brand and resonates with your audience.
Craft compelling headlines:
Grab attention with attention-grabbing headlines. Use captivating language, pose intriguing questions, or promise valuable insights to entice readers to click and engage with your content.
Tell stories:
Storytelling is a powerful tool for engaging your audience. Use narratives, anecdotes, and personal experiences to convey your brand’s message and create an emotional connection with your readers.
Provide value:
Ensure that your content offers value to your audience. Educate, entertain, inspire, or solve problems for them. Deliver actionable insights, practical tips, or in-depth information that meets their needs and interests.
Utilize various formats:
Experiment with different content formats to cater to diverse preferences. Incorporate blog posts, videos, infographics, podcasts, and interactive content to deliver your message in engaging ways.
Incorporate visually appealing elements such as high-quality images, graphics, and videos to enhance the visual appeal of your content. Visuals not only capture attention but also help convey information effectively.
Encourage interaction:
Foster engagement by encouraging readers to leave comments, share their opinions, or participate in discussions. Respond to comments promptly to nurture a sense of community and connection.
Incorporate calls-to-action:
Guide your audience toward desired actions by incorporating clear and compelling calls-to-action (CTAs). Whether it’s subscribing to a newsletter, downloading a resource, or making a purchase, CTAs help drive conversions.
Analyze and optimize:
Regularly analyze the performance of your content. Monitor metrics like engagement, click-through rates, and conversions. Use this data to identify successful content strategies and optimize future content creation efforts.
Remember, consistency is key when creating engaging content. Develop an editorial calendar, establish a content creation routine, and ensure a steady flow of valuable content. By delivering content that resonates with your audience, you can build trust, strengthen your brand, and drive meaningful interactions in the online realm.
Drive more clicks, conversions, and app installations by deep linking
to your favorite platforms.
Try deep links for free
4. Social media branding
Social media branding is decisive for building and enhancing your brand’s online presence.
Here are key steps to effectively establish your brand on social media:
Define your social media strategy:
Clarify your goals and objectives for using social media. Determine which platforms are most relevant to your target audience and align with your brand’s values and messaging.
Maintain consistent branding across all social media platforms. Use your logo, colors, fonts, and visual style to ensure brand recognition and cohesiveness.
Engaging profile:
Optimize your social media profiles to create a compelling first impression. Craft a concise and captivating bio, use high-quality visuals for your profile and cover photos, and include relevant links to your website or other online assets.
Content planning and creation:
Develop a content strategy that aligns with your brand identity and resonates with your target audience. Create a mix of engaging and shareable content, including text, images, videos, and interactive elements.
Consistent brand voice:
Maintain a consistent brand voice and tone in your social media posts. Whether it’s informative, conversational, or humorous, ensure it reflects your brand’s personality and resonates with your audience.
Audience engagement:
Actively engage with your audience by responding to comments, messages, and mentions. Encourage conversations, ask questions, and foster a sense of community around your brand.
Utilize relevant hashtags in your posts to expand your reach and attract a wider audience. Research popular and industry-specific hashtags to enhance discoverability and engagement.
Influencer collaboration:
Consider partnering with influencers or brand advocates who align with your brand values. Collaborating with influencers helps expand your brand’s reach, build credibility, and generate buzz around your products or services, which is essential for an effective international expansion strategy.
Social media advertising:
Explore paid advertising options on social media platforms to reach a targeted audience and amplify your brand’s visibility. Set specific objectives, define your target audience, and craft compelling ad campaigns.
Analytics and optimization:
Regularly monitor social media metrics and analytics to track the performance of your social media efforts. Adjust your strategy based on insights gained and optimize content to maximize engagement and results.
5. Online advertising
Online advertising plays a vital role in boosting brand visibility, driving website traffic, and generating leads in the digital landscape.
Here are key steps to effectively leverage online advertising and promotion:
Set clear goals:
Define your objectives for online advertising and promotion. Is it to increase brand awareness, drive website traffic, generate leads, or boost sales? Setting clear goals helps you tailor your strategies accordingly.
Identify your target audience:
Understand your target audience’s demographics, interests, and online behaviors. This knowledge allows you to target your advertising efforts effectively and deliver relevant messages to the right people.
Choose the right advertising channels:
Select the online advertising channels that align with your target audience and goals. Options include search engine advertising (such as Google Ads), social media advertising (like Facebook Ads), display advertising, influencer collaborations, and native advertising.
Create persuasive and engaging ad copy that grabs attention and compels viewers to take action. Clearly communicate your unique value proposition, highlight benefits, and include a strong call-to-action to drive conversions.
Utilize visuals:
Incorporate visually appealing images or videos in your ads to capture attention and enhance engagement. High-quality visuals that align with your brand identity help make your ads more memorable and impactful.
Landing page optimization:
Ensure that the landing page linked to your ads is optimized for conversions. It should align with the ad’s messaging, provide a seamless user experience, and have clear calls to action to guide visitors toward desired actions.
Regularly monitor the performance of your online advertising campaigns. Track key metrics such as click-through rates, conversion rates, and return on investment (ROI). Based on data insights, make necessary adjustments to optimize your campaigns for better results.
Utilize remarketing (retargeting):
Implement remarketing strategies to target users who have previously interacted with your brand. Remarketing allows you to re-engage potential customers and drive conversions by showing tailored ads based on their past interactions with your website or app.
Influencer marketing has become a powerful strategy for brands to reach their target audience, build credibility, and drive engagement.
Here are key steps to effectively leverage influencer marketing and collaborations:
Define your goals:
Clearly define your objectives for influencer marketing. Is it to increase brand awareness, reach a new audience, drive sales, or generate user-generated content? Defining your goals helps you identify the right influencers and measure the success of your campaigns.
Identify relevant influencers:
Research and identify influencers who align with your brand values, target audience, and industry. Look for influencers with an engaged and authentic following, and analyze their content quality, reach, and engagement metrics.
Build genuine relationships with influencers based on mutual trust and shared values. Reach out to them with personalized messages that demonstrate your understanding of their content and how it aligns with your brand.
Collaborate on campaigns:
Work with influencers to create engaging and authentic content that resonates with their audience and promotes your brand. Collaborate on sponsored posts, product reviews, giveaways, or creative campaigns that showcase your brand organically and compellingly.
Set clear expectations:
Clearly communicate your expectations, campaign goals, and guidelines to influencers. Provide them with the necessary information, assets, and creative briefs to ensure a consistent brand message and visual identity.
Tracking and analyzing the performance of your online branding efforts is essential for understanding the effectiveness of your strategies and making informed decisions.
Here are key steps to effectively track and analyze performance:
Define key performance indicators (KPIs):
Determine the specific metrics that align with your goals. Examples include website traffic, conversion rates, engagement metrics (likes, shares, comments), click-through rates, time spent on a page, bounce rates, and customer acquisition costs.
Set up analytics tools:
Implement robust analytics tools such as Google Analytics to track website traffic, user behavior, and conversion data. Use social media analytics tools to monitor engagement metrics, reach, and audience demographics across different platforms.
Use custom tracking links (UTM parameters) to identify the source of traffic and the effectiveness of different campaigns or channels. This allows you to attribute conversions and engagement to specific initiatives accurately.
Monitor website analytics:
Regularly review website analytics to gain insights into visitor behavior, traffic sources, popular pages, and conversion funnels. Identify patterns, trends, and areas of improvement to optimize your website for better performance.
Analyze social media metrics:
Leverage social media analytics platforms to track engagement metrics, follower growth, reach, and demographics. Analyze the performance of individual posts and campaigns to identify successful content and optimize future strategies.
Conduct A/B testing:
Test different variations of your content, landing pages, ads, and calls to action to identify which elements perform better. A/B testing allows you to make data-driven decisions and optimize your campaigns for improved results.
Use conversion tracking:
Implement conversion tracking pixels or codes on your website to track specific actions, such as purchases, form submissions, or newsletter sign-ups. This enables you to measure the effectiveness of your online branding efforts in driving conversions.
Utilize social listening tools to track online mentions of your brand, products, or industry keywords. This helps you understand the sentiment, identify customer feedback, and address any issues or opportunities proactively.
Compare performance over time:
Analyze performance data over different periods to identify trends, seasonal variations, and the impact of specific campaigns or initiatives. This allows you to make informed decisions and allocate resources effectively.
Generate reports and insights:
Compile regular reports summarizing key metrics, trends, and insights. Present the data in a clear and actionable format that helps stakeholders understand the impact of online branding efforts and guides future strategies.
Remember, tracking and analyzing performance is an ongoing process. Continuously monitor metrics, adjust strategies based on data insights, and experiment with new approaches to improve your online branding efforts and achieve your business objectives.
What is brand authority and why it’s important?
Brand authority refers to the level of expertise, credibility, and influence that a brand possesses within its industry or niche. It represents the brand’s reputation and perception as a trusted source of information, products, or services. Brand authority is built over time through consistent delivery of high-quality content, thought leadership, positive customer experiences, and a strong online presence.
Brand authority helps establish trust and credibility with customers. When a brand is perceived as an expert in its field, customers are more likely to trust its products or services, resulting in increased customer loyalty and advocacy.
Competitive Advantage:
Brands with high authority have a competitive advantage over their competitors. They are seen as leaders in the industry, attracting more customers and gaining a larger market share.
Thought Leadership:
Brand authority enables brands to position themselves as thought leaders. By sharing valuable insights, industry trends, and expert opinions, they become go-to sources for information and influence the conversation within their industry.
Brand Recognition and Awareness:
A brand with authority is more likely to be recognized and remembered by consumers. It stands out in a crowded marketplace, making it easier to attract new customers and retain existing ones.
Brands with authority often have opportunities for partnerships and collaborations with other influential brands or industry leaders. These partnerships can further enhance their reputation and expand their reach.
Customer Acquisition and Retention:
Brand authority helps attract new customers who seek trusted sources of products or services. Additionally, it fosters customer loyalty, as customers are more likely to continue engaging with a brand they perceive as authoritative.
Media Coverage and PR Opportunities:
Brands with authority are more likely to attract media attention and PR opportunities. Journalists and influencers often seek expert opinions and insights from authoritative brands, leading to increased media coverage and brand exposure.
Building a strong online presence requires mastering online branding strategies. From defining your brand identity to creating engaging content, leveraging social media, and utilizing online advertising, each step plays a crucial role. Tools like Replug enhance reach and engagement. By continuously refining strategies and staying adaptable, you can establish a compelling online presence that sets you apart.
FAQs
What strategies can I use to enhance my brand’s visibility online?
To enhance brand visibility online, focus on search engine optimization (SEO), content marketing, social media marketing, influencer collaborations, online advertising, guest blogging, and leveraging partnerships with complementary brands.
How can online advertising and promotion boost my brand’s online presence?
Online advertising and promotion can boost your brand’s online presence by increasing visibility through targeted ads, reaching a wider audience, driving traffic to your website, and generating leads and conversions. It helps amplify your brand message and build brand awareness.
What role does content marketing play in online branding?
Content marketing plays a crucial role in online branding by providing valuable, informative, and engaging content that resonates with your target audience. It helps establish thought leadership, build trust, increase brand visibility, and drive organic traffic to your website.
How can influencer marketing help strengthen my brand’s online presence?
Influencer marketing can strengthen your brand’s online presence by leveraging the influence and reach of relevant influencers. Collaborating with influencers helps expand your brand’s reach, build credibility, and generate buzz around your products or services.
What are some common mistakes to avoid in online branding?
Some common mistakes to avoid in online branding include inconsistent messaging, neglecting social media engagement, ignoring customer feedback, lack of brand differentiation, and failure to monitor and manage online reputation.
How can I track and measure the performance of my online branding efforts?
You can track and measure the performance of your online branding efforts through analytics tools like Google Analytics, social media insights, tracking link metrics, conversion tracking, and monitoring key performance indicators (KPIs) such as website traffic, engagement metrics, and conversion rates.
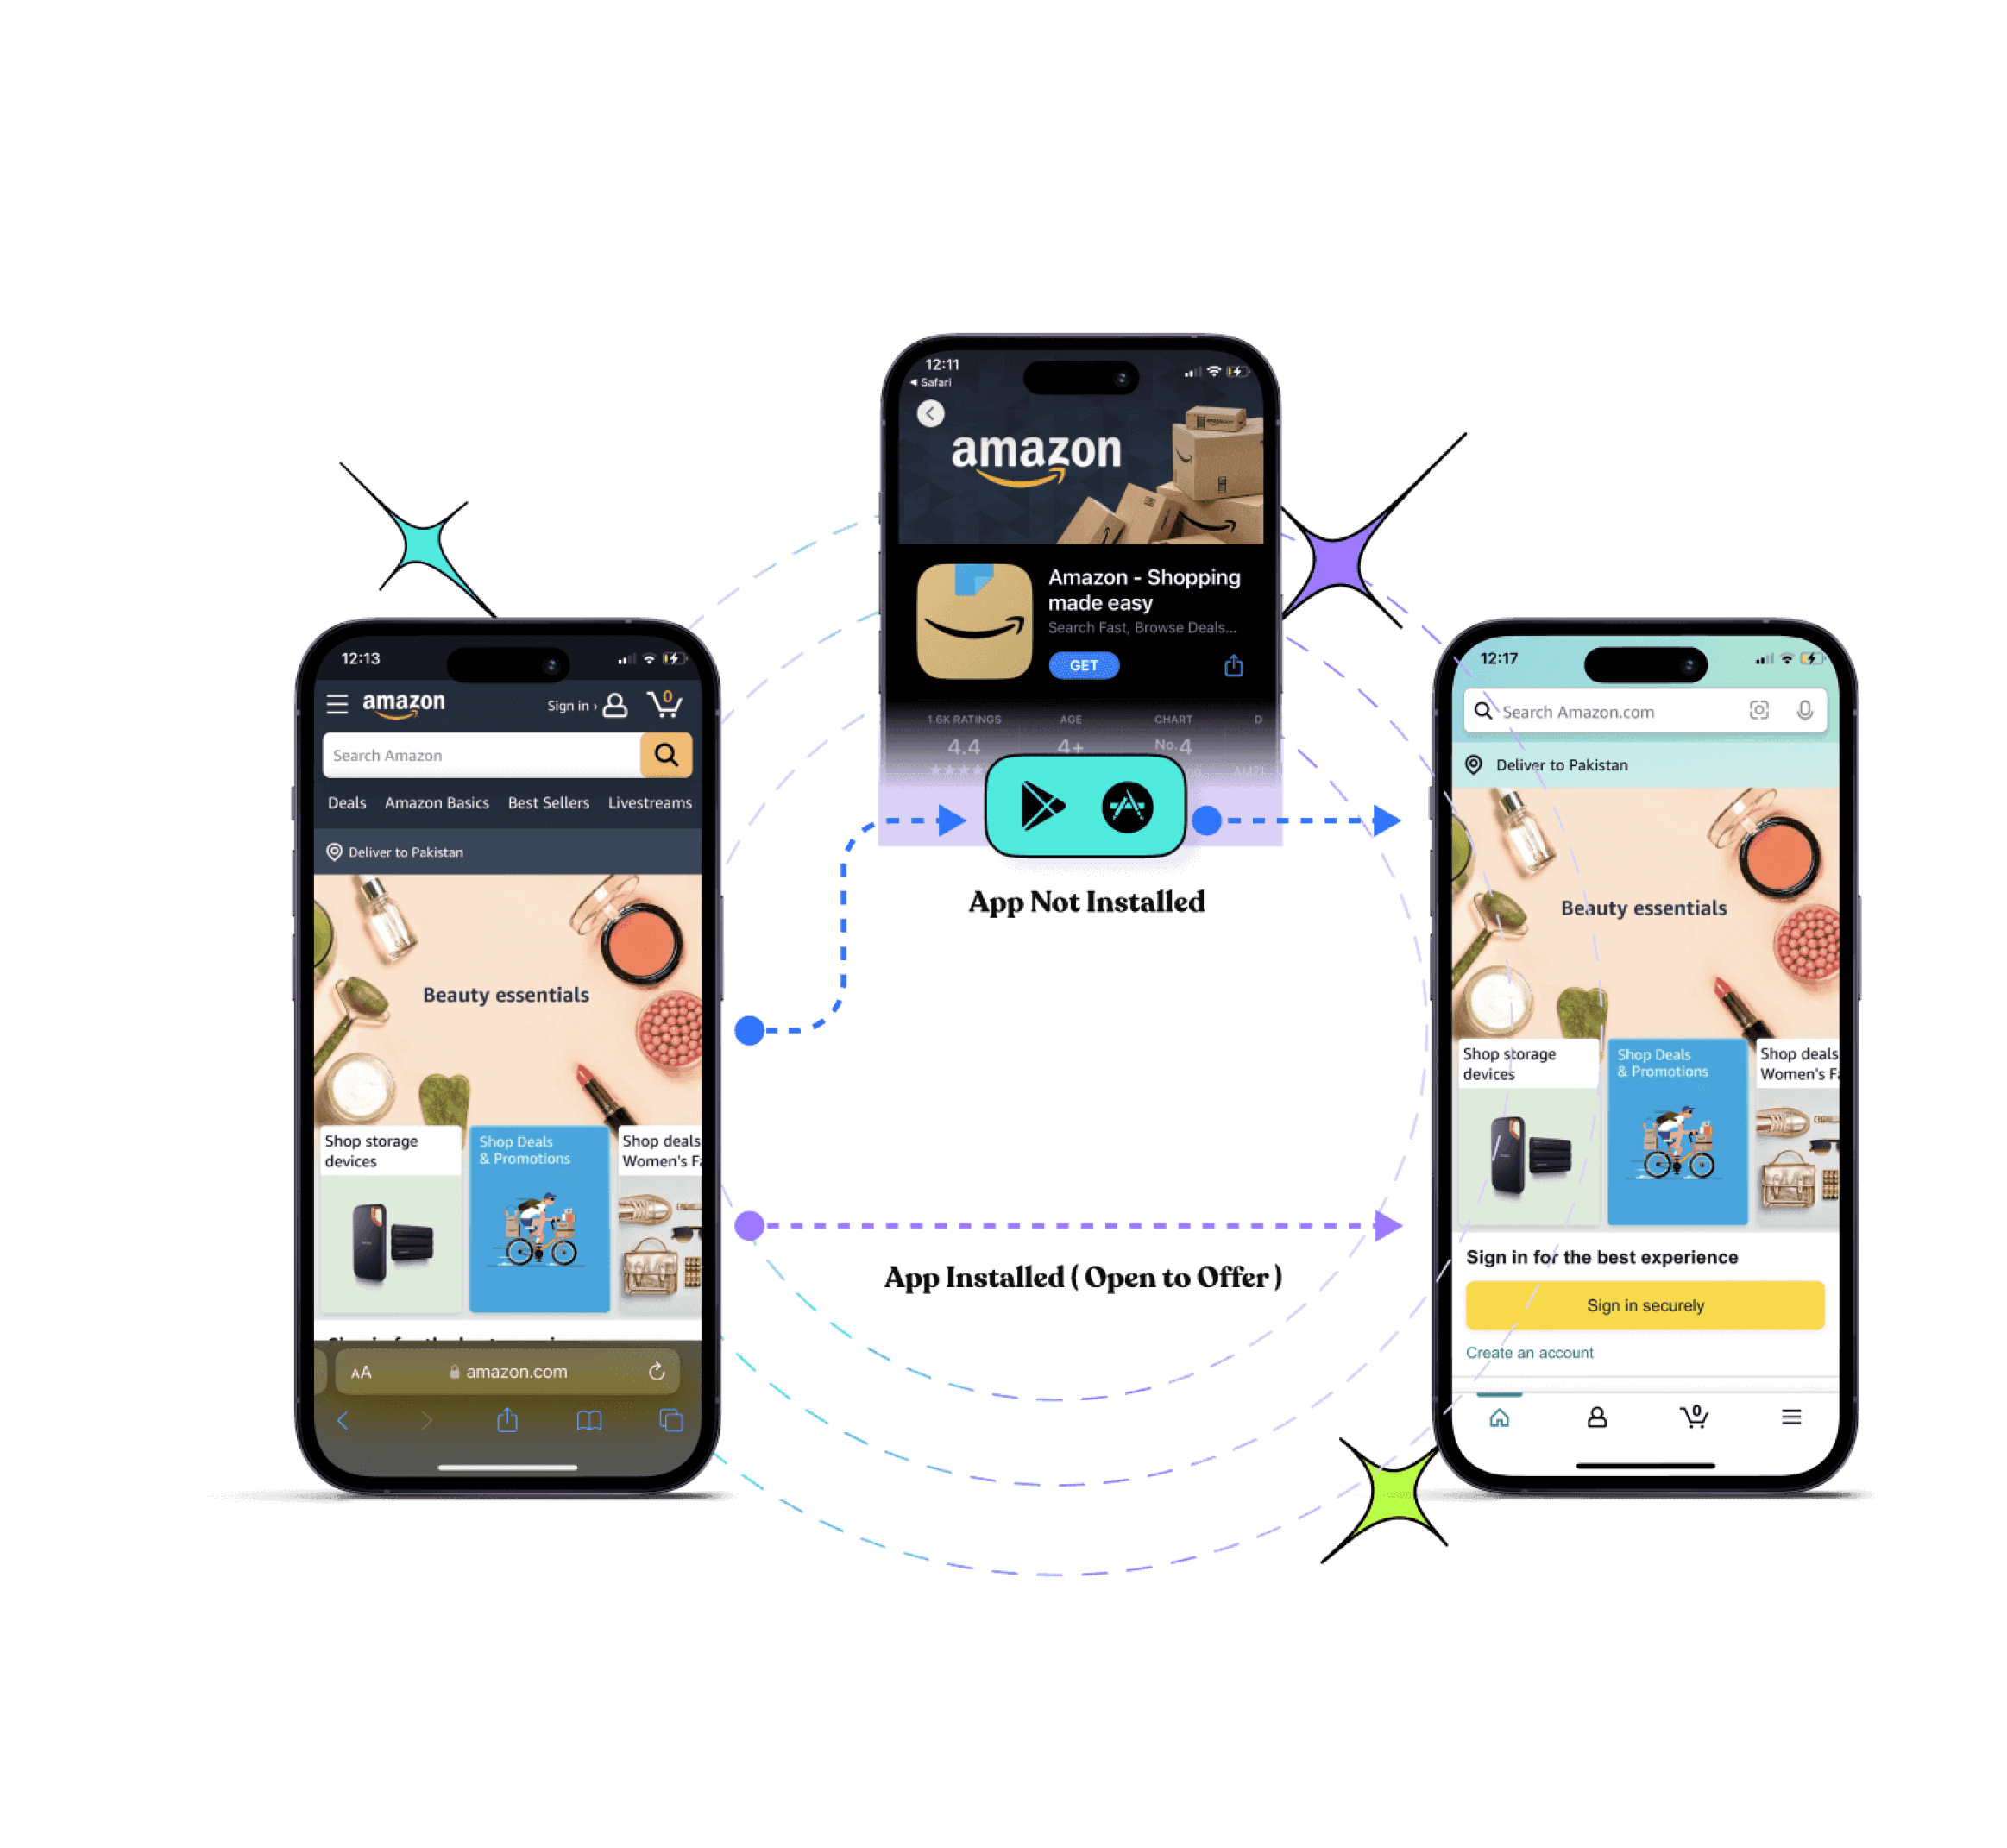
Are you tired of encountering dead ends and frustrating error messages while browsing the web? Well, get ready to bid farewell to those exasperating moments because we have a game-changer for you: URL redirection. It’s like having your very own digital GPS that ensures every click you make leads you straight to your desired online destination.
In this guide, we’re going to unravel the mysteries of URL redirection and make it crystal clear why it’s a must-know concept for anyone navigating the digital realm. No jargon, no complicated technicalities – just straightforward explanations and practical tips that will empower you to redirect URLs like a pro.
Ready? Let’s dive in and discover how to redirect a URL in WordPress!
What is URL Redirection?
URL redirection, also known as URL forwarding, is the process of directing a user from one web address (URL) to another. It is a technique used to ensure that when a user clicks on a specific URL, they are automatically redirected to a different URL, typically to a new location or destination.
URL redirection serves multiple purposes in the digital landscape. It allows website owners to manage changes such as rebranding, domain changes, or restructuring their website’s content without breaking existing links or causing inconvenience to users. It also helps to maintain search engine rankings by preserving the authority and relevance associated with the original URL.
Types of URL redirects:
There are two primary types of URL redirection:
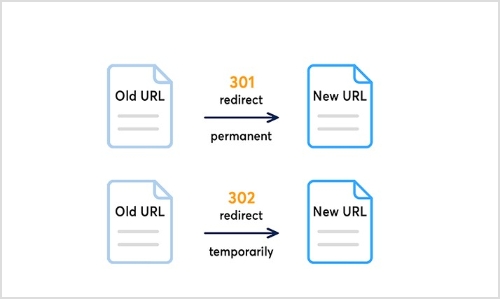
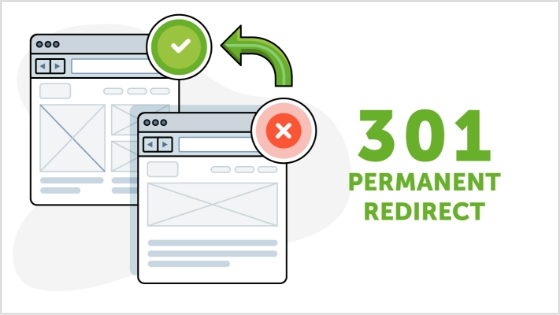
Permanent redirect (HTTP 301):
This type of redirect indicates that the original URL has moved permanently to a new location. It informs search engines and web browsers that the new URL should be considered the main and preferred address for the content. Permanent redirects are commonly used for situations like domain changes or when merging multiple web pages into a single page.
Temporary redirects are used when the original URL is only temporarily unavailable or has moved to a different location for a short period. It instructs web browsers and search engines to visit the new URL temporarily, while still recognizing the original URL. Temporary redirects are often used during website maintenance or when testing new pages before making them permanent.
Other unusual redirects include:
Besides the commonly used permanent redirect (HTTP 301) and temporary redirect (HTTP 302), there are a few other types of redirects that serve specific purposes. These include:
303 see other:
This redirect is similar to the temporary redirect (HTTP 302) but has a specific meaning defined in the HTTP protocol. It indicates to the browser that the requested resource can be found at a different location, and the response to the redirected request should be a GET method.
307 temporary redirect:
This is another type of temporary redirect, similar to HTTP 302. It indicates to the browser that the requested resource has temporarily moved to a different location. However, unlike HTTP 302, the browser should continue to use the same HTTP method (e.g., POST) for the redirected request.
308 permanent redirect:
Similar to the permanent redirect (HTTP 301), the 308 status code indicates that the requested resource has permanently moved to a new location. The key difference is that the browser should use the same HTTP method (e.g., POST) for the redirected request, whereas HTTP 301 may convert a POST request to a GET request.
These additional redirect types (303, 307, and 308) have specific use cases and are less commonly utilized compared to HTTP 301 and HTTP 302 redirects. The choice of which redirect type to use depends on the specific requirements of your website and the desired behavior for the redirected requests.
How to redirect a URL in WordPress?
To redirect a URL in WordPress, you can use either a plugin or modify the .htaccess file. Here are two methods you can follow:
Method 1: Using a WordPress redirection plugin
Step 1: Install and activate a redirection plugin
Go to your WordPress dashboard, navigate to “Plugins” > “Add New,” and search for a redirection plugin such as “Redirection” or “Yoast SEO.” Install and activate the plugin of your choice.
Step 2: Set up the redirect
Once the plugin is activated, go to the plugin’s settings or options page (usually located under “Tools” or “SEO” in the dashboard menu). Look for a section related to URL redirection or redirects.
Step 3: Add a new redirection rule
In the plugin’s settings, you should find an option to add a new redirection rule. Enter the old URL (source) and the new URL (target) where you want the redirect to point. Choose the appropriate redirect type (301 or 302) as needed.
Step 4: Save the redirection rule
After filling in the necessary details, save the redirection rule. The plugin will handle the redirection, and when someone accesses the old URL, they will be automatically redirected to the new URL you specified.
Connect to your website’s hosting account using FTP (File Transfer Protocol) or access the file manager in your hosting control panel.
Step 2: Backup the .htaccess file
Before making any changes, it’s important to create a backup of the existing .htaccess file in case anything goes wrong. Simply download a copy of the .htaccess file to your local computer.
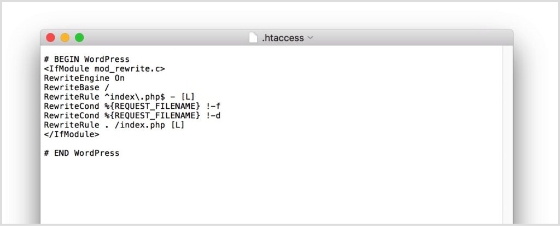
Step 3: Edit the .htaccess file
Open the .htaccess file using a text editor. Add the following code at the beginning or end of the file, depending on your preference:
Replace “/old-url/” with the actual URL slug or path of the old URL you want to redirect, and “http://www.example.com/new-url” with the desired destination URL.
Step 4: Save and upload the modified .htaccess file
Save the changes to the .htaccess file and upload it back to the root directory of your WordPress installation, overwriting the existing file.
Step 5: Test the redirection
Visit the old URL in your web browser and verify that it correctly redirects to the new URL you specified. If the redirection is working as expected, you have successfully redirected the URL in WordPress.
Remember, modifying the .htaccess file requires caution, as any mistakes in the code can cause issues with your website. Make sure to double-check the changes and keep a backup of the original .htaccess file for safety purposes.
Why you should create a redirect?
There are several scenarios in which you may need to create a redirect. Here are some common situations where redirects are useful:
1. Rebranding or website restructuring:
If you undergo a rebranding process or make significant changes to your website’s structure, you may need to redirect old URLs to their new equivalents. This ensures that users who access the old URLs are seamlessly directed to the updated content.
2. Changing domain names:
When you change your website’s domain name, it’s essential to set up redirects from the old domain to the new one. This preserves your website’s traffic, and search engine rankings, and ensures that visitors who may have bookmarked or shared your old URLs are still able to access your content.
3. Handling outdated or expired content:
When you remove or archive certain pages or posts on your website, you can create redirects to guide users to relevant and up-to-date content. This prevents visitors from encountering dead ends or 404 error pages and helps maintain a positive user experience.
4. Managing affiliate or marketing campaigns:
If you’re running specific marketing campaigns or affiliate programs that involve unique URLs, you might need to create redirects to track and direct visitors to the intended landing pages. This allows you to monitor campaign performance and ensure visitors land at the correct destination.
5. Correcting broken or mistyped URLs:
If you discover broken or mistyped URLs on your website, creating redirects can fix these issues. By redirecting the incorrect URLs to the correct ones, you can ensure a smooth browsing experience for your users and prevent them from encountering frustrating dead ends.
Remember, redirects are powerful tools that can help you maintain website functionality, improve user experience, and preserve SEO efforts. Whenever you make changes to your website that impact URLs, consider whether a redirect is necessary to ensure a seamless transition and to guide users and search engines to the right content.
In the vast realm of the internet, URL redirection is the key to unlocking seamless navigation and preserving your online presence. By mastering the art of redirection, you can ensure a flawless user experience, maintain search engine rankings, and adapt to changes with ease.
Whether you’re rebranding, restructuring, or simply seeking to enhance your website’s performance, redirecting URLs is your secret weapon. So, embrace the power of redirection, navigate the digital landscape with confidence, and watch as your online presence soars to new heights. Get ready to redirect your way to success!
FAQs
FAQs
What is the difference between a permanent redirect (HTTP 301) and a temporary redirect (HTTP 302)?
A permanent redirect (HTTP 301) informs search engines and browsers that the original URL has permanently moved to a new location. A temporary redirect (HTTP 302) indicates a temporary move or change. It’s important to choose the appropriate type depending on the situation.
How can URL redirection impact my website’s search engine rankings?
URL redirection can impact search engine rankings by preserving the authority and relevance associated with the original URL. If implemented correctly, redirects can transfer link equity and prevent loss of traffic and rankings when URLs change or move.
Can I implement URL redirection without a plugin?
Yes, you can implement URL redirection without a plugin by modifying the .htaccess file on your server. This method allows you to set up server-side redirects using rules defined in the .htaccess file.
Are there any SEO best practices to consider when setting up URL redirects?
Yes, when setting up URL redirects, it’s important to ensure that the redirect is a one-to-one mapping from the old URL to the new URL. Additionally, update internal links and notify relevant parties to update their references. Monitor and maintain redirects to address any issues promptly.
How do I test if my URL redirection is working correctly?
To test URL redirection, simply access the old URL and verify that you are automatically redirected to the new URL. Test on different devices and browsers to ensure compatibility and functionality.
What should I do if I encounter redirect loops or broken redirects?
If you encounter redirect loops or broken redirects, review your redirect configurations and ensure they are set up correctly. Check for any circular redirections or incorrect rules. Make necessary corrections and retest the redirects.
Is it possible to redirect multiple URLs at once?
Yes, it is possible to redirect multiple URLs at once. In WordPress, you can use a plugin that supports bulk or wildcard redirects. Alternatively, with server-side redirects, you can set up rules in the .htaccess file to redirect multiple URLs simultaneously.
In today’s digital landscape, capturing and retaining the attention of potential customers is a constant challenge. However, what if there was a way to reconnect with those who have already shown interest in your brand? Enter LinkedIn retargeting ads – a game-changing strategy that enables you to precisely target and engage with your desired audience.
Whether you’re aiming to increase conversions, drive brand awareness, or nurture leads, understanding how LinkedIn retargeting ads work is crucial. In this complete guide, we delve into the intricacies of LinkedIn retargeting, unraveling the mechanisms behind this powerful advertising tool.
Get ready to embark on a journey that will transform the way you connect, engage, and convert on the world’s largest professional network – LinkedIn. Buckle up and prepare to discover the untapped potential of LinkedIn retargeting in this comprehensive and insightful guide.
What is retargeting?
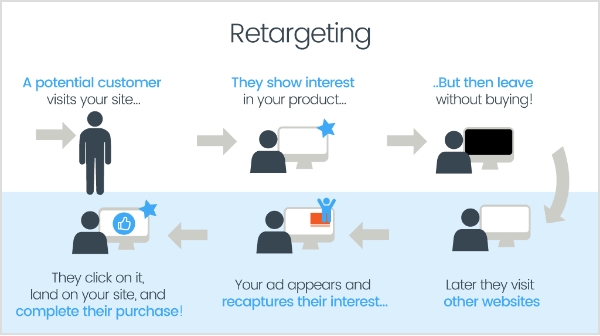
Retargeting, also known as remarketing, is a strategic advertising technique that allows you to reconnect with users who have previously interacted with your brand or website. It involves targeting ads specifically to individuals who have shown interest in your products or services, but may not have completed a desired action, such as making a purchase or filling out a form.
When someone visits your website, a small piece of code called a tracking pixel or tag is placed on their browser. This pixel enables your advertising platform to track their online behavior and collect valuable data about their interactions. Using this data, you can then deliver personalized ads to these individuals as they browse other websites or social media platforms.
The goal of retargeting is to stay top-of-mind with potential customers, reminding them of your brand and enticing them to return to your website to complete the desired action. By targeting individuals who have already shown interest, retargeting allows you to maximize your advertising budget and increase the chances of converting leads into customers.
Maximize your lead generation efforts with retargeting pixels from Replug. Capture valuable data and engage your website visitors with targeted ads. Boost conversions and grow your customer base. Get started with Replug today.
What is retargeting on LinkedIn?
Retargeting on LinkedIn refers to the advertising strategy that allows businesses to target and engage with individuals who have previously visited their website or interacted with their brand on LinkedIn. LinkedIn, being the world’s largest professional network, offers powerful retargeting capabilities to reach a specific audience of professionals and decision-makers.
LinkedIn’s retargeting feature utilizes the LinkedIn Insight Tag, which is a code snippet placed on a website to track visitor behavior. This Insight Tag collects valuable data about website visitors, including company names, job seniority, industry, geography, and more. This data enables advertisers to create highly targeted and personalized ad campaigns on LinkedIn.
With LinkedIn retargeting, businesses can show tailored ads to individuals who have shown interest in their brand by visiting their website. These ads can appear across the LinkedIn platform, including the LinkedIn feed, sponsored content, messaging, and more. By reconnecting with website visitors on LinkedIn, businesses can nurture leads, drive conversions, and increase brand visibility among a professional audience.
LinkedIn retargeting works by utilizing the LinkedIn Insight Tag, a code snippet placed on a website to track visitor behavior and collect valuable data. Here’s a step-by-step overview of how LinkedIn retargeting works:
Implement the LinkedIn Insight Tag:
To start using LinkedIn retargeting, you need to place the LinkedIn Insight Tag on your website. This tag is a small snippet of code provided by LinkedIn that needs to be added to the pages of your website.
Capture Visitor Data:
Once the Insight Tag is installed, it starts capturing data about the visitors to your website. The tag collects information such as company names, job seniority, industry, geography, and more, providing valuable insights into your website visitors’ characteristics.
Create Audience Segments:
Using the data collected by the Insight Tag, you can create customized audience segments based on specific criteria. For example, you can target visitors from specific industries, job titles, or company sizes. These audience segments allow you to tailor your retargeting campaigns and deliver personalized messaging.
With your audience segments defined, you can create retargeting campaigns on LinkedIn’s advertising platform. These campaigns enable you to display targeted ads to the specific audience segments you have defined. The ads can appear on various LinkedIn placements, including the LinkedIn feed, sponsored content, and messaging.
Display Tailored Ads:
When a visitor who has previously been on your website visits LinkedIn, the LinkedIn platform recognizes them through the Insight Tag and displays your tailored ads to them. This ensures that your ads reach the right people at the right time, maximizing their effectiveness.
Drive Engagement and Conversions:
Through retargeting, you can engage with visitors who have already shown interest in your brand. By delivering relevant and personalized ads, you can encourage them to take desired actions, such as signing up for a newsletter, requesting a demo, or making a purchase. Retargeting allows you to nurture these leads and guide them through the customer journey.
Setting up LinkedIn retargeting ads involves a few steps to ensure your campaigns are properly configured. The first step is to install the LinkedIn Insight Tag on your website. This tag is a code snippet provided by LinkedIn that needs to be placed on all the pages of your website. It enables LinkedIn to track visitor behavior and collect data for retargeting purposes.
Here’s how to set up retargeting on LinkedIn:
Once LinkedIn Insight Tag is Installed, you can set up retargeting ads on LinkedIn by following the steps below:
Step 2: If needed, switch to the correct account by clicking on the account name in the upper-left corner and selecting the desired account from the dropdown.
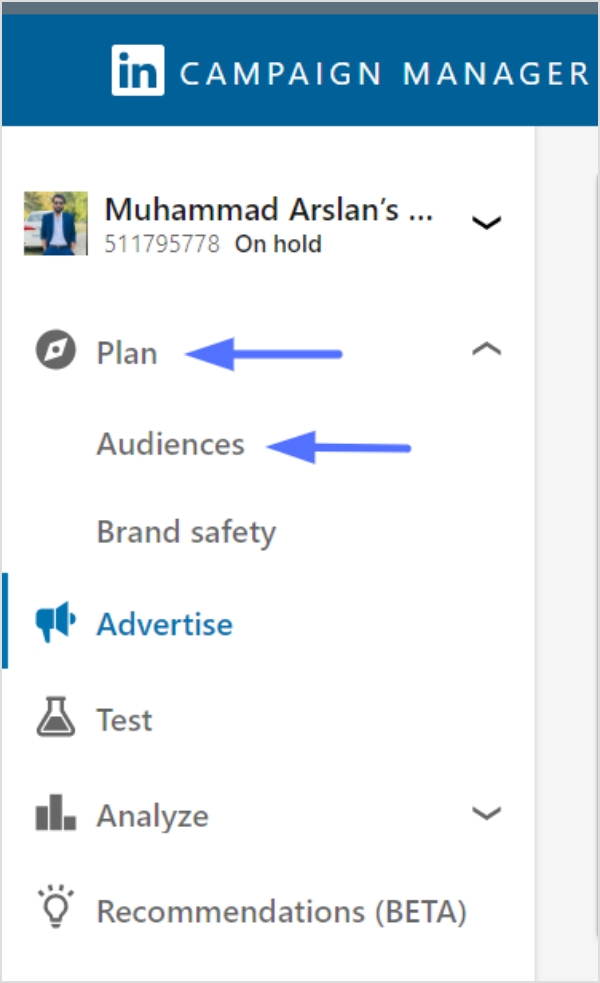
Step 3: Click on “Plan” in the left menu and select “Audiences”.
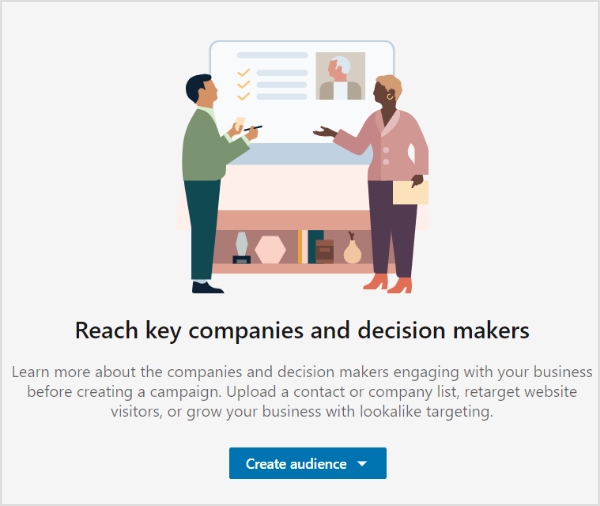
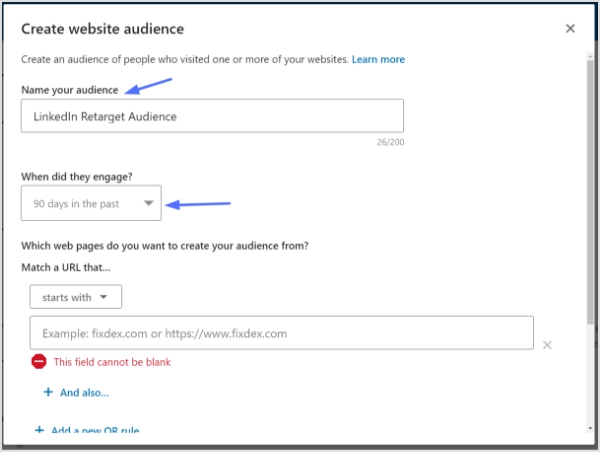
Step 4: Click on the “Create Audience” button in the top left of the page.
Step 7: Choose the time range for your audience engagement. You can select from 30, 60, 90, or 180 days in the past.
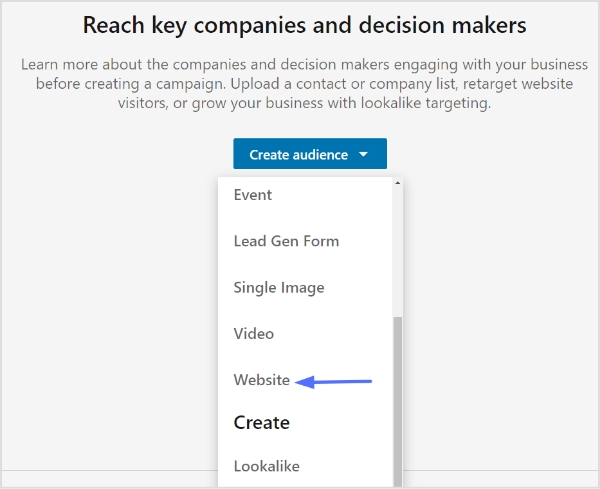
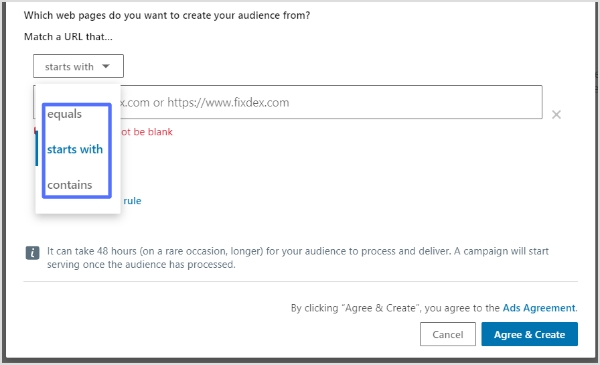
Step 8: Add the website URLs you want to retarget. You can specify whether the URL starts with,equals, or contains a specific value. This allows you to define the pages on your website that will contribute to building your retargeting audience.
“Starts with” is useful for URLs with dynamic parameters at the end.
“Equals” is used when you want to match a specific URL.
“Contains” allows you to target URLs that contain specific keywords or phrases.
You can click “+ And also” below a URL to further narrow down the pages where conversions are counted.
Use “+ Add a new OR rule” if you have multiple URLs contributing to the audience.
Step 9: Click “Agree & Create” to create your retargeting audience.
Important Note:
Note that your audience needs to have at least 300 website visitors to be usable in an active campaign. Depending on the traffic to your website, it may take up to 48 hours for your audience to build.
Keep in mind that website retargeting audiences cannot be used with member interests and traits when selecting targeting facets for your campaign audience.
The benefits of LinkedIn retargeting are numerous and can significantly enhance your customer acquisition efforts. Here are some key advantages of utilizing LinkedIn retargeting in your marketing strategy:
Enhanced Customer Acquisition:
LinkedIn’s extensive user database and professional targeting options allow you to reach highly relevant audiences. By retargeting individuals who have previously visited your website, you can reconnect with potential customers who have already shown interest in your brand. This familiarity increases the likelihood of engagement and conversion, ultimately driving customer acquisition.
Increased Engagement:
Retargeting allows you to engage with visitors who have already interacted with your brand. These individuals are more likely to view multiple pages on your website, spend more time exploring your offerings, and exhibit a genuine interest in what you have to offer. This heightened engagement can lead to higher conversion rates, increased customer loyalty, and a higher customer lifetime value.
Integration with Paid Traffic Acquisition:
Retargeting works synergistically with paid traffic acquisition efforts. By broadly targeting website pages through paid ads, you can capture initial awareness and generate new traffic. Then, through retargeting, you can focus on those visitors who landed on your pages but did not convert on the first visit. This keeps your brand top of mind as they continue to browse the internet, maximizing the impact of your advertising investment.
Augment Organic Traffic Strategies:
In addition to paid traffic, retargeting can complement your organic traffic strategies. By retargeting visitors who came to your website through search engines, social media platforms, or referral channels, you can reinforce their interest in your brand and encourage them to take further action. This amplifies your organic traffic efforts and increases the likelihood of conversions.
Launching a LinkedIn retargeting campaign can be a powerful strategy to maximize your marketing efforts and drive better results. While there is no fixed rule on when to start, it is generally recommended to consider a few factors before launching your campaign.
Minimum visitor requirement:
Firstly, it’s important to have a sufficient amount of website traffic to retarget. While the common suggestion is to start retargeting once you’ve reached 500-1,000 monthly visitors, the actual number can vary based on your specific circumstances.
For example, if you have a one-page website, retargeting 1,000 visitors can yield stronger results compared to retargeting the same number of visitors on a larger website with multiple pages. It’s crucial to have a minimum of 300 visitors for a segment to be eligible for retargeting using the LinkedIn Insight tag.
Maximizing returns on high-converting pages:
Additionally, it’s beneficial to launch retargeting campaigns when your traffic acquisition efforts have scaled and are consistently targeting pages that convert visitors into paid customers. By focusing on pages that have a higher conversion rate, you can maximize the effectiveness of your retargeting campaigns and achieve better returns on your investment.
Timing is the key:
Timing is key when it comes to retargeting. While launching retargeting early in the traffic acquisition lifecycle has its advantages, such as building brand familiarity and engaging with visitors who have already shown interest, it’s essential to align your retargeting efforts with the stage where your traffic acquisition is scaled and generating consistent conversions.
Retargeting vs Remarketing: What is the difference?
Remarketing and retargeting are two distinct methods of marketing to existing leads, often used interchangeably but with subtle differences.
Retargeting:
Retargeting involves serving paid ads to previous visitors across various platforms to re-engage them and prompt them to take desired actions. It utilizes tracking pixels and JavaScript codes to capture visitor data and display tailored advertising.
Retargeting focuses on reaching out to visitors who have shown interest but may not have converted yet. It helps increase brand visibility, engagement, and customer acquisition.
Remarketing:
On the other hand, remarketing uses the retargeting pixel to serve ads specific to existing customers and leads who have provided their email addresses. With access to the visitor’s email address, businesses can leverage email marketing to deliver personalized offers and messages.
Remarketing allows for more targeted and personalized communication, such as sending subscription renewal reminders, re-engaging cold subscribers, or offering targeted up-sells and cross-sells based on purchasing behavior.
It provides an opportunity to tie behavioral data to action and deliver offers in a more personal environment.
LinkedIn Retargeting offers a powerful means to re-engage with past website visitors, leveraging the platform’s extensive user data and advanced advertising capabilities. By implementing effective retargeting campaigns, businesses can boost engagement, increase conversions, and drive revenue growth. With its unique features and the ability to tailor content based on visitor insights, LinkedIn Retargeting stands out as a valuable tool in any comprehensive customer acquisition strategy.
Remember, successful LinkedIn Retargeting campaigns require careful planning, audience segmentation, and ongoing optimization to yield optimal results. By harnessing the potential of LinkedIn Retargeting, businesses can connect with their target audience on a more personalized level, nurturing valuable relationships and achieving their marketing objectives.
FAQs
When is the right time to launch a LinkedIn retargeting campaign?
The ideal time to launch a LinkedIn retargeting campaign may vary depending on the specific circumstances of each business. While some recommend starting retargeting after reaching 500-1,000 monthly visitors, it is crucial to consider the quality and relevance of the traffic. Retargeting campaigns generally yield higher returns when traffic acquisition efforts have scaled and when there are consistent conversions of website visitors into paid customers.
How many website visitors do I need for LinkedIn retargeting?
LinkedIn’s Insight tag requires retargeting segments to have a minimum of 300 website visitors. This ensures that the audience is large enough to generate meaningful results and target effectively.
What are some effective strategies for LinkedIn retargeting?
Effective strategies for LinkedIn retargeting include segmenting the audience based on specific actions or pages visited, creating compelling ad creatives that align with the visitor’s interests, using personalized messaging, and testing different ad formats and placements to optimize performance.
Can LinkedIn retargeting be used for B2B marketing?
Yes, LinkedIn retargeting can be used for B2B marketing. With LinkedIn’s professional user base, businesses can target specific industries, job titles, company sizes, and more, making it a valuable platform for reaching and engaging with the B2B audience.
What metrics should I track to measure the success of my LinkedIn retargeting campaigns?
Key metrics to track the success of LinkedIn retargeting campaigns include click-through rates (CTRs), conversion rates, cost per click (CPC), return on ad spend (ROAS), and overall campaign performance. These metrics help measure the effectiveness of the ads, audience targeting, and overall campaign ROI.
In WordPress, permalinks play a crucial role in defining the structure of your website’s URLs. Changing the permalink structure can improve your site’s search engine optimization (SEO) and make your links more user-friendly. This guide will walk you through the process of changing permalinks in WordPress by providing step-by-step instructions. Let’s dive in!
Here’s how to change Permalink in WordPress:
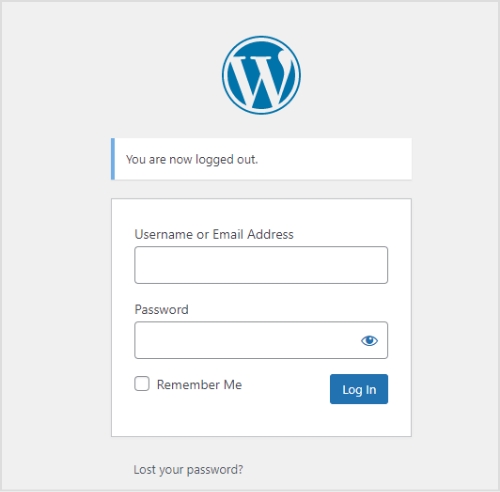
Step 1: Log in to your WordPress admin dashboard
To begin, log in to your WordPress admin dashboard using your credentials. Once logged in, you’ll have access to the necessary settings to modify your permalink structure.
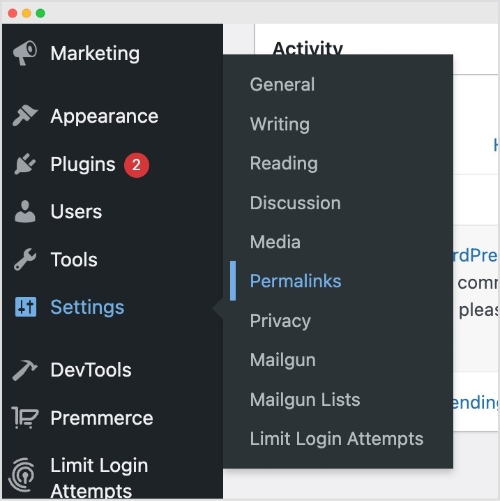
From the left-hand menu, locate and click on “Settings,” and then select “Permalinks.” This action will take you to the Permalink Settings page, where you can customize your Permalink structure.
Step 3: Choose a common Permalink structure or create a custom one
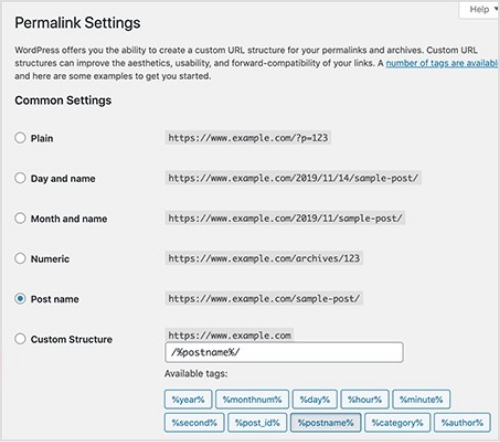
On the Permalink Settings page, you’ll find various pre-defined options for permalink structures, including plain, day and name, month and name, numeric, post name, and more. Select the one that best suits your needs. If you prefer a custom permalink structure, proceed to Step 4.
Step 4: Create a custom Permalink structure (optional)
If you want a custom permalink structure, select the “Custom Structure” option on the Permalink Settings page. This will reveal a text field where you can enter your desired permalink structure using tags. Utilize tags like %year%, %monthnum%, %day%, %post_id%, %postname%, %category%, %author%, and %pagename% to craft a unique permalink structure.
Step 5: Save changes
After selecting a common or custom permalink structure, click on the “Save Changes” button located at the bottom of the Permalink Settings page. By doing so, your new permalink settings will be saved, and WordPress will automatically update the URLs accordingly.
A permalink, short for “permanent link,” is a URL (Uniform Resource Locator) that points to a specific web page or post on a website. It is called a “permanent” link because it is intended to remain unchanged and accessible over time, even if the content of the page or post is updated or moved.
Permalinks determine the structure and format of URLs for individual posts, pages, categories, and other content types. They provide a unique and stable address that can be used to access a specific piece of content directly. Permalinks are often used in navigation menus, hyperlinks, search engine results, social media shares, and other online references.
Will changing my permalink structure affect my website’s SEO?
Yes, changing the permalink structure can impact your SEO. It’s advisable to set up redirects or use a plugin to manage redirects in order to preserve the SEO value of your URLs and prevent broken links.
Can I change the permalink structure for existing posts and pages?
Yes, when you modify the permalink structure, it will apply to all new posts and pages you create. However, for existing content, the URLs will change, which may result in broken links. Implementing redirects can help mitigate this issue.
What if I change my mind after modifying the permalink structure?
A3: WordPress allows you to revert to your previous permalink structure. Simply revisit the Permalink Settings page, choose the desired structure, and save the changes. However, keep in mind that this will once again alter the URLs of your posts and pages.
Are there any performance implications of changing the permalink structure?
Generally, changing the permalink structure itself doesn’t have a significant impact on website performance. However, if you have a large number of posts or pages, updating the URLs may require additional server resources during the redirect process.
Can I localize my permalinks for different languages?
Yes, if you have a multilingual website, you can utilize plugins like WPML or Polylang to set up language-specific permalink structures. These plugins enable you to create separate URLs for different language versions of your content.
Are you tired of manually checking multiple websites for updates on your favorite topics? Do you wish there was a simpler way to stay informed without getting lost in the sea of information online? Enter RSS feed, a tool designed to streamline content delivery and help you keep up with your favorite websites and topics. But what exactly is an RSS feed, and why should you consider creating one for your website?
In this article, we’ll explore the ins and outs of RSS feeds and show you how this powerful tool can improve your website’s content delivery, increase engagement with your audience, and save you time in the process. So if you’re ready to take your content to the next level, let’s dive in and discover the power of RSS feed.
What is an RSS feed?
An RSS feed is a technology that allows websites to automatically syndicate their content to users who subscribe to their feed. In simple terms, it’s a way for websites to push new content to subscribers as soon as it’s published, without the need for users to manually check the website for updates.
Here’s an example of how an RSS feed works:
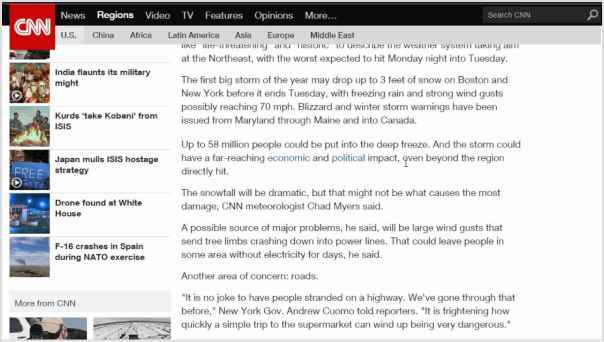
Imagine you are an avid reader of a CNN news website that covers a variety of topics. You want to stay up-to-date with the latest news, but checking the website multiple times a day for new articles is time-consuming and inefficient.
Therefore, CNN offers RSS feeds for various topics such as top stories, world news, politics, business, entertainment, and more. By subscribing to one or more of CNN’s RSS feeds, users can receive updates on the latest news articles as soon as they are published, without the need to constantly check the CNN website for updates.
In short, an RSS feed is a powerful tool that benefits both website owners and users, by streamlining content delivery and improving the user experience.
A brief history of RSS feeds:
The history of RSS feeds dates back to the late 1990s, with the emergence of the Really Simple Syndication (RSS) technology. It was developed as a means to simplify the distribution and aggregation of web content.
The roots of RSS can be traced back to a format called RDF (Resource Description Framework), which was developed by the World Wide Web Consortium (W3C) in 1997. RDF aimed to provide a standardized way of describing metadata for web resources.
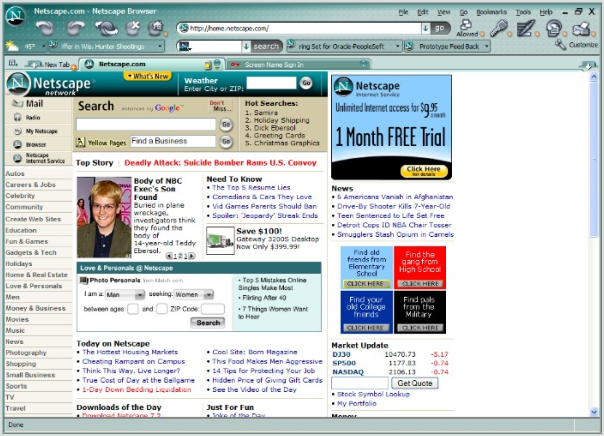
In 1999, Netscape, a prominent web browser at the time, introduced a simplified version of RDF called RDF Site Summary (RSS). It was created by Dan Libby and Ramanathan V. Guha, and its purpose was to allow websites to easily syndicate their content.
The initial versions of RSS were relatively basic, allowing websites to provide a list of headlines and summaries of their articles. However, as RSS gained popularity, new versions were developed to enhance its capabilities. RSS 1.0, based on RDF, offered more flexibility in terms of data representation and allowed for more detailed metadata.
In 2002, a different version of RSS emerged, known as RSS 2.0. It was developed by Dave Winer and included improvements such as better support for enclosures (allowing the inclusion of multimedia content) and increased compatibility with various web applications and platforms.
As the popularity of RSS feeds grew, many software applications and online services were developed to facilitate their use. RSS feed readers, also known as RSS aggregators, allowed users to subscribe to their favorite websites and receive updates automatically. Popular feed readers included Google Reader, Feedly, and Netvibes.
Yes, RSS feeds are still widely used in 2023. In fact, RSS feeds have not only endured the test of time but have also evolved into a convenient, efficient, and personalized method of staying up to date with the latest news and developments.
With RSS, you have the power to curate your own digital universe. Say goodbye to information overload and hello to a carefully crafted newsstand brimming with the sources you love. Customize your subscriptions with ease, effortlessly adding, removing, and organizing your favorite news outlets. What’s more, you can set up automated systems that whisk the latest updates right to your digital doorstep as soon as they hit the digital realm.
But it’s not just users who benefit from RSS feeds. Savvy businesses have tapped into the power of RSS as a marketing tool, offering subscription links on their websites or even exclusive promotions through RSS feeds. It’s a win-win situation, allowing businesses to reach wider audiences while still targeting the most engaged and interested customers.
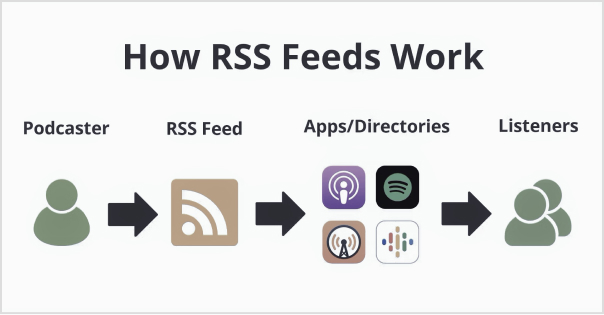
How RSS works?
RSS (Really Simple Syndication) works based on a structured XML (Extensible Markup Language) format. Here’s a step-by-step breakdown of how RSS works:
Step 1: Content Creation
Website owners or content creators generate new articles, blog posts, or other forms of content on their websites.
Step 2: RSS feed generation
The website’s content management system or specialized software generates an RSS feed that contains the metadata and information about the new content. This includes the title, summary, publication date, and a link to the full article.
Step 3: RSS feed publication
The website publishes the RSS feed file on a specific URL, often indicated as the website’s RSS feed URL.
Step 4: User subscription
Users who are interested in receiving updates from the website subscribe to its RSS feed. They can do this by using an RSS feed reader, which is a software application or online service designed to read and aggregate RSS feeds.
Step 5: Feed reading
The RSS feed reader regularly checks the subscribed RSS feeds for updates. It sends a request to the website’s RSS feed URL to fetch the latest feed content.
Step 6: Content delivery
If there are new articles or updates in the RSS feed, the RSS reader retrieves the content and presents it to the user in a readable format. This typically includes the title, summary, and a link to the full article on the website.
Step 7: User interaction
Users can click on the links within the RSS reader to access the full content on the original website. They can read, share, or bookmark the articles based on their preferences.
Step 8: Update notifications
RSS readers can be configured to provide notifications or display unread item counts to keep users informed about new content.
Step 9: Synchronization
Some RSS readers offer synchronization across multiple devices, allowing users to access their subscribed feeds from different devices and keep their reading progress and subscriptions up to date.
The process repeats itself as new content is published on the website. RSS feeds provide a standardized and efficient method for content distribution, enabling users to stay updated with the latest information from multiple sources without the need to manually visit each website separately.
Using RSS feeds can significantly boost productivity by streamlining the process of accessing and managing relevant information. Here are some ways to leverage RSS feeds to enhance productivity:
Consolidate information
Subscribe to RSS feeds from your favorite websites, blogs, news outlets, and industry publications. By aggregating content from various sources into a single RSS feed reader, you can access all the updates and news in one central location, eliminating the need to visit multiple websites individually.
Efficient information consumption
RSS feeds allow you to scan headlines, summaries, and key points of articles without visiting the full web page. This enables you to quickly assess the relevance and importance of each item, saving time by focusing on the most essential content.
Customized content curation
Tailor your RSS feed subscriptions to specific topics, industries, or areas of interest. This customization ensures that you receive content that aligns with your needs and eliminates unnecessary noise. By fine-tuning your feed, you can access high-quality information that directly impacts your work or personal interests.
Time-saving automation
RSS feeds deliver updates automatically, eliminating the need to manually check each website for new content. Set up regular intervals for your RSS reader to refresh and fetch updates, ensuring you stay up to date without wasting time on repetitive manual checks.
Prioritize and organize
RSS readers often provide features to categorize and organize feeds. Take advantage of these capabilities to create folders or tags based on topics, importance, or urgency. This helps you prioritize the content you consume and ensures you don’t miss critical updates.
Mobile and cross-device access
Many RSS readers offer mobile apps and cloud synchronization, enabling you to access your feeds and read content across different devices. This flexibility ensures you can stay productive and consume information wherever you are, whether on your computer, smartphone, or tablet.
Reduce information overload
With RSS feeds, you have control over the sources and types of content you consume. By curating a focused selection of feeds, you can avoid being overwhelmed by excessive information. This reduction in information overload enables you to concentrate on what truly matters, improving your productivity.
By leveraging the power of RSS feeds, you can streamline information consumption, stay informed efficiently, and focus on content that is most relevant to your work and interests. With reduced distractions and improved content management, you can enhance your productivity and make the most of your valuable time.
To find the RSS feed of a website, you can try the following methods:
Method 1: Look for the RSS icon
Many websites that offer RSS feeds display a recognizable RSS icon or a link to their feed. Look for the RSS icon, usually in the header, footer, or sidebar of the website. It typically looks like a square or rectangle with a curved line in the corner resembling a Wi-Fi signal icon.
Method 2: Check the source code
Right-click on the website’s page and select “View Page Source” or “Inspect” (depending on your browser). This will open the HTML source code of the webpage. Search for “RSS” or “feed” using the browser’s search function (usually accessible by pressing Ctrl+F or Command+F). Look for URLs containing “RSS” or “feed” that may indicate the presence of an RSS feed.
Method 3: Use browser extensions or add-ons
Some web browser extensions or add-ons are specifically designed to detect and display RSS feeds for websites. Examples include “RSS Subscription Extension” for Chrome and “RSSPreview” for Firefox. Install these extensions, and they will automatically scan the webpage for RSS feeds and provide a convenient way to subscribe.
Method 4: Search the website
Use the website’s search functionality and enter keywords such as “RSS” or “feed” to see if any relevant results appear. Some websites may have dedicated pages or sections that provide information or links to their RSS feeds.
Method 5: Utilize online RSS feed directories
There are online directories that catalog RSS feeds from various websites. These directories can be searched by topic, website name, or keyword. Examples include Feedly,RSS.com, and Feedspot. Enter the website’s name or topic of interest in the search bar of the directory to see if the website’s RSS feed is listed.
It’s worth noting that not all websites offer RSS feeds, as some have transitioned to other content distribution methods. If you are unable to find an RSS feed for a specific website, it is possible that they do not provide one.
How to create an RSS feed for a Podcast?
To create an RSS feed for a podcast, you’ll need to follow the steps below:
Step 1: Choose a content hosting platform
Choose a podcast hosting platform that offers RSS feed generation as part of its services. Popular options include Libsyn,Podbean, and Buzzsprout. These platforms provide tools to upload and manage your podcast episodes, as well as automatically generate an RSS feed for your podcast.
Step 2: Sign up and set up your account
Create an account on your chosen podcast hosting platform. Follow the platform’s instructions to set up your podcast profile, including providing necessary details such as podcast title, description, cover art, and other metadata.
Step 3: Upload episodes
Use the hosting platform’s interface to upload your podcast episodes. Typically, you’ll need to provide the audio files, episode titles, descriptions, and any additional information required. The platform will store and organize your podcast episodes.
Step 4: Customize settings
Configure settings specific to your podcast, such as episode release schedule, episode numbering, categories, and tags. These settings help categorize and promote your podcast effectively.
Step 5: Verify and preview
Review and verify the information and settings for your podcast episodes. Ensure that the episode titles, descriptions, and other metadata are accurate and formatted correctly. Preview how your podcast will appear in the RSS feed.
Step 6: Obtain the RSS feed URL
Once you’ve uploaded your episodes and configured the necessary settings, your podcast hosting platform will generate an RSS feed URL for your podcast. This URL is crucial for distributing and sharing your podcast with various podcast directories and platforms.
Escalate your brand marketing through Replug RSS Automation
Replug RSS Automation is a powerful feature that can significantly enhance your brand marketing efforts. Here’s how Replug RSS Automation can take your brand marketing to the next level:
Efficient content distribution:
With Replug RSS Automation, you can automatically distribute your content to various channels, including social media platforms, email newsletters, and content aggregators. This ensures that your brand’s message reaches a wider audience without the need for manual sharing and promotion.
Customized messaging:
Replug RSS Automation allows you to tailor your marketing messages based on the specific content being shared. You can add personalized call-to-actions, branding elements, and tracking links to maximize engagement and drive desired actions from your audience.
Targeted audience segmentation:
Through Replug RSS Automation, you can segment your audience based on their interests, preferences, and behavior. This enables you to deliver highly relevant content to specific segments, increasing the chances of capturing their attention and driving conversions.
Data-driven insights:
Replug RSS Automation provides valuable analytics and performance metrics to help you optimize your content marketing strategy. You can track the engagement, click-through rates, and conversions generated from your automated RSS campaigns. These insights allow you to refine your approach and make data-driven decisions to improve your marketing efforts.
Yes, RSS feeds are completely legal to use either for personal or commercial purposes. But, as there is a rule for using anyone’s personal content commercially one must have its owner’s concern and the same goes for RSS feeds. RSS feeds are free and easy to use. That’s why everyone tries to add them to websites. Moreover, all these perks can be achieved if you are using RSS feeds in a legal way.
Can RSS feeds be tracked?
RSS feeds can be tracked easily with Replug’s analytics feature. It is the best tool for estimating the traffic on your websites and achieving meaningful data.
Are RSS feeds public?
Yes, RSS feeds are public as they facilitate users. It has a public URL link anyone can access. RSS feeds are unencrypted readable XML files that are acceptable by any platform that supports RSS. Private security functions are not built into RSS feeds
Can RSS feed have images?
Yes, Images are the crux of all the content available. Generally, graphical representation gives more captivating looks so images play an important role in content ranking. Content can be of any type like images it can be as written media or audio media even. Images must support all the requirements for uploading like size, quality, and pixels so, it must not affect the performance of the website.
Does Google use RSS feed?
Google does use RSS feed indirectly but it doesn’t have any such ranking factor pre-defined in its algorithm. However, you can create an RSS feed on any niche by Google Alerts in the settings option. Its major role is, searching for new and updated content for users to get a high ranking. Google News uses RSS feeds to increase the audience and content visibility.
What replaced the RSS feed?
Yes, it is replaced by new advanced techniques. It is human nature that one is always curious to get into new things and the same goes for this RSS Feeds. Email subscriptions, push notifications, and even social media platforms like Facebook, and Twitter are based on a such algorithm that automatically generates user-demanding content on the basis of previous history. Whereas, RSS Feeds are still vastly used to enable the syndication of their content.
In today’s digital age, the internet has become an essential part of our daily lives, allowing us to access information, connect with others, and conduct business anywhere.
However, some websites and online content may be blocked or restricted in certain regions, making accessing the information they need difficult. Being blocked can be frustrating if you’re trying to stream your favorite TV show or access a website for work or research purposes.
Luckily, there are several ways to unblock websites and gain access to restricted content. In this guide, we’ll explore seven effective methods for accessing blocked websites and content, so you can get back to browsing the internet freely and securely.
Why do websites get blocked?
There are various reasons why websites can get blocked. Some of the common reasons include:
Government censorship
In some countries, the government may block certain websites that they consider to be a threat to national security, or that they deem inappropriate.
Workplace or school restrictions
Employers and schools often use web filters to prevent employees or students from accessing websites that are not related to work or studies.
Geo-restrictions
Some websites may be blocked in certain countries due to licensing agreements or legal restrictions.
Website maintenance:
Occasionally, websites may be temporarily blocked for maintenance or updates.
Hacking and cyber threats
Websites that have been hacked or are susceptible to cyber-attacks may be temporarily or permanently blocked to prevent further damage.
The reasons for website blocking can vary widely, and it’s important to understand why a website has been blocked before attempting to access it using any of the methods mentioned above.
Here’s how to unblock websites using seven different ways:
1. Use a VPN
If you’re looking for a reliable and secure way to access restricted websites, a Virtual Private Network (VPN) is a great option. A VPN encrypts your internet traffic and routes it through a secure server in another location, making it look like you’re accessing the internet from that location. This not only lets you unblock websites that are restricted in your region, but it also adds an extra layer of security to your online activities.
VPNs are easy to use, simply download and install a reputable VPN service on your device, select a server location, and connect to the internet.
2. Use a Proxy
Another way to unblock restricted websites is by using a proxy server. A proxy acts as a middleman between your device and the internet, allowing you to access websites that may be blocked in your region. Proxies are typically free to use, but they may not always be reliable or secure. For affordable and secure proxy solutions, websites like ProxyCoupons can help you find deals and discounts on trusted proxy providers.
For example, you can use a web-based proxy site such as KProxy to access the blocked website by entering the website URL into the proxy site’s search bar. To use a proxy, you’ll need to find a proxy server and configure your device to use it. You can find free proxy servers online, but it’s important to be cautious when using them, as they may not be trustworthy. Using a free online proxy checker is a helpful way to verify the functionality and security of a proxy server before relying on it for your online activities.
Tor is a free and open-source software that lets you browse the internet anonymously. It works by encrypting your internet traffic and routing it through a network of volunteer-run servers, making it difficult for anyone to track your online activities.
To use Tor, simply download and install the Tor browser on your device, and you’ll be able to access the internet anonymously. However, it’s worth noting that Tor can be slower than other methods of accessing the internet, so it may not be the best option if you need to access websites quickly.
4. Use a URL Shortener
If a website is blocked due to its URL, you can try using a URL shortener to access it. URL shorteners like Replug or Rebrandly take a long website address and shorten it to a shorter, more manageable URL. By using a URL shortener, you may be able to bypass website blocks that are based on the website’s URL.
When using a URL shortener, simply visit the website of your chosen service, enter the URL of the blocked website, and click “shorten.” You’ll be provided with a new, shortened URL that you can use to access the website.
If a website has been recently blocked in your region, you may still be able to access it via its crawl history. Search engines like Google and Bing regularly crawl websites and store cached versions of the website’s pages. By accessing the cached version of the website, you may be able to bypass any website blocks that are currently in place.
To access a website’s crawl history, simply search for the website on a search engine and look for the “cached” option next to the search results. Clicking on the cached version will take you to a version of the website that was saved by the search engine. For example, you can use the Wayback Machine website to access a website’s previous versions and find the version of the website that was not blocked.
6. Change Your Device Settings
In some cases, website blocks may be based on your device settings. For example, if you’re using a public Wi-Fi network, the network’s administrator may have blocked certain websites. To bypass these blocks, you can try changing your device’s DNS settings or using a different Wi-Fi network.
To change your device’s DNS settings, go to your device’s network settings and enter a new DNS server address. Some popular DNS servers include Google DNS, OpenDNS, and Cloudflare DNS.
If a website is blocked due to your account being banned or suspended, you may need to create a new account to access the website. However, this method may not work for all websites, as some may block your IP address from accessing their content even if you create a new account.
To open a new account, you will need to create a new email address, username, and password. Make sure to use a different email address than the one you used for your previous account, as some websites may block your new account if they detect that it is associated with a previously banned or suspended account.
This method is useful if the website has banned your previous account, but it may not be effective if the website has blocked your IP address. Additionally, creating multiple accounts on a website can be against their terms of service, so be sure to read the website’s policies before creating a new account.
For example, social media platforms like Twitter and Facebook may ban accounts for violating their community guidelines. In such cases, creating a new account with a different email address and username can help you regain access to the website. However, some websites like Netflix may not allow users to create multiple accounts, and may even block the new account if they detect that it is associated with a previously banned or suspended account.
While using a proxy can be a quick and easy way to access blocked websites, it’s important to be cautious about the security implications. Some proxies may collect and store your personal information, or be used by hackers to steal your data. Make sure to choose a reputable and secure proxy provider, and use HTTPS websites to ensure that your browsing activity is encrypted.
How do I know if a website is blocked?
If you’re unable to access a website, the first step is to check whether the site is actually down or blocked. You can use online tools such as DownForEveryoneOrJustMe.com to see if the site is unavailable to everyone, or just to you. You can also try accessing the site using a different device or network to rule out any issues with your own connection.
Can I unblock websites on my mobile phone?
Yes, many of the methods for unblocking websites described above can also be used on mobile devices. For example, you can use a VPN app to access blocked sites, or use a browser with built-in proxy support. However, keep in mind that some mobile networks may have more aggressive content filtering in place, so you may need to use more advanced methods to bypass these restrictions.
Is it legal to unblock websites?
The legality of unblocking websites can vary depending on the country and the circumstances. In some countries, it is illegal to use VPNs or proxies to access blocked websites. However, in most cases, unblocking websites for personal use is not considered illegal. It is always recommended to research the local laws and regulations related to internet usage and unblocking websites before attempting to do so.
Why is my internet blocking websites?
There can be various reasons why your internet is blocking websites. One common reason is the use of content filtering software or parental controls, which block access to certain categories of websites. Another reason could be the use of firewalls or antivirus software that blocks websites with malicious content or phishing attempts. In some cases, your internet service provider (ISP) may be blocking certain websites due to legal or regulatory reasons.
How do I stop my browser from blocking a website?
If your browser is blocking a website, you can try the following steps:
– Check if the website is included in your browser’s block list and remove it if necessary.
– Disable any browser extensions that may be causing the issue.
– Clear your browser cache and cookies.
– Reset your browser settings to default.
How do I unblock a website on a school Chromebook?
If you are using a school Chromebook, the ability to unblock websites may be restricted by the school’s IT policies. However, you can try the following steps:
– Use a VPN or proxy to access the blocked website.
– Try accessing the website through a different browser.
– Ask the school’s IT department to unblock the website if it is necessary for academic purposes.
Facebook is among the most popular social media platforms billions of people use worldwide. Its vast collection of videos has become a go-to source for entertainment, information, and education. However, users may want to download Facebook videos for offline viewing, sharing with friends, or reposting on other platforms.
In this context, downloading Facebook videos can be helpful for those who want to save their favorite videos, access them without an internet connection, or keep a backup copy. However, it’s essential to remember that downloading videos without the owner’s consent violates copyright laws and Facebook’s terms of service.
Therefore, respecting the creator’s rights and using downloaded videos ethically and responsibly is crucial.
Step 5: Open a facebook Video Downloader online tool from the search results, paste the video link, click the download button, and select the preferred quality. Your video will be downloaded within a few moments.
To download Reels videos from Facebook, you can use the following method:
Open the Facebook app and find the Reels video you want to download.
Tap on the Reels video to open it in full screen.
Tap on the three dots in the bottom right corner of the screen.
Select “Save Video” or “Save Reel” from the options.
The Reels video will be saved to your device’s camera roll or gallery.
If the “Save Video” or “Save Reel” option is not available, it may be because the creator has disabled the option to save their videos. For a case like this, you can download Facebook reels with FBDownloader, an online option for saving Facebook reels for offline use.
However, downloading videos without the owner’s consent violates copyright laws and Facebook’s terms of service. Therefore, using downloaded videos ethically and responsibly is essential, respecting the creator’s rights.
It depends on the copyright laws of your country and Facebook’s terms of service. Downloading videos without the owner’s consent is generally considered a violation of copyright laws, and Facebook’s terms of service prohibit the downloading of videos without permission.
Can I download live videos from Facebook?
Live videos cannot be downloaded directly from Facebook, but some third-party tools can help you record and download live videos from Facebook.
How do I download private Facebook videos?
Private Facebook videos cannot be downloaded unless you can access the video or the owner’s permission. If you have access to the video, you can use the same methods as downloading public videos. You can try contacting the owner to request permission if you don’t have access.
Is there any app to download Facebook videos on iOS devices?
Yes, several apps, such as “Video Downloader for Facebook” or “MyMedia,” can be used to download Facebook videos on iOS devices.
Can I download Facebook videos in high quality?
Yes, some video downloader apps and websites allow you to download videos of high quality. However, remember that higher-quality videos take up more space on your device.